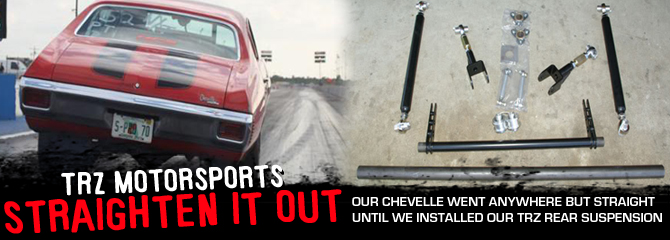
Old suspensions just aren’t the best when it comes to adding big power. The more power you add and the harder you try to launch, the more that torque wants to twist the chassis. Case in point, our peg-legging Chevelle. We are hoping to get the Chevelle launching straight with faster 60-foots with some help from TRZ and their twenty-first century suspension components.
The Chevelle
I have had this car since 1987. Although it had a hopped up 396 in it, the rest of it was stock – bench seat and all – but it was clean, fairly straight, and had very little rust, so I took it home for $2,700. Soon after, I realized that the guy must have just been flipping it, as the engine developed a knock that turned into much more than that rather quickly. I’ll just say we saved the heads and the rest was scrap and leave it at that.
I replaced that engine with a 402 short block and reused the heads, added some gauges and put a shift kit in the TH 350 transmission. I drove it around like that for a little while, but I had a bad itch for more power that I satisfied in 1990 by upgrading to a 427.

Then I started playing with nitrous and running mid-11’s at 118 in street trim and ultimately got down to 11.20’s @ 121 without the exhaust. I ran this combo from late 1992 until 1995, eventually switching my NOS cheater plate with a Top Gun plate with 200 horsepower on tap. The car ran 6.7’s @ 102 through the mufflers on slicks, but was inconsistent as I was now making more than enough power to tax the factory suspension. After a few of those, the track officials gave me some warnings and we had to install a roll bar.
The next Dead Hooker event that need2speed put on was in December 2006. The air was good, and the changes made to the car after the dyno session put me in the 10’s naturally aspirated, running a best of 10.66 @ 125. On the bottle, I ran down to a 10.08 @ 130 with a 1.40 60’ on my third try. It took that many runs to get a good pass. Where I thought that it was a handful before, now it was practically a joke. It hooked, but it sure didn’t go straight.

As you can see from the photo, this setup still resulted in excessive twist and separation. Photo courtesy of Wade Exum.

The old stuff consisted of uppers that I had fabricated locally and factory stamped steel lowers with urethane bushings that we boxed for added stiffness and the Art Morrison “No Hop” bars.
The History of TRZ
TRZ Motorsports started out in 1995 in Chicago, IL with brothers Mike and Todd Braasch as a manufacturer of parts for first generation Camaros, before making the move to Kissimmee, FL. At that time, they expanded their product line to include “A” bodies and Mustangs, manufacturing front and rear suspension components, anti-roll bars, ladder bars, steering systems and other accessories. Their more recent development is a product line for “G” bodies has been a huge success.
TRZ is also dealer for many other suspension components manufacturers, including Strange, QA1, Flaming River and Santhuff. They currently have three full-time employees and one part-time employee, and consider customer service a top priority.

TRZ makes three styles of rear lower control arms – single adjustable, double adjustable with Delrin bushings, and double adjustable with dual rod ends. “The single adjustable style requires removing the control arm from the vehicle for adjustment and is targeted towards the street car market,” states Braasch. “The Delrin bushing allows a small degree of flexibility without sacrificing performance and significantly improves the life span of the Chrome-Moly rod ends.”

These are the housing bearings, which allow free movement of the suspension without binding.

TRZ also has single adjustable control arms with Delrin bushings in two styles. One allows on car adjustment, the other does not. Photo courtesy of TRZ Motorsports
Understanding Suspension Terms
Before we get started with the installation, here are a couple of definitions that will help you understand some of the technical aspects of what we are doing.
• Instant Center (IC) – The upper and lower bars are angled towards each other. If you were to draw a line along the length of the lower and upper control arms forward, the IC is the imaginary point of intersection.
• Anti-Squat (AS) – This is a term used to describe how much the rear of the car will rise or squat during launch. If a chassis has 160% of AS, then the rear will rise drastically, planting the tires violently. By comparison, if a chassis has 100% AS, then the rear of the car will not rise or squat and if it has less than 100%, the rear of the car will squat.
The anti-squat percentage is determined by the height of the instant center in relation to the center of gravity of the car.

The Lakewood bars that I had installed on my Chevelle were literally from the mid 1960’s. That particular style bar relocates the upper rear control arm mounting point up about 4 1/2 inches, thereby changing the instant center of the suspension and forcing the rear into the ground (anti-squat). While this rids the car of wheel hop quite well, it can sometimes cause violent wheel separation in very high horsepower cars. Later Lakewood “no hop” bars were designed with multiple holes to adjust the instant center and the “hit” on the tires.
One problem with running a lot of anti-squat with a big HP car, is that it causes the rear to separate or raise up from the tire, and can cause the rear shocks to fully extend, resulting in the loss of control over the suspension. Another issue is that while it does create a lot of force to plant the tires by effectively pushing them into the ground, the effect is short lived and can unload the tire after a few feet out, causing tire spin. Additionally, having the control arms at greater diverging angles can create handling problems down track or at high speed on the street. Generally, factory four-link cars tend to work best when the lower control arm is nearly parallel to the ground.
Getting the Parts I Need
I recently met TRZ’s Todd Braasch through their involvement with the Real Street class here in Florida, as well as the Outlaw Drag Radial events. This year, TRZ is a contingency sponsor for all classes in the NMCA and they plan to attend and provide service and customer support at some NMCA races, as well some races in the ORSCA, both the ORTC races for 2009, The Shakedown at E Town, and the Orlando Street Nationals.
After seeing some video and photos of my car that I had posted on Yellow Bullet, Todd contacted me regarding the suspension issues I was clearly having and our conversations eventually led to this project.
Here is the information on the TRZ Rear “A” Body kit that we will be installing.
- 317-201-2 1968 – 1972 Double Adjustable Rear Upper Control Arms
- GM-207S – Spherical Housing Bearings
- 317-200R – Double Adjustable Lower Control Arms w/ Dual Rod-Ends
- 317-203 – Rear Anti-Roll Bar
Installing the TRZ Suspension
I took the car to Rock Star Performance for the installation. Troy Fedora is the fabricator there and has a lot of experience, having worked in the industry since the late 1980’s. Since the Chevelle currently does not see any street duty, and because I don’t care about any noise generated by the solid rod ends holding the rear in place when it does see street duty, we opted to go with the full race style kit. These parts are the same pieces you will find under some of the top Drag Radial cars around, and are made from 4130 Chrome-Moly for the ultimate in strength and durability.
After installing the control arms, the rear is centered in the car. First, center the rear in the wheel well with the lower control arms. If you are running bigger slicks, you may need a bit of extra clearance in front of the tire to accommodate for growth. It’s OK to push the housing back a bit, just watch that you have enough thread engagement for the rod ends.

Next, center the housing side-to-side. Do this by adjusting one upper control arm until you are satisfied that the rear is centered. You can do this by measuring from one of the factory holes in the frame to the housing, or from one edge of the frame to the housing, or by hanging a plum-bob from the wheel well. There is no guarantee the body is centered on the frame though, so take that into consideration. Check it, and then check it again. When this is done, snug the jam nuts.

Next, check the pinion angle. The pinion angle is the difference between the pinion and the driveshaft angle. To adjust the angle, adjust BOTH the upper arms equally – that way the rear stays centered. Cars with urethane engine and transmission mounts should use 1-2 degrees more pinion angle than those with solid mounts. If you happen to have control arms with urethane bushings, you will want to set it up with at least 3-4 degrees of pinion angle to allow for flex.
We checked with Todd at TRZ, and per his instructions, pinion angle was set to two degrees.

Next, we had to remove a small section of the bracing on the floor for the stock gas tank. It was right were the arms go, and we had to ensure that they would not hit the body under suspension compression. A little extra effort was made to get the bar high in the car, as it is going to be lowered later for improved geometry. We will still have to shorten the links.

Here you can see how the anti-roll bar will mount to the crossmember. This design allows for easy maintenance or replacement if the bar becomes worn or damaged.

TRZ supplied this housing tab where the anti-roll bar endlinks attach to the housing. I must stress this: With an anti-roll bar in the car, care must be taken when jacking up the car, so as not to put stress on it. Do this by raising the car from the center, and not from one side of the frame (or any other places).

After measuring, the frame area is cleaned and ground smooth then the cross member is welded into place. You can also see one of the tie-downs we welded onto the frame. It’s better to pull the car down onto the trailer when towing, rather than let it bounce by tying onto the housing, because there is less wear on the shocks and springs.

After everything is in and tightened up (with the exception of the anti-roll bar endlinks) it’s time to adjust the preload on the bar. Since we were on a platform style lift, we set it up right there. If you don’t have this type of lift, you will have to put the car on the ground. Make sure that the car is at race weight with the driver seated in the car, then adjust the endlinks to neutral so that you can easily slip the bolt into position.
Next, lengthen the passenger side link up to one full turn to induce some preload. “The amount of preload depends on the stiffness of the chassis, with the stiffer car requiring little at all,” states Braasch. “Remember, these are
After the TRZ suspension was installed, I opted for a couple more modifications before I took the Chevelle back out on the track. A constant duty solenoid for the fuel pump was installed, and I did a converter swap at JBR Automotive in New Port Richey. I had purchased a used 9” ATI Treemaster, and after I called ATI with the numbers, I decided to run it as is.
I have to thank Don Bitler for the help (and the trailer) and the whole JBR crew for the use of the lift. I especially want to thank the shop owner, Larry, for staying after hours so we could get it done. I left the car on the trailer overnight, and headed out to Bradenton on Saturday for the testing.
Both the before and after testing for this article was done at a private track event held by need2speed.com at Bradenton Motorsports Park.
Back to the Track for Testing
With the new TRZ suspension components installed, I couldn’t wait to get back to the track to see how it improved my short times. I have to say, the car drove so much better that I can’t describe it. It went straight and didn’t feel darty at all, like it had before. Not having to fight the car makes driving it down the track a pleasure.

Todd Braasch from TRZ Motorsports, with the new QA 1 double adjustable shocks ready to install. He brought them to the track for me and gave a hand with the installation and setup through out the day.

Photo courtesy of Wade Exum

Photos courtesy of Fillepe Carguy1985
I had hoped that the new (to me) converter would offer more stall speed on the line and less slip on top, but I only got one wish, with the trap RPM down about 400 RPM’s in the lights. Although it seemed looser coming up, as I able to get a 2500 RPM launch with no problem (where the last wanted to push hard at 2000), it locked up about 4000 – just 200 more then the other one. I may send it back for an adjustment after a dyno session to determine horsepower and torque RPM peaks accurately.

Much better, wouldn’t you say? Photo courtesy of Ray Osypenko (Slowmaro).

I took the car to Steve Johnson’s Induction Solutions so the plate could be examined. They founded a restriction in the line to the plate from the solenoid, as well as a leak on the upper set of bars. Improper assembly from the factory had frayed the ends of the braided line. Steve supplied me with a replacement line, and plumed the other side with hard line and some new solenoids. Results from my August 21st test session resulted in a new personal best of 6.14 @ 111 with the 83 square (very safe) tune in the plate. Then I went back to the 1320 and tested on the big shot plate and 73 jets for my first 9-second pass with a 9.73 @ 137 mph, needless to say I was pleased.
After all is said and done with the installation and initial testing, the Chevelle is now well on its way to performing up to potential. Although it still needs some adjustments and changes, the car now has the potential to run well into the nine second zone and meet the original goals that I had set for the combo.
I plan to upgrade the front end with TRZ control arms, drag springs, and adjustable shocks, as well as drop the ride height a bit. After that, we should consistently see 60’s in the low-to-mid 1.3 range.
Eventually I plan to bolt some drag radials on the car and see just what it takes to make them work. As many people say that the radial is faster, maybe I can ultimately squeak this car into the 5’s.


