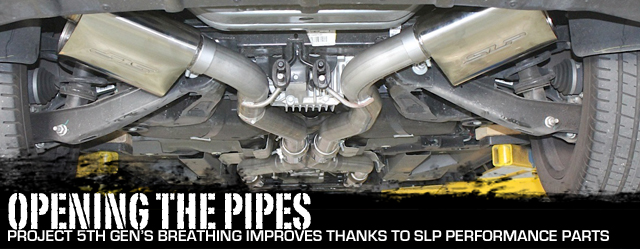
 Recently we introduced Project ZL1UPED to the LSXMag stables, with big plans for the future in terms of performance upgrades and track time. The car is a 2010 Camaro SS sporting an LS3 engine and the 2SS and RS option packages, and in this segment of the project we’ll be installing a complete SLP exhaust system from front to back, along with the company’s sweet Blackwing cold-air intake system.
Future mods will include a supercharger and a twin-disc clutch, so these breathing upgrades are a step in preparation for the car’s life as a triple-duty dragstrip stormer, road-course warrior, and everyday driver of Power Automedia Group Editor Mike Alexander.
Power To The Front
Simplicity reigns when improving the intake tract on our LS3 engine – the SLP Stage 1 Blackwing cold air kit [PN 21126A] consists of just a few pieces, but shows a nice gain on the dyno while offering improved breathing under power.
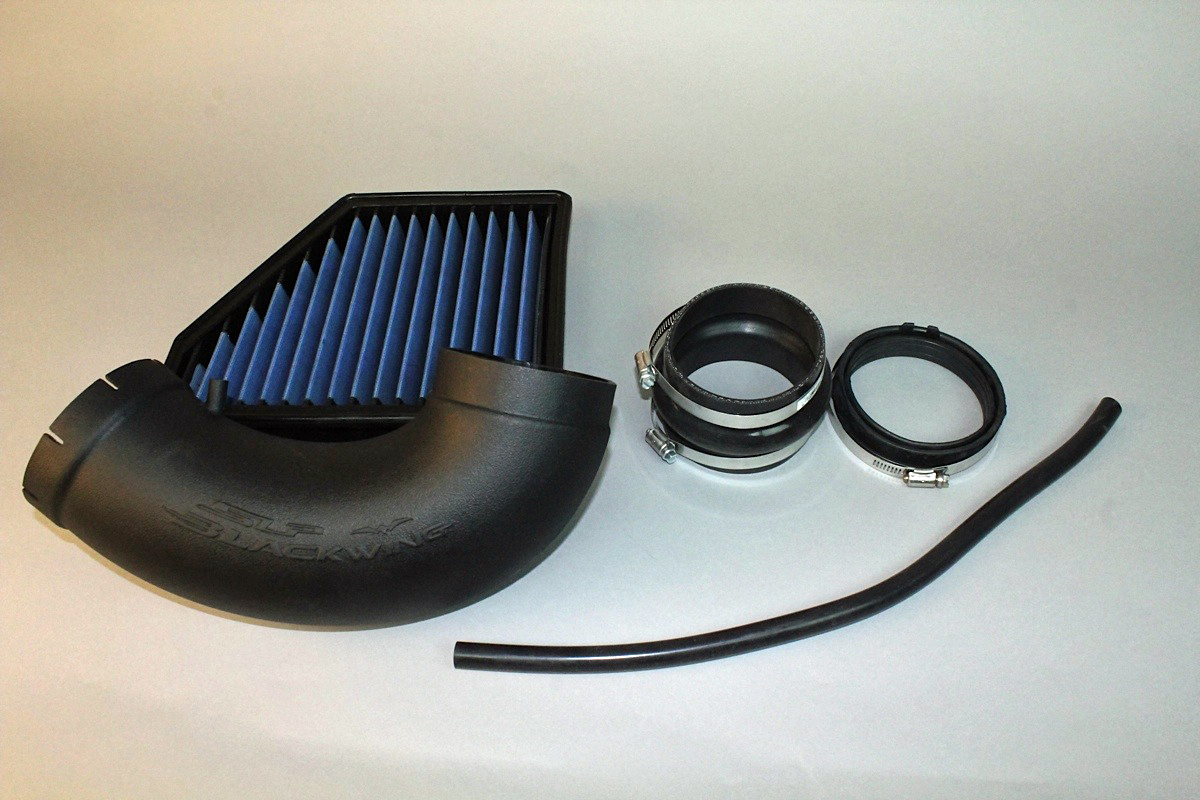
SLP’s Blackwing cold-air kit includes a new high-flow filter and larger molded polypropylene intake tube.
As there is limited room under the hood of the Camaro, SLP’s engineering team decided that a high-flow reusable panel-style filter placed into the stock airbox was the best solution for the platform. The panel filter can be cleaned and reused, but the star of the show in this portion of the project is the smooth, OEM-quality polypropylene high-flow air-intake tube. It provides a larger, smoother path for the airflow coming through the filter straight into the throttle body, offering deep-breathing capability in a simple, easy-to-install package. Silicone connectors are provided for the airbox-to-tube and tube-to-throttle-body connection. The Blackwing system fits all 2010-’13 V8 Camaros, not just our SS.
The gains you have seen with the installation of this kit are phenomenal. – Jay Velthoven, SLP Performance Parts

Installation is simple; it can be accomplished in under half an hour and requires only simple hand tools. Loosen the factory worm-gear clamp at the throttle body, and the one at the MAF/lid assembly, and remove the tube and rubber bellows as one piece. Remove the air filter and drop the new high-flow filter into place.
Slide the cuff clamp onto the throttle body end of the new inlet tube, and the new high-flow bellows onto the MAF side of the new air inlet tube. Don’t forget to place the new worm-gear clamps into place before attaching the inlet tube in place of the factory unit. Tighten everything down using a nut driver or ratchet/socket assembly, and attach the small vacuum hose to the passenger side valve cover. That’s it – simple and effective.
Undercar Improvements
Long-tube headers offer one of the largest bolt-on power-improvements possible to an otherwise-stock vehicle. By opening up the exhaust flow by removing the restrictive stock exhaust manifolds, horsepower increases will be seen on the dyno that subsequently translate to improved track times and better overall performance.
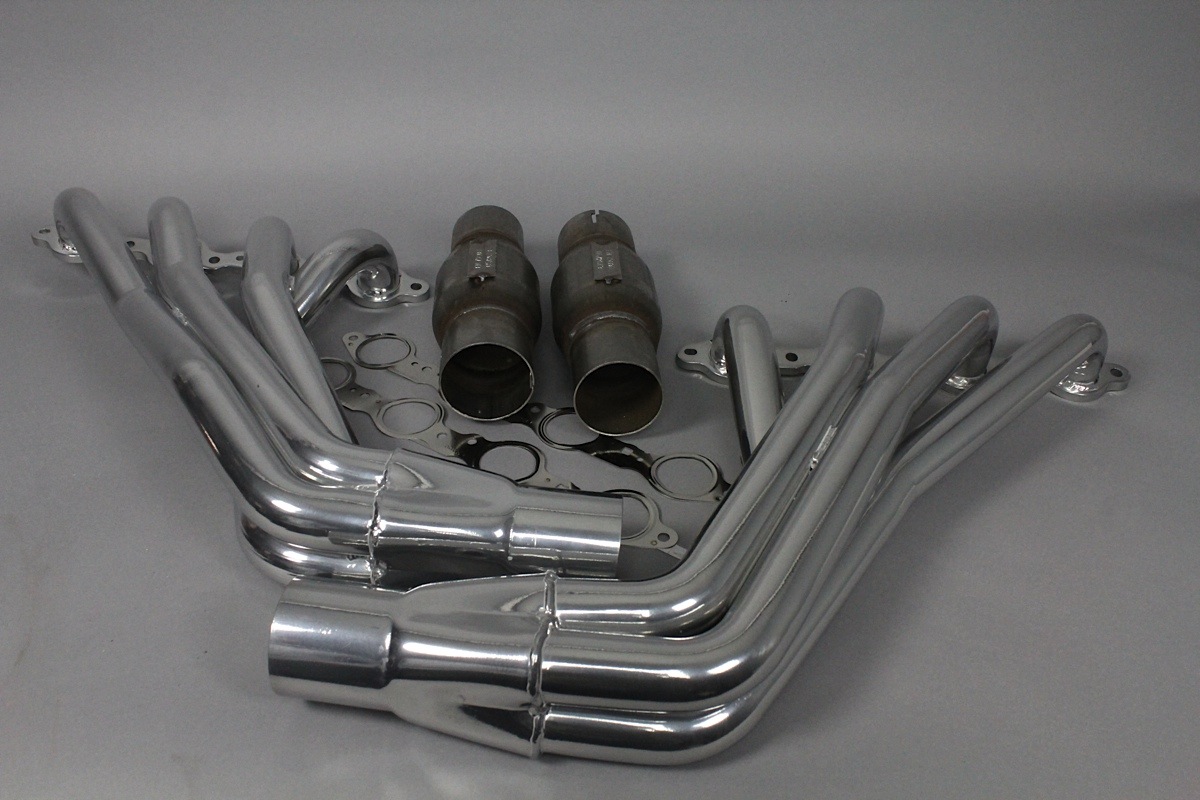
Big 1 3/4-inch primary tubes, three-inch collectors, aluminum-ceramic coating, and stainless-steel OEM-style gaskets – our new SLP headers look the part and perform like it too.
SLP offers a number of different replacement packages from 1 3/4-inch diameter headers and high-flow catalytic converters [PN 30211] to the system we used [PN 30213], which includes the 1 3/4-inch long-tube headers and high-flow, 3-inch X-pipe assembly that mates right up with one of the three axle-back systems the company offers.
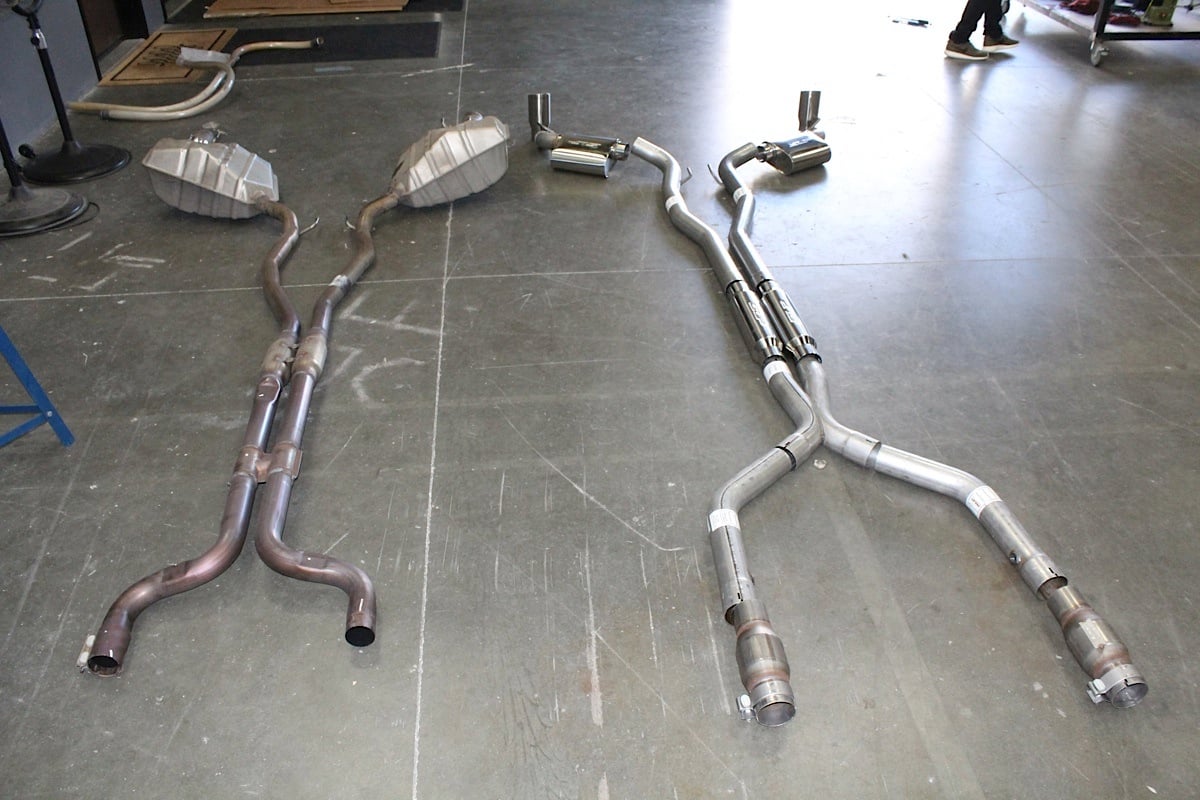
Stock exhaust on the left, new SLP undercar pieces on the right. We like that the SLP system gives the ability to remove the first set of mufflers and replace them with straight pipes should the need (or want) arise in the future.
The headers are covered in a polished aluminum-ceramic thermal barrier coating that helps to keep the heat in the tubes, maintain flow velocity, and underhood temperatures in check. The headers have a 4-into-1 design that feature the aforementioned 1 3/4-inch primary tubes. The header pipes flow into 3-inch-diameter collectors and directly into the company’s 3-inch high-flow catalysts.
According to SLP’s Jay Velthoven, “These headers are built from equal-length, mandrel bent 409 stainless steel, and we build them in-house here at SLP in the Detroit area. All of the high-temp ceramic coating is also applied in-house.”
The 200-cell-per-inch high-flow catalysts are at the forefront of the PowerFlo-X crossover pipe, which offers the added sound control advantage of 3-inch mufflers at the back of the system just prior to the under-axle pipes. This particular system must be used with SLP’s axle-back exhaust, although the 30211 kit will mate right up with the factory H-pipe assembly. Of special importance is the installation note that this header kit does NOT work with convertible cars due to differences in chassis design.


There are catalysts included in the package, but as with any long-tube header system, SLP will tell you these should only be used in off-road applications. We'll be going off-road plenty - to the dragstrip, and the road course.
One of the neat aspects to this system is that the 3-inch before-axle mufflers can be removed and replaced with optional straight pipes to amplify the sound prior to the axle-back system’s entry for an even more aggressive bark, although we’d recommend being careful with this option if your neighborhood is filled with older folks who might be inclined to dial the local constabulary.
Installation is a true bolt-on, achieved through the use of OEM-style flanges for proper fit and bolt retention. As always, SLP’s instructions are extensive and well-written, with plenty of quality photos to assist you in your own installation.

In The Beginning...
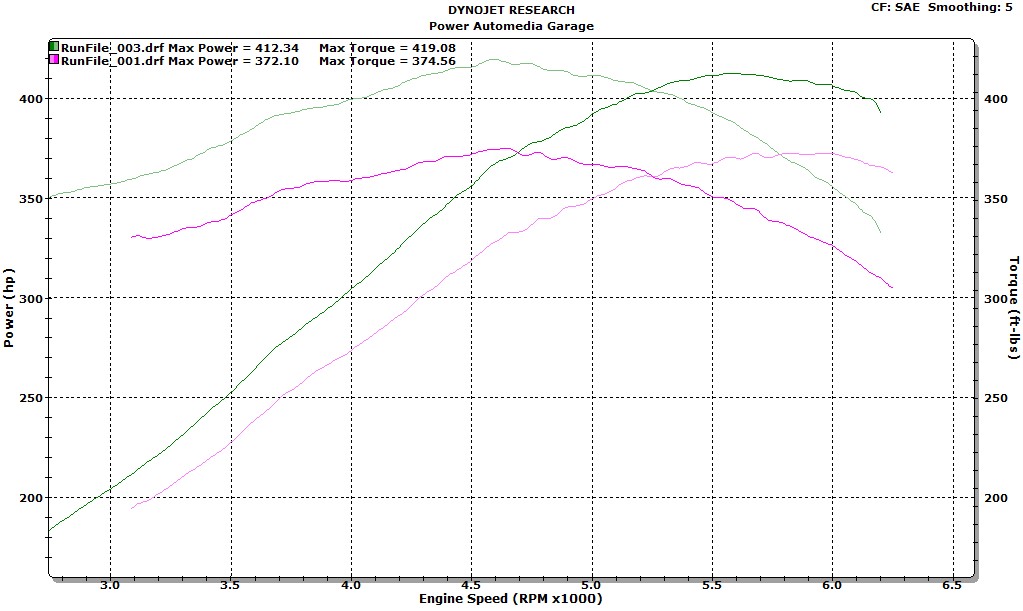
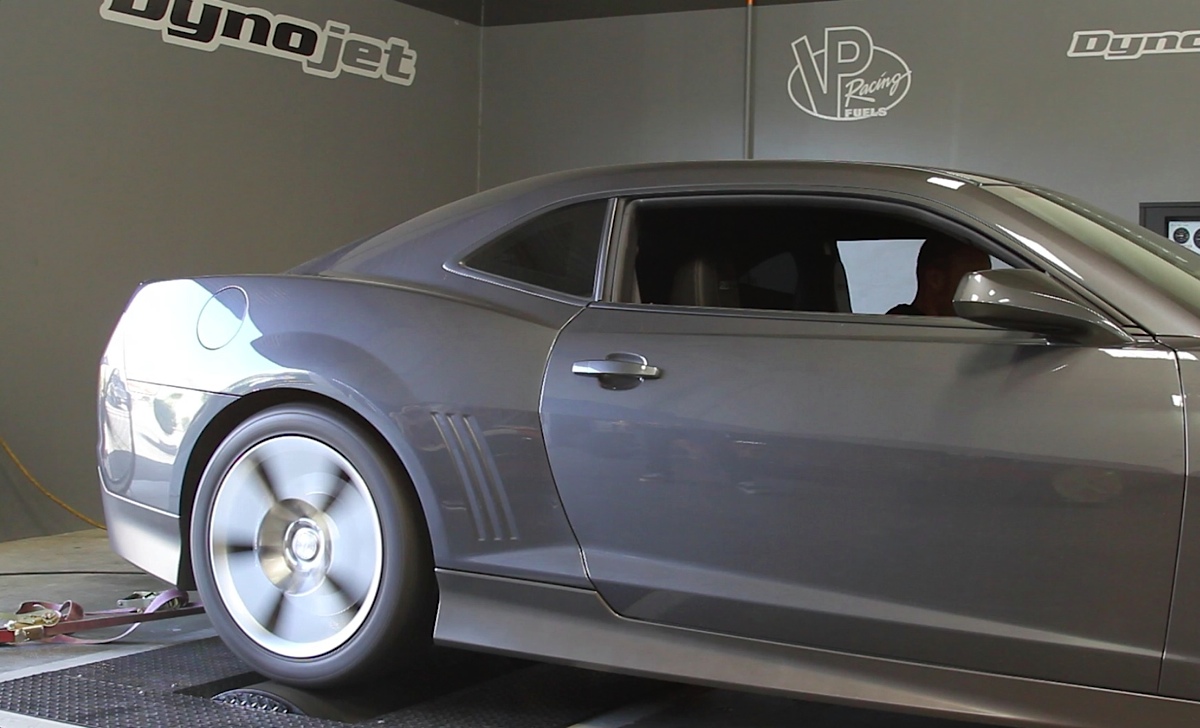
Prior to the SLP installation, Alexander hit the Power Automedia Dynojet dynamometer with the car in “all-stock” configuration. When all was said and done on the dyno, the car spun the roller to 372.1 horsepower at 6,000 RPM and 374.6 foot-pounds of torque at 4,600 RPM – healthy numbers representative of what an LS3 will do on the available not-so-hot 91 octane “high-test” pump gas.
Keep in mind that he’s a street-rod guy who doesn’t have a whole lot of drag racing experience, and factor in that the track surface at our local dragstrip is fair at best on a typical street night. His “before” eighth-mile elapsed time of 9.3 at 82 MPH converts to somewhere around a 14.50 in the quarter, and when you take all factors into account, it’s a good representative view of what most owners might see their first few times at the track – and we don’t pick on him too much about it!
The Voice
If you’ve ever heard one of SLP’s exhaust systems, you know one thing’s for sure – they definitely let you know they’re coming. They offer three different styles of axle-back exhaust designs for the Camaro: The PowerFlow system we used [PN 31210A], the Loud Mouth [PN 31211], which is basically a set of straight pipes with tips, and the Loud Mouth II [PN 31212] that includes a set of straight-through, ceramic-wrapped perforated-core mufflers. Square exhaust tips are also available for any of these systems – check the SLP website for part numbers.
Our PowerFlo system offers minimal flow restriction through the use of a straight-through, ceramic-fiber-wrapped perforated core to achieve the legendary SLP sound. Like the X-pipe, the tubing is constructed from mandrel-bent 3-inch stainless steel prior to and aft of the muffler entry point.
Velthoven says, “The PowerFlo exhaust systems use a pair of full chambered mufflers, where the Loudmouth II uses resonator technology, and the original Loudmouth uses the factory after-cat resonators to dampen the sound – it’s basically a pair of straight pipes. The Loudmouth sounds great if you don’t plan on using headers, but when you start to get into full header system with the catback like you guys used, the Loudmouth is going to be extremely loud. The PowerFlo is a great choice for a full exhaust system to keep the sound levels acceptable for street use – it’s a good combination for the entire system.”
The mufflers themselves are hand-polished, include pre-welded hangers, and are in fact lighter than the factory muffler assemblies. The system includes a badass set of 4-inch polished round tips to really finish off the look at the back bumper. Limited lifetime warranties are included on all of these exhaust parts, meaning that we won’t be looking at any other exhaust catalogs, ever. We like that.
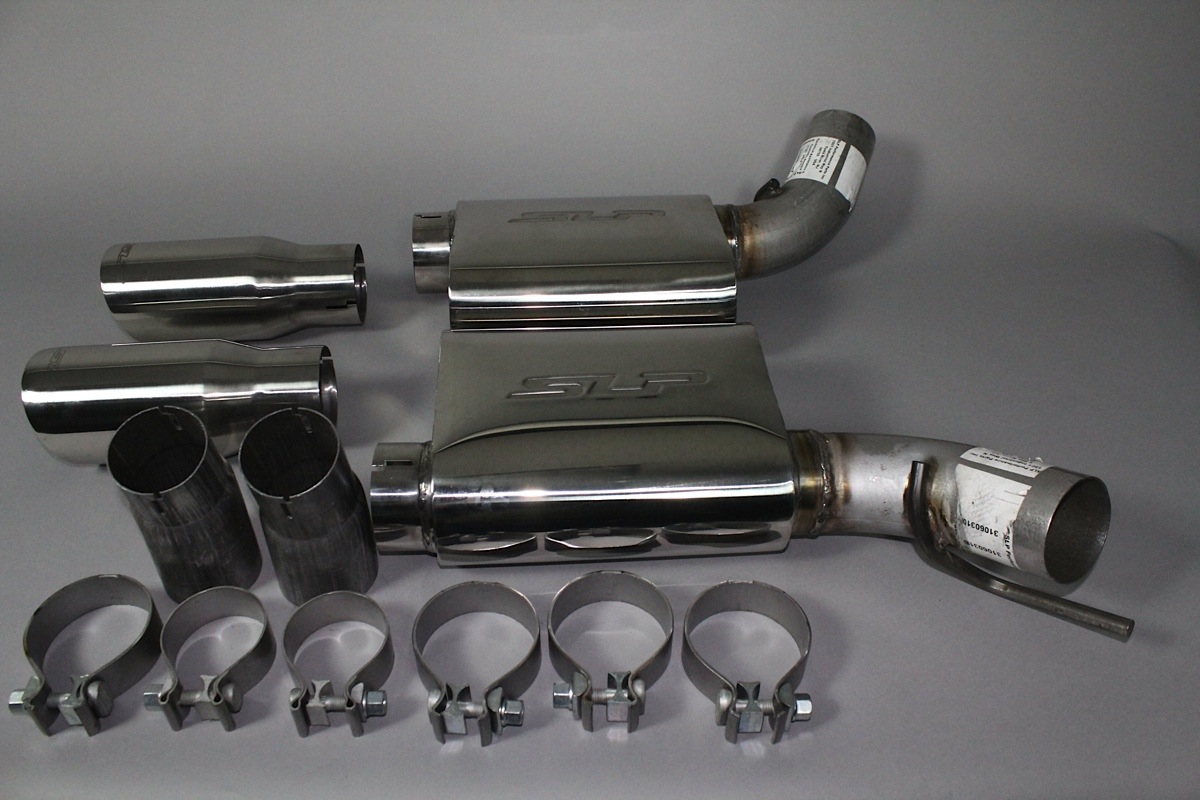
SLP’s PowerFlo exhaust system is the quietest of the three options they offer for the Camaro – it has a smooth tone at all RPM ranges and a nice voice when stepped on. Sweet 4-inch angle-cut tips complete the look.
Getting It On
It is recommended to perform this installation on a lift, as you’ll need plenty of room to maneuver underneath the car, and the exhaust parts can become quite heavy and cumbersome if you’re trying to do this on the ground.
First, soak all of the rubber hangers in the penetrating lube of your choice to make removal of the old exhaust easier – those hangers can be a pain if they’re not lubed up properly. Disconnect the negative battery cable, then the positive cable. The center support bar underneath the car needs to be removed so you can get the old exhaust out of the way. Four bolts removed here and you’re in business.


Left To Right - Remove the undercar support brace, disconnect and tape up the oxygen sensors, and pull the stock exhaust off the car. Make sure to lube up the rubber hangers with penetrating oil to simplify the job of removal.
Next, take out the factory crossover pipe, making sure to disconnect the oxygen sensor plugs first. Note which ones go in the front, and which go in the rear, as this is important. Pull the rest of the exhaust, including the axle-back, and set it all aside – you might be able to get a couple of bucks for it on Craigslist.
Move to the top side of the car, and pull the coil wires, pull both the dipstick and the dipstick tube out, then remove all of the spark plugs from the engine. At this point you can unbolt the factory exhaust manifold assemblies (including the catalysts, which should still be attached to the bottom of the manifolds).


Left - Continue removing the exhaust, getting the massive stock mufflers out from under the rear of the car. Right - Time to remove the plugs - they need to be out of the way in order to take the stock manifolds off.
Now that the factory guts are out of the way, it’s time to slide the new headers into position from underneath. Here’s where having an extra set of hands and eyes will be very helpful. Once you have the headers into place, torque the fasteners in two steps – first to 12 foot-pounds, then 18 foot-pounds, to ensure that the gaskets seal properly.


Left - Once the manifold assemblies are out, the headers are inserted into place from the bottom. Middle - The catalysts mount directly to the ends of the headers with a band clamp. Right - Make sure to get those exhaust gaskets lined up properly, and don't forget the torque wrench!
Move back to the top side, reinsert the dipstick tube and dipstick, put the plugs in and wires back on, then move to the bottom of the car again. SLP provides oxygen sensor extensions for the front sensors – plug them in, but don’t connect them yet. Put your band clamps into place on the catalysts, install the cats to the back side of the headers, and build the X-pipe on the floor. Detailed instructions on which pieces go where are included with the system. Follow the rest of the directions, get everything situated properly, and reinstall the oxygen sensors.
Put the center support bar back into place, and move to the rear of the car to install the axle-back.The axle-back install is simple – just assemble the pieces according to the instructions, hang the mufflers into place using the stock rubber isolators, connect it to the rear of the X-pipe/muffler assembly, and start the adjustment process before tightening everything up. Take your time here, and you’ll have to go up and down a number of times to make sure everything is lined up properly, but the payoff is worth the squeeze.


Left To Right - Install the extension pipes, build the X-pipe, and move to the rear of the car to get the mufflers in place. Don't tighten everything down until you have it all lined up nice and neat.
The Final Word
Our “after” dyno results revealed a huge increase in power – on the order of 40.2 horsepower and 44.5 pound-feet of torque at the wheels. Even better, the car didn’t lose any low-end torque at all; the gains were solid across the board. And the sound improvement was simply insane, as you can see and hear from our video.
Big gains to be realized here, and a stout improvement at the track, albeit with new sticky tires. These upgrades will help immensely with our new supercharger, coming in a future article.
For the track, since Alexander had so much difficulty getting the car to hook up stock, the decision was made to install a set of Nitto’s finest NT555R tires, in size 275/35/20. And this time, in an effort to get more representative numbers on the car’s performance, Power Automedia Group Editor Mark Gearhart took the spot in the driver’s seat.
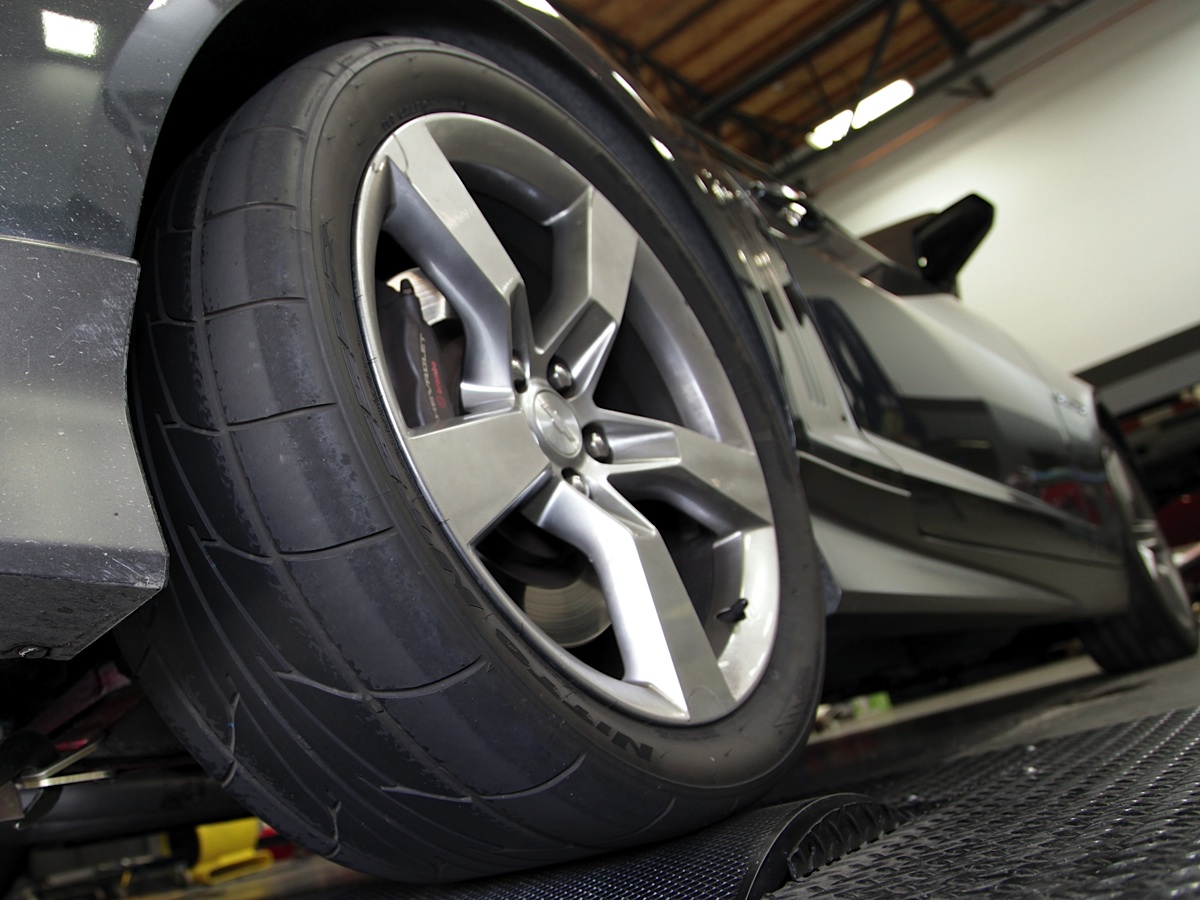
Proper competition tires, like our Nitto drag radials, play a huge role in cutting low elapsed times.
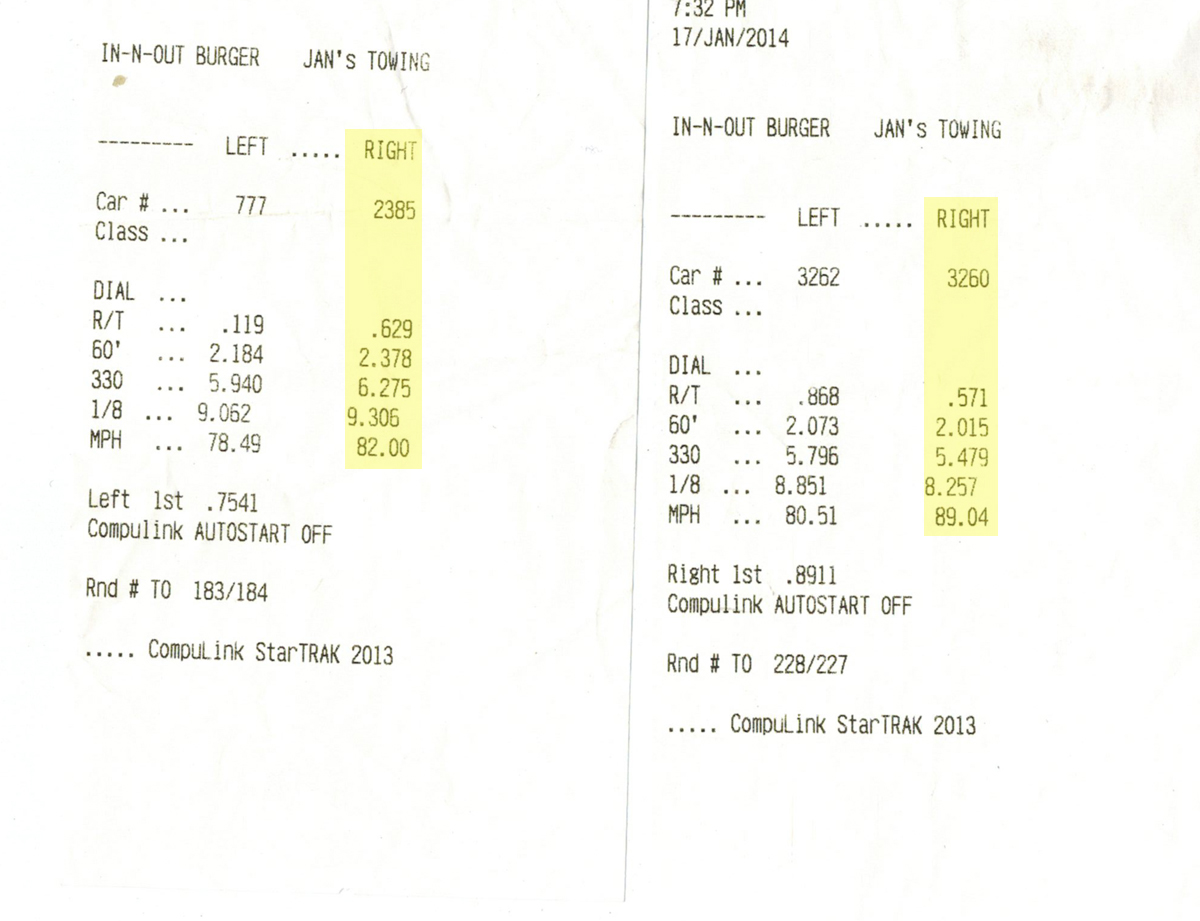 The power gains plus better tires and a more seasoned driver netted an awesome decrease of 1.048 seconds, with Gearhart crossing the eighth-mile finish line in 8.25 seconds at 89.04 MPH – a 7.04 MPH increase, and equal to somewhere around a 12.95 in the quarter.
While some of that can be attributed to a better driver making smoother shifts, some of it is directly attributed to the improvement seen by installing our new SLP exhaust and Blackwing cold-air kit.


All in all, a solid gain from the installation of our new parts, and a smart move in anticipation of our new supercharger.


