
If you’re a drag racer, chances are you’ve spent a considerable amount of time pondering where you could shave some weight from your ride to reduce those precious ticks of the clock on the race track. There are of course an endless number of ways to accomplish this — some more affordable than others — but one of the places you can drop a sizable amount of weight is in your front suspension package. That is, if you haven’t already.
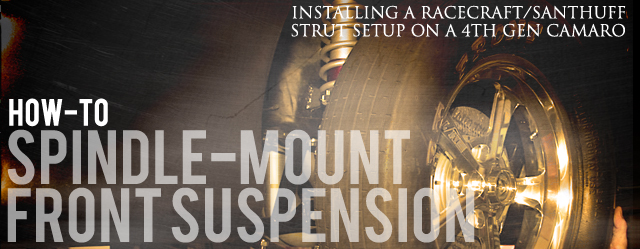
A spindle-mount strut suspension package, with struts like the Santhuff 8-degree, double adjustable parts you see here, can take a significant amount of weight out of the front end of a race car compared to a hub and lug-mount setup.
Aftermarket hub-mount front suspensions with coilover shocks are the most common setup on most entry level sportsman and bracket-style race cars, due primarily to the more affordable cost of such a combination that really sacrifices in weight but not as much in actual performance. The upgrade path, however, and what you’ll find on virtually any hardcore heads-up race car, is the more lightweight package of spindle mount struts and wheels. Such a move can drop well over 100 pounds off the nose of a car, adding up to a noticeable increase in performance.
In this tech piece, we’re going to take a look at the installation of a bolt-in K-Member and suspension package from the folks at Racecraft Inc., complete with double-adjustable struts from Santhuff, carbon brakes from Strange Engineering, and spindle mount wheels from our friends at Mickey Thompson, on a fourth generation F-body Camaro, with a goal of putting the car on an extreme diet. Read on and learn more about the steps of this valuable upgrade.
First Steps
To begin, we must remove all of the existing suspension components from the car to give us a fresh slate to work from. That means the upper and lower control arms, the upper control arm mounts, shocks, spindles, brakes, and wheels. As well, the upper control arm stiffening plate and hood shock mounts that are located on top of the shocks tower must be removed by drilling out the attachment spot welds. We can then begin the initial process of installing the new components, beginning with location of the OEM reference hole, where we’ll drill a 5/8-inch hole for the starting point for the top of our new struts.
Racecraft K-Member And Suspension Package

The Racecraft K-member that will serve as the nucleus of our bolt-in strut and spindle mount wheel/brake installation.
Taking a pause from the topside of the suspension setup, we move down below to installation of the Racecraft Camaro Front Tube Stiletto K-member (Part No. 4293FTST). This K-member is a fairly new part from Racecraft, with a lightweight chromoly construction that’s designed to bolt right up to the stock framerails of the fourth-gen F-bodies. The K-member comes with the rack and pinion already installed, making for a very easy setup.
“We built this K-member for hardcore 275 radial, 10.5, Limited Street, any cars of that nature,” explains Racecraft’s Matt Mungal. “It’s the same basic design as our Stiletto Mustang K-Member, and it still uses the stock strut tower, and that’s what makes it class legal — the whole thing bolts into the car and doesn’t require any welding up to the top of the strut tower.”

Hubs To Spindles: By The Numbers
The primary aim of strut and spindle-mount configurations is weight, and the switch from a hub-mount setup will definitely accomplish that. Racecraft advertises their setup at 96 lbs. complete and ready to install. We did some unofficial and unscientific weighing of our parts, old and new, minus the wheels and brakes. The former setup weighed in at 146 lbs., while the new package, including K-member, rack and pinion, A-arms, and struts, came in at 70 lbs. or less than half the previous nose weight.
The K-member is designed to go hand-in-hand with Racecraft’s suspension package, as one of two K-member options that are available when you purchase the package. It’s designed for use with the two-piece A-arms, with all 1/2-inch hardware, and the steering rack is set up in the forward position nine inches to enhance oil pan clearance when running a diaper or things of that nature.
Continued Mungal, “It’s a perfect strut front end kit for the do-it-yourself’er that wants to do the work in their garage with your basic fabrication tools.”
We then move to the components of the Racecraft Pro Strut suspension package, designed specifically for the 1993-2002 Camaro. This package, one of many vehicle-specific kits that Racecraft offers, includes:
- Santhuff 8 Degree Double Adj. Spindle Struts
- Camaro 4130 Spherical Bearing Rod End A-Arms
- Tie Rod Kit w/ Bumpsteer Kit
- Bolt In Caster Camber Plates
- 20 Degree Stiletto Rack and Pinion
- 93-02 Camaro Race Bolt Kit
- Santhuff Strut Hat Adapters
- Racecraft Inc. 4130 Steering Arms (Installed on Struts)
- Segmented Spacer Kit
“The package is designed for hardcore, stock suspension fourth-gen Camaros, and the whole reason behind making a bolt-in strut front end is that you can lose weight by getting rid of the upper control arms and the spindles, along with all of the mounting hardware,” says Mungal. “You can also run a lot lower rocker height with our K-member versus a more standard part.


The 20-degree rack and pinion setup, shown in detail here, is moved forward in the K-member nine full inches, allowing for more oil pan clearance should you need it for engine placement or use of a diaper.
“It’s the lightest assembly on the market at 96 pounds complete and ready to go on the car, brakes and everything.”
It’s the same basic design as our Stiletto Mustang K-Member, and still uses the stock strut tower, and that’s what makes it class legal. – Matt Mungal

The most important process in the installation is properly setting up the strut towers and A-arms to provide the pallet for all of our hardware. We begin by installing the A-arms, making sure the front A-arm tubes are parallel. The front heim should show roughly four threads past the jam nut to ensure proper connection. The Racecraft A-arms can be mounted in the stock location or moved forward in 1/2-inch increments by using a segmented a spacer kit. However, to maintain steering geometry, it’s recommended to install the A-arms one inch forward of the factory position.
The double-adjustable struts from Santhuff, one of the leaders in racing struts, are custom versions of their popular Super Stock 8-Degree coilover struts, having been lengthened two inches below the spindle, making them more suited to radial tire-style cars. These are based off Santhuff’s original strut design, with continual improvements and tweaks input over the years. The bodies are all-4130 chromoly, tig-welded, and stress-relieved, and, as Santhuff’s Chris Hart puts it, “…stand the test of time and are always rebuildable,” regardless of age or wear and tear.
Hart points to the double adjustable functionality and the range of adjustability as the key to this strut package, “We can go to the point where the front end is almost locked down, or still be able to loosen it up if track conditions call for it. If you’re at a track with a lot of bite, you’ll tend to want to hold the front down, while a track that’s not quite as good will require some of that weight transfer. So you can loosen that extension up to let the car stay hooked up.”
Continued Hart, “The compression side adjustment, meanwhile, allows you to control how the car sits back down as the weight transfers back to the front and the car wants to settle down. You can control how quick you allow that to happen with the double-adjust side of it.”
Next, we bolt the steering arm into the strut and install the struts onto the A-arms, then then slide the strut adjustment hex through the newly-drilled hole to begin placing the camber plate. After that, we raise the A-arms to the desired ride height, using blocks to hold them in position. As Racecraft points out, you want to make sure the ride height is within the kit limits. The ride height should be measured from the bottom of the rocker panel pinch weld to the ground, and is recommended at 4-5 inches with a maximum of 5.5-inches with 26-inch tall tires. In our case, our final ride height is set right at five-inches.
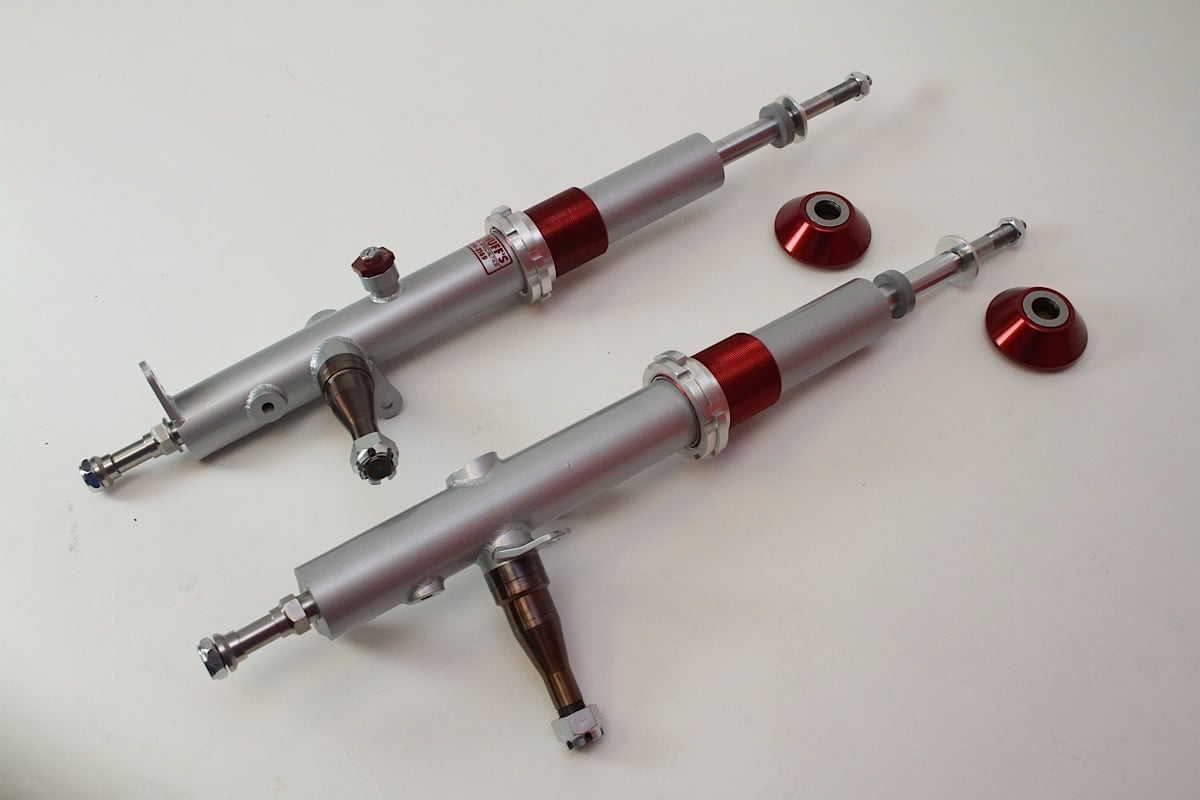
As you can see, we removed the upper control arm mount as we wouldn’t be needing it. That left some holes in the inner fender, but the way we see it, that’s a few grams of weight saved by not filling it in.


Getting the camber plate set up properly is the most important element of this process. Racecraft provides instructions on how to accomplish this, and as long as you're somewhat mechanically inclined, you shouldn't have much trouble preparing everything for the installation of the struts.
We then check our camber angle and adjust to zero by slotting the strut hole. At this point, we know the location of the camber plate. As a side note, there is no caster adjustment as it’s determined by the plate design and proper installation.
Moving on, we open up the hole/slot with a die grinder to allow the camber plate bearing cup to pass through, centering it in the zero camber location. We then tape the wedge spacer onto the camber plate in the center of the mounting slots. Racecraft supplies two different stepped strut spacers so that you can adjust the strut installation height. It’s suggested to start by installing the taller spacer on the bottom, then swapping them if need be to optimize the bump stop height.
We then insert the spacers into the bearing and slide the camber plate over the strut shaft. Next, we square the camber plate and ensure that the mounting locations rest flat on the strut tower. It may be necessary to slot the strut bearing cup hole front to back to correctly locate the camber plate. With the plate in place, we can make our reference points and mark the mounting slot centers, before removing the camber plate. We then drill our 5/16-inch attachment points.


With the camber plates in place, the next step is installing all of the hardware, from the A-arms down below to the struts themselves. That then prepares us for the next step of bolting up the wheels and brakes.
As Racecraft illustrates, from the zero camber location, the kit affords positive or negative camber adjustment by slotting the strut hole side-to-side to allow full movement of the bearing cup, spacers, and coil over kit.
After our final alignment, it’s time to drill the hole for the non-slotted mounts and install the struts.
Strange Brakes And M/T Wheels
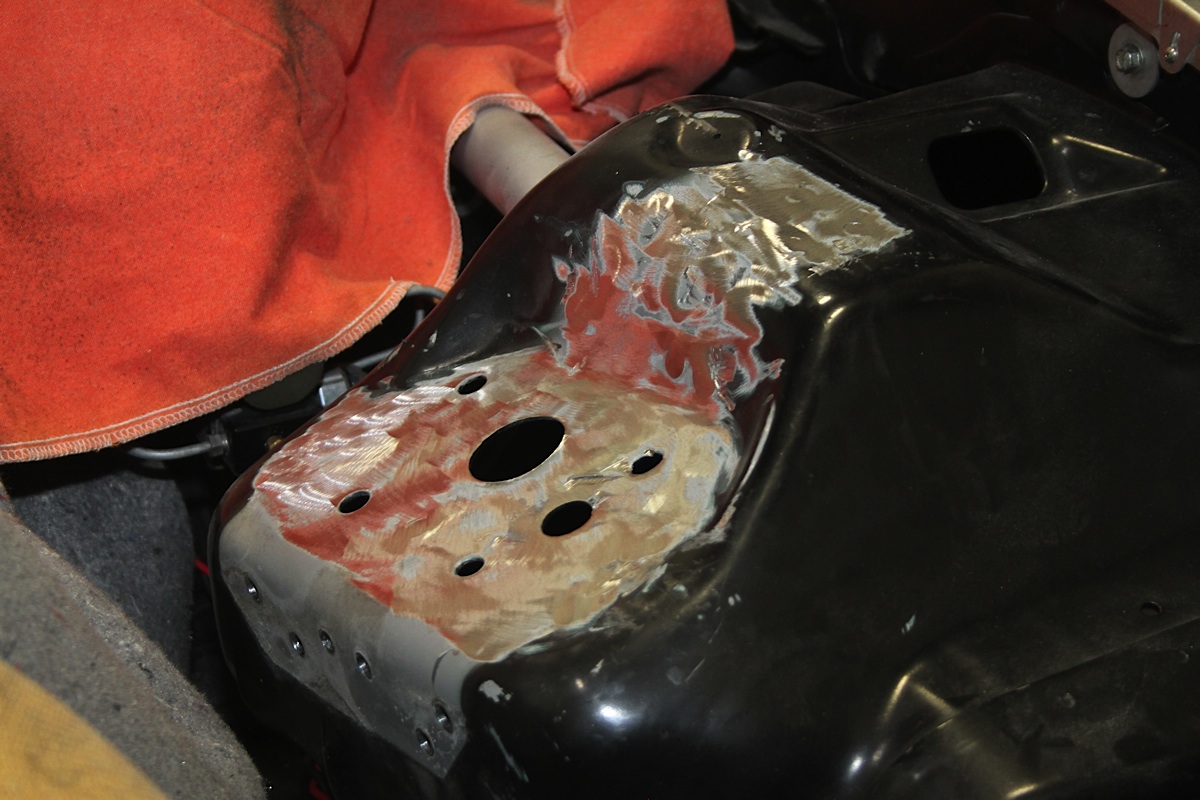
The sharp looking Mickey Thompson Pro 5 wheels – in spindle mount form – that we’ll be using on this project.
For those unfamiliar with such combinations, in a spindle-mount configuration, the brake rotor is mounted to the wheel itself using five lugs in the backside of the wheel center. The wheel is then mounted to the spindle using a single lock nut. The brakes we’ll be using are Strange Engineering’s Pro Race Carbon Front Brake Kit (Part No. C4598WC), which are designed for spindle mount struts and offers the maximum in braking power for fast (and heavy) cars, while reducing rotating weight by over eight pounds and total weight by over 11 pounds.


A detailed look at the one-piece M/T Pro 5 wheels. With a spindle mount wheel, the brake rotor affixes to the backside of the wheel using five lugs, which you'll see in the next set of images.
The Pro Race Carbon brake kit, measuring 10-inches on the front, is the very same setup used on the front end of 330 mph nitro Funny Cars, so there’s no lack of braking potential here.
One of the big advantages of a carbon brake kit as far as speed goes is the reduced rotating weight of the rotors. – JC Cascio, Strange Engineering
“One of the big advantages of a carbon brake kit as far as speed goes is the reduced rotating weight of the rotors,” says JC Cascio. “On our 11-inch kits, each side weighs a full five pounds less than our steel rotor kits.”
The safety advantage, on the other hand, is that with carbon, the hotter it gets, the more aggressive it becomes. So whereas steel brakes begin to fade as they get hot, carbon will perform better when hot and will actually stop the car better with heat in the pads and rotors.
The wheels we’re using are Mickey Thompson’s sleek one-piece Pro 5 race wheels designed for spindle mount application. These are M/T’s top-line drag racing wheel, thanks to their design, light weight, and of course, looks.
“The main advantage of the spindle mount wheel is really that you can run the lighter brake and strut package to reduce weight,” says Mickey Thompson’s Tom Kundrik. “This wheel, however, has all the same great attributes of the lug-mount Pro 5 wheel. You could, however, fit the spindle mount wheel with a ceramic bearing to make them roll better if you wanted to, but overall, the real advantage is in the parts behind the wheel.”


Here you can see the carbon fiber rotor from Strange Engineering being installed onto the lugs of the wheel. These rotors, measuring 10-inches is diameter, are the very same used on 330 mph nitro Funny Cars.

The struts come with the bracket for mounting the brake caliper, which, paired with a set of “hot dog” brackets creates the structural support for the caliper. With the rotor on the wheel, we can go ahead and place the wheel onto the awaiting spindle.
Unlike a hub assembly, in order to put the brake calipers on the car, we first have to mount up the wheel and rotor onto the spindle. Once on, we then assemble the brakes onto the strut bracket.
The Strange brakes are assembled in two halves around the rotor, with an inner and outer section and the carbon brake pads and caliper piston placed in between. The assembly uses a pair of inboard and outboard “hot dog” brackets (because they look like a slightly unappetizing hot dog) to hold the caliper in place, using the strut bracket as the primary support for the entire assembly.


With a spindle mount setup, the wheel and rotor are installed onto the spindle and the lock nut is tightened down to the proper torque rating. The brake caliper is then assembled around the rotor, mounting to the bracket affixed to the strut. Although working behind the wheel can be tedious, the weight savings is well worth the effort.

Our finished product, with the brakes now assembled and installed onto the brackets.
Once everything is double-checked and buttoned up, we’re ready to get the suspension dialed in and roll it out the door. As you’ve seen here, performing an installation of a complete K-member and spindle-mount suspension package isn’t as difficult as you might have once believed, but you’ll certainly need some mechanical prowess and the proper tools to do the job correctly. A spindle mount combination, complete with carbon brakes aren’t the package for everyone, as they’re designed more for you high-end, heads-up style race cars, but if you’re in this market or see yourself there one day, we hope this walk-through will help get you rolling. No pun intended.


