In the high-octane world of GM LS engines, achieving peak performance demands more than raw horsepower. Holley’s Premium Mid-Mount Accessory Drive is a game-changer, seamlessly merging engineering finesse with unmatched support for vital components like alternators and power steering pumps. Let’s dive into Holley‘s innovation and master the art of optimizing your LS engine’s prowess.

In order to create a seamless installation, Holley went and designed all new parts that fit together like the perfect puzzle piece.
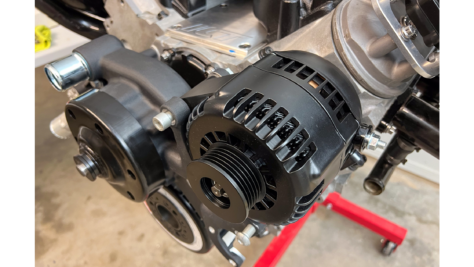
The top-tier Mid-Mount accessory system from Holley is smaller in size than other drives, with all of its parts positioned closer together. The main attraction of this system is a special “bracketless” design in which the add-ons are directly attached to the water pump for a sleeker look. The system has takes advantage of bottom heater outlets for clearance in tight applications. The Holley alternator, which makes use of 6-phase technology seen in the C7 Corvette, is ground-breaking. The C7 Corvette also served as an inspiration for the water pump’s design. The system also includes a small Type II P/S pump with a baffled reservoir. The Mid-Mount drive completes Holley’s trio of accessory solutions by offering a third option in addition to the previously released High and Low-Mount options.
An engine’s accessory drive system can make or break your build. Having inefficient pulleys, misrouted belts, or any other resistance can cause a loss in horsepower. Holley has thought all of this through. Their belt route, bearing smoothness, and pulley efficiency are all things that Holley maximized with this system. Even the included alternator has been engineered to decrease electricity loss.

Satin black has never looked so good. Holley understands that customization is a significant to automotive enthusiasts. To cater to one-of-a-kind styles, this system is available in a couple of finishes, including black, cast, and polished. This variety ensures that you can choose the finish that best compliments your vehicle’s overall aesthetics.
Now that we’ve talked about the thorough engineering, we can install the system and show off how easily it’s installed.
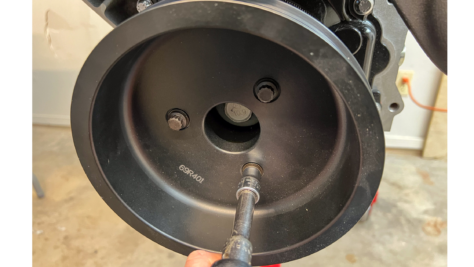
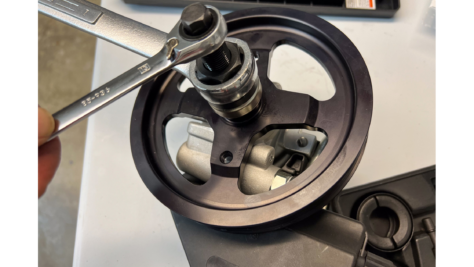
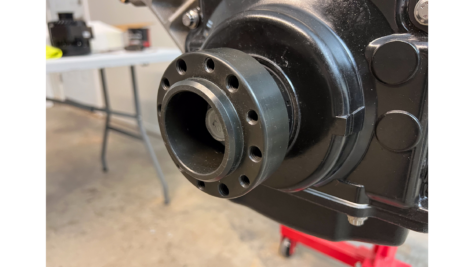
 The first step is going to be removing the old damper and/or installing the new one that’s included in the kit. The damper included in the kit is SFI approved, so passing racing certification is still accomplishable. There are a quite a few different tools for removing and installing dampers. Holley recommends ICT 551329 (remover) and ICT 551141 (installer) to get the job done. The damper bolt needs to be torqued, so make sure you have a trusty torque wrench on hand.
The next step is to mount the water pump manifold to the block. This step is as easy as installing two gaskets and tightening six bolts. The rest of the system bolts directly to the water pump, so after this step, the rest just falls into place.

With everything falling into place at this point, it’s okay to stop and admire how it looks.
With the manifold’s included mounting hardware properly torqued we’ll move on to installing the thermostat, thermostat housing, and the heater hose fittings. Keep in mind that if the included hardware does not allow for optimal hose routing for your build, there are different angles and swivel hardware available.

Notice there are four total heater hose ports. This is due to some applications requiring different routing methods. This allows you to have a few different options for routing your lines. Using the included plugs, plug whichever ports are not being used.
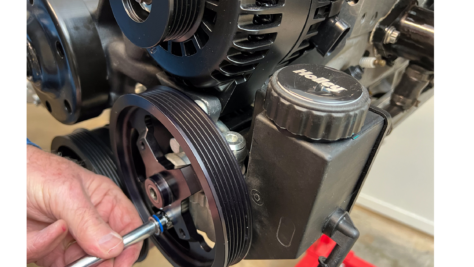
The alternator and power steering pump are next in line to be installed, but we’ll start with the alternator. Keep in mind that this alternator is rated at 150 amps, so it’s charge is enough to carry just about any accessory you could wire up.

This step is as easy as tightening down two bolts.
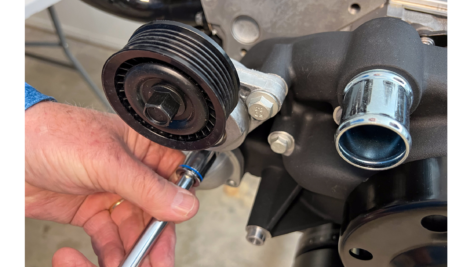
Before we move on to installing the power steering pump the AN-6 line adapter needs to be installed, with a sealing crush washer on either side. Next, we installed the power steering pulley on the pump using a pulley installation tool. After the pulley is installed the power steering pump attaches to the water pump manifold using flange head fasteners.

This is probably the most detailed step, so smooth sailing from here.
If the hardest part of this project is installing the power steering fitting, that counts as a major win. This could potentially be one of the first projects that is truly a quick job.

Just like the rest of the installation, the power steering falls right into place too.
The final step step is to install the belt tensioner and idler pulley. The good news is that the hardest part was not saved for last. Installing these parts makes for a total of four bolts that need tightened down.

All done!
After the installation is complete and the accessories are tucked in nice and tight against the heads, the accessories now sit lower than the valve covers. The finish product makes for a clean look that will be easy to simply wipe down when things get dirty.

Overall, Holley’s Premium Mid-Mount Accessory Drive offers a range of advantages for those seeking to enhance their engine’s performance and aesthetics. Its compact design, easy belt changes, durable construction, and customizable finishes make it a compelling choice for enthusiasts. While this might have been one of the easiest installations, it creates a high-performing and visually appealing engine bay.