When you hammer the loud pedal and all hell breaks loose on the dragstrip starting line (it’s what we live for), having the suspension and steering aligned together keeps you pointed straight. Which is what you want it to do. Having the basics of caster, camber, toe-in, and bump steer only “close enough” can be magnified very quickly, then work against you when manhandling your horsepower down the track.

Rick Jones from RJ Race Cars and Quarter-Max Chassis, and Dave Zimmerman from Team Z Motorsports, provided their expertise in pointing us in the right direction (pun intended).
Your front-end alignment is one of your final and most critical steps to allow raw acceleration to be easily controlled at the steering wheel. Following proper squaring of your overall chassis and rear differential, you can now focus on your front suspension and steering alignment.

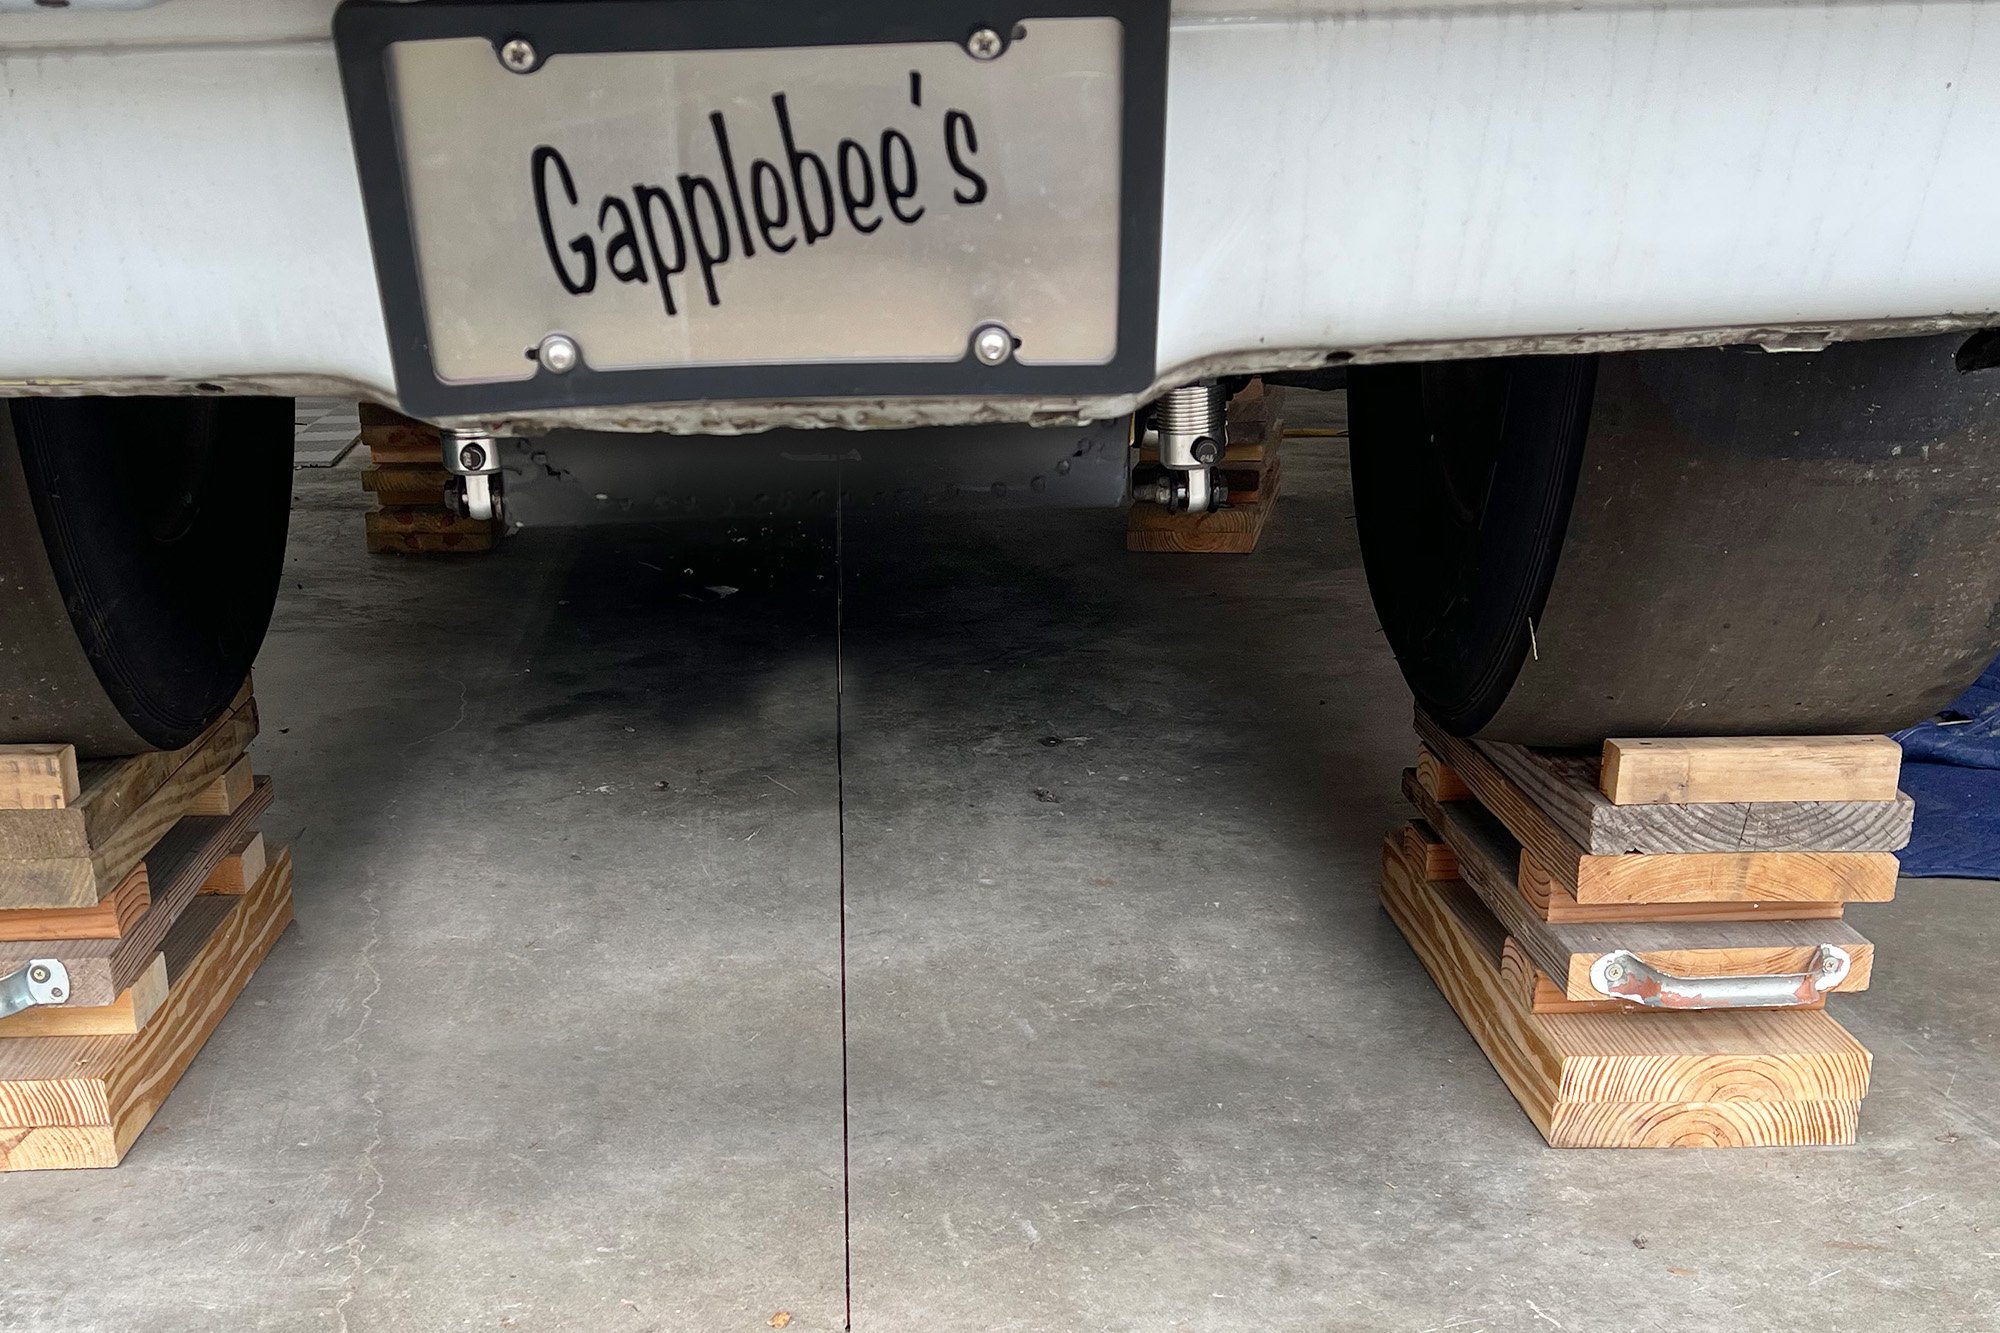
We just completed squaring our chassis and rearend. With that, we settled the car on the ground and ensured the front of the chassis was level with the floor.
Zimmerman jumped right in on the subject by explaining his process of establishing a true centerline on the chassis they build. He says, “We always scribe a center line completely down the car at every crossmember; then, we can always refer to different points along the underside of the car to measure back from center.”
Jones refers to a book he publishes and sells entitled Rick Jones Chassis Tuning Guide. He offers a complete chapter on front-end alignment where he explains the mechanics of adjusting your front end, and describes exactly how they affect your steering.
There is no real black magic to squaring your car and properly aligning yourself for the dragstrip. Having an understanding of those “big four” adjustment terms — camber, caster, toe-in, and bump-steer — is half the battle. – Rick Jones, RJ Race Cars
Basic Definitions
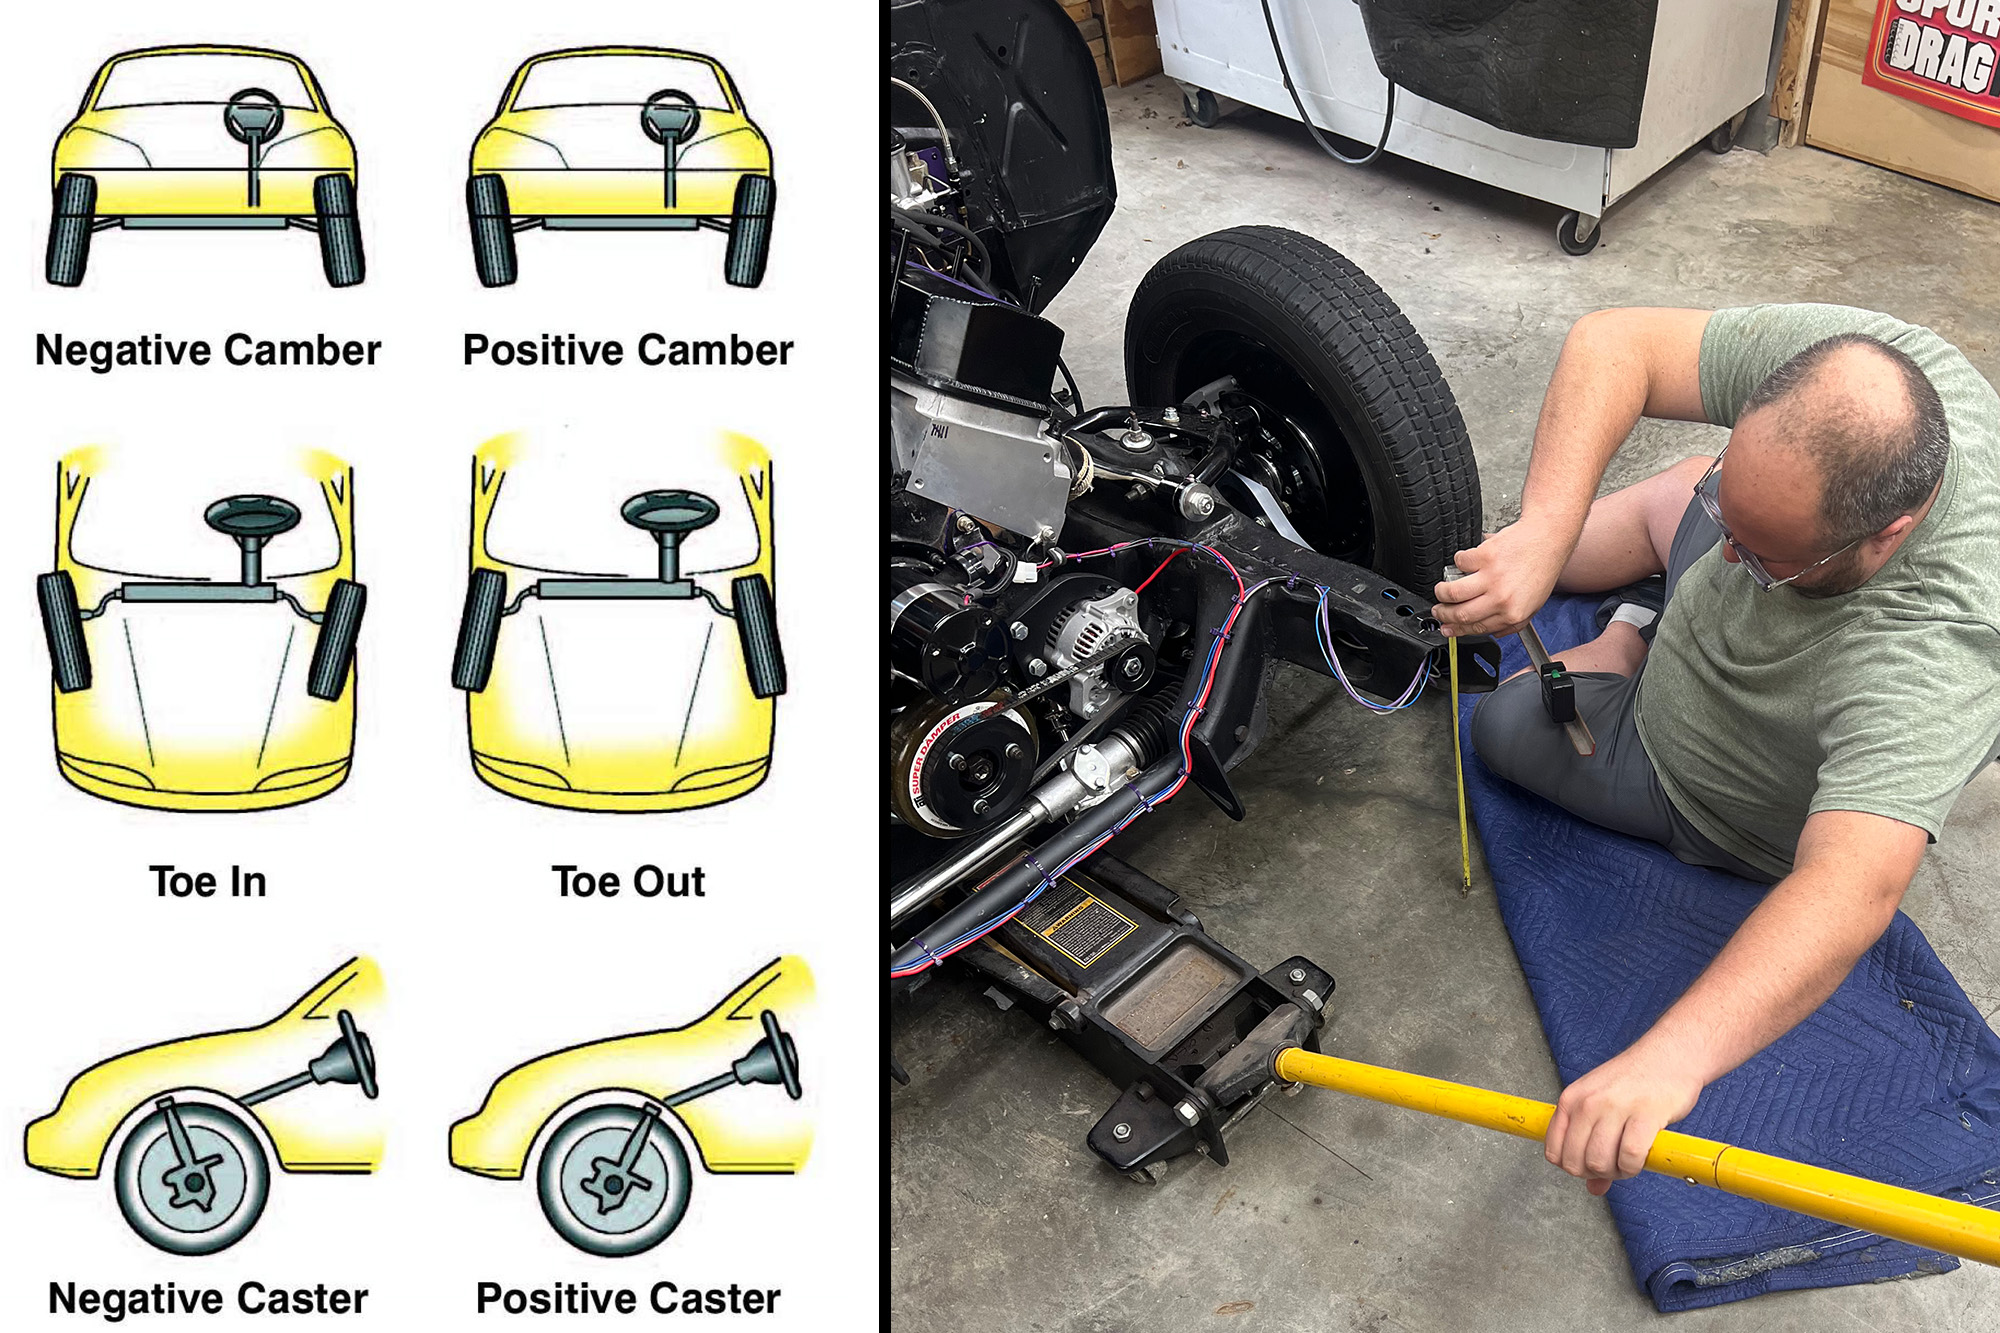
Caster
The caster is the angle of the steering axis. Suppose you draw an imaginary line between the upper and lower ball joints. In that case, positive caster is when that line tilts backward, away from the direction of forward motion. Zero caster is when the steering axis is straight up and down, and negative caster is when the axis leans forward.
“With our full-tube racing chassis, 10 degrees of positive caster is our preferred layout. With many stock-type front suspensions, you might have a hard time getting 5 degrees, but try to get as much as possible,” says Jones.
An illustration dramatizes the effects of the caster, camber, and toe. We pre-recorded our resting and acceleration chassis heights while the project Camaro was assembled with the doghouse on and driver in the seat, then reproduced those heights for setting our suspension.
You always want the top ball joint further towards the rear of the car compared to the bottom ball joint. This positive caster creates steering self-alignment at speed. For example, when you let go of the steering wheel while your family car, truck, or racecar is moving forward, the steering wheel returns to center. If it doesn’t, you have a problem.
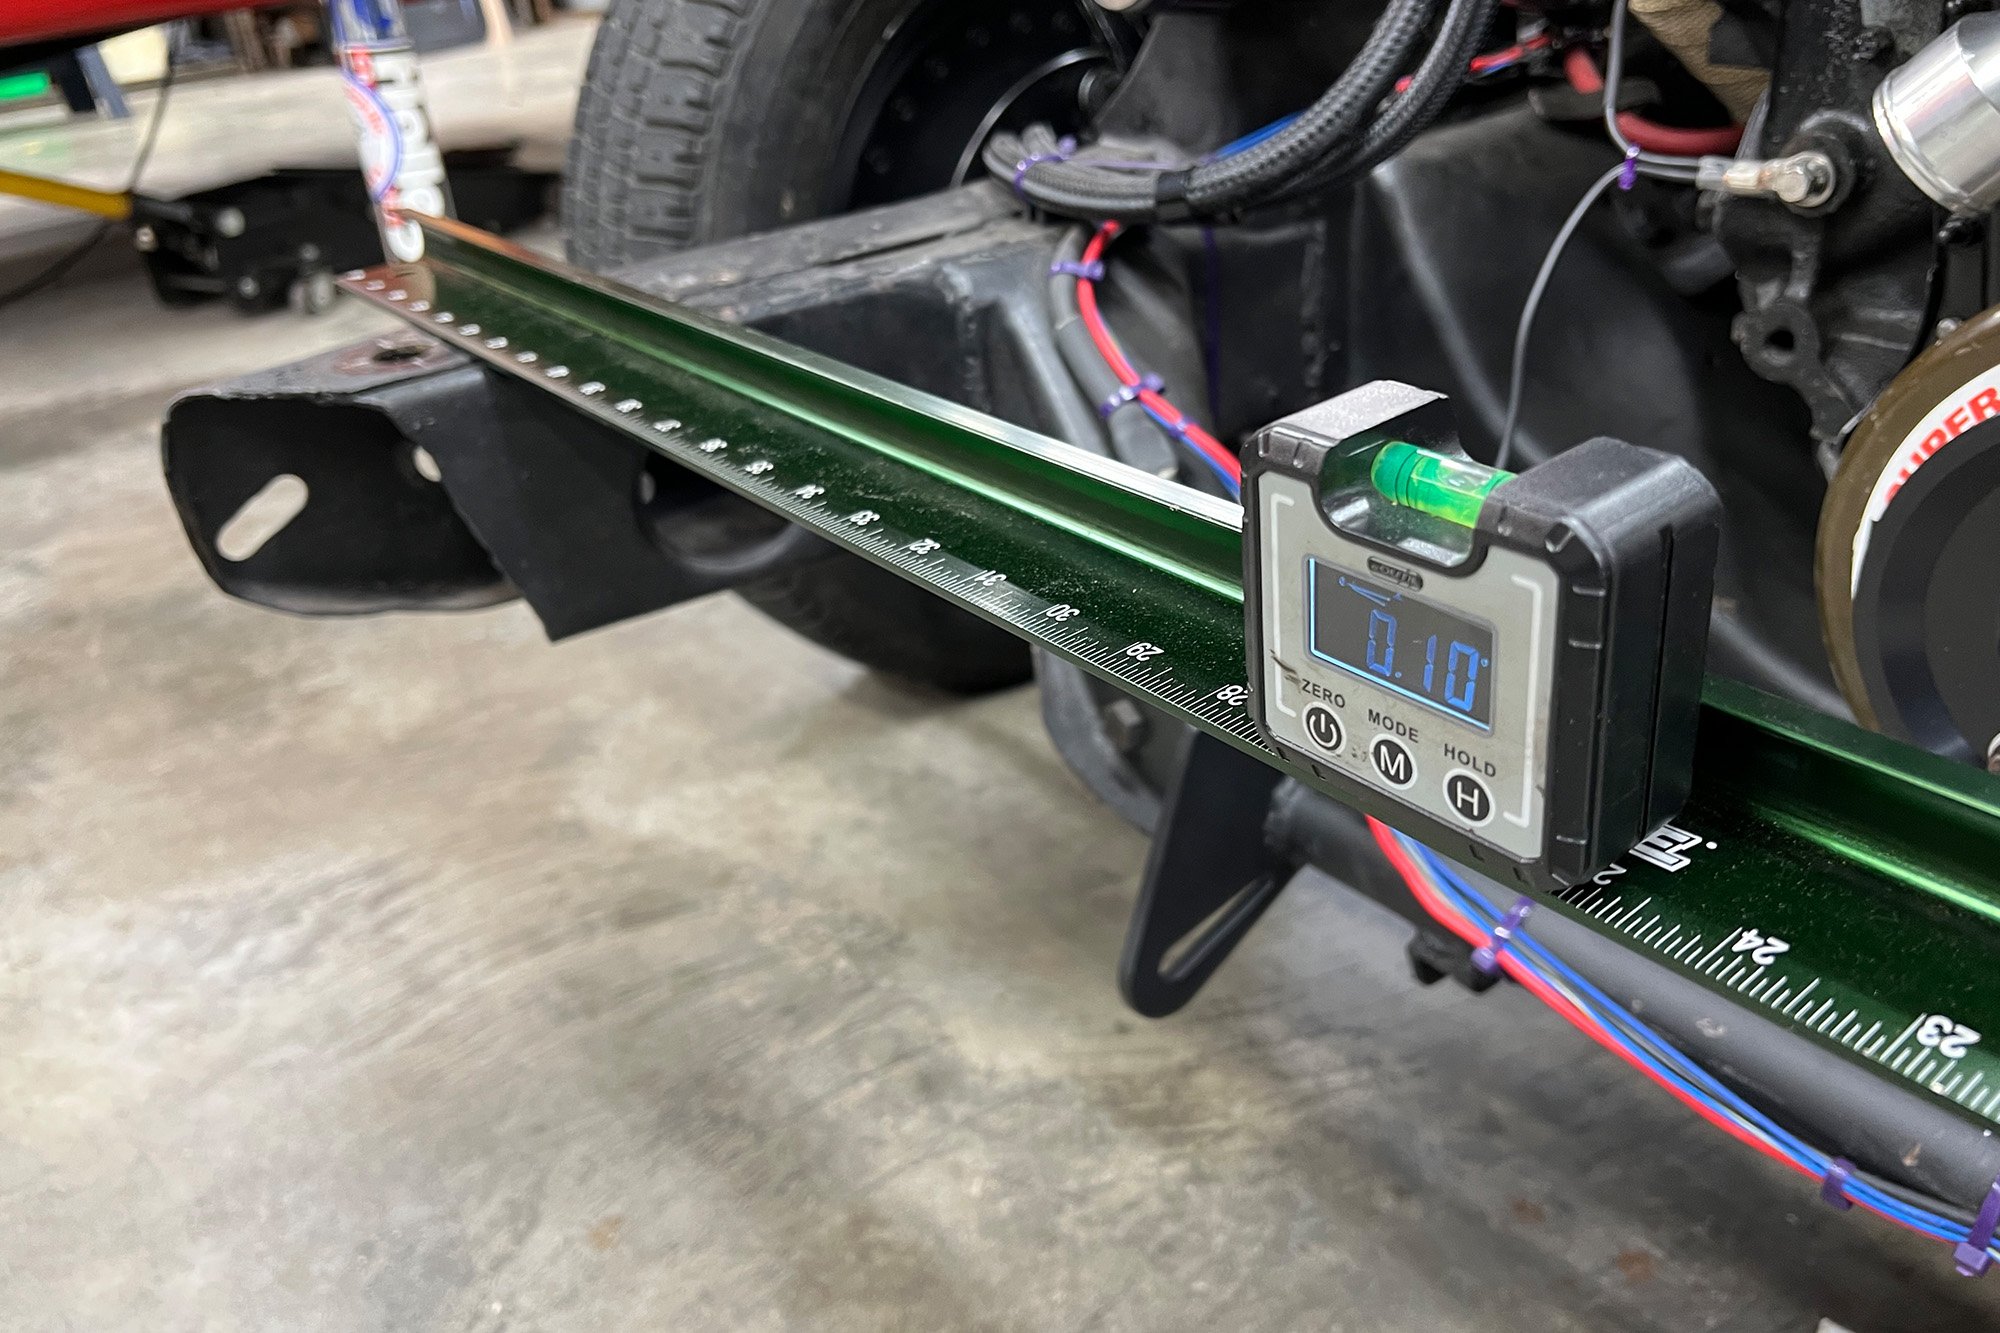
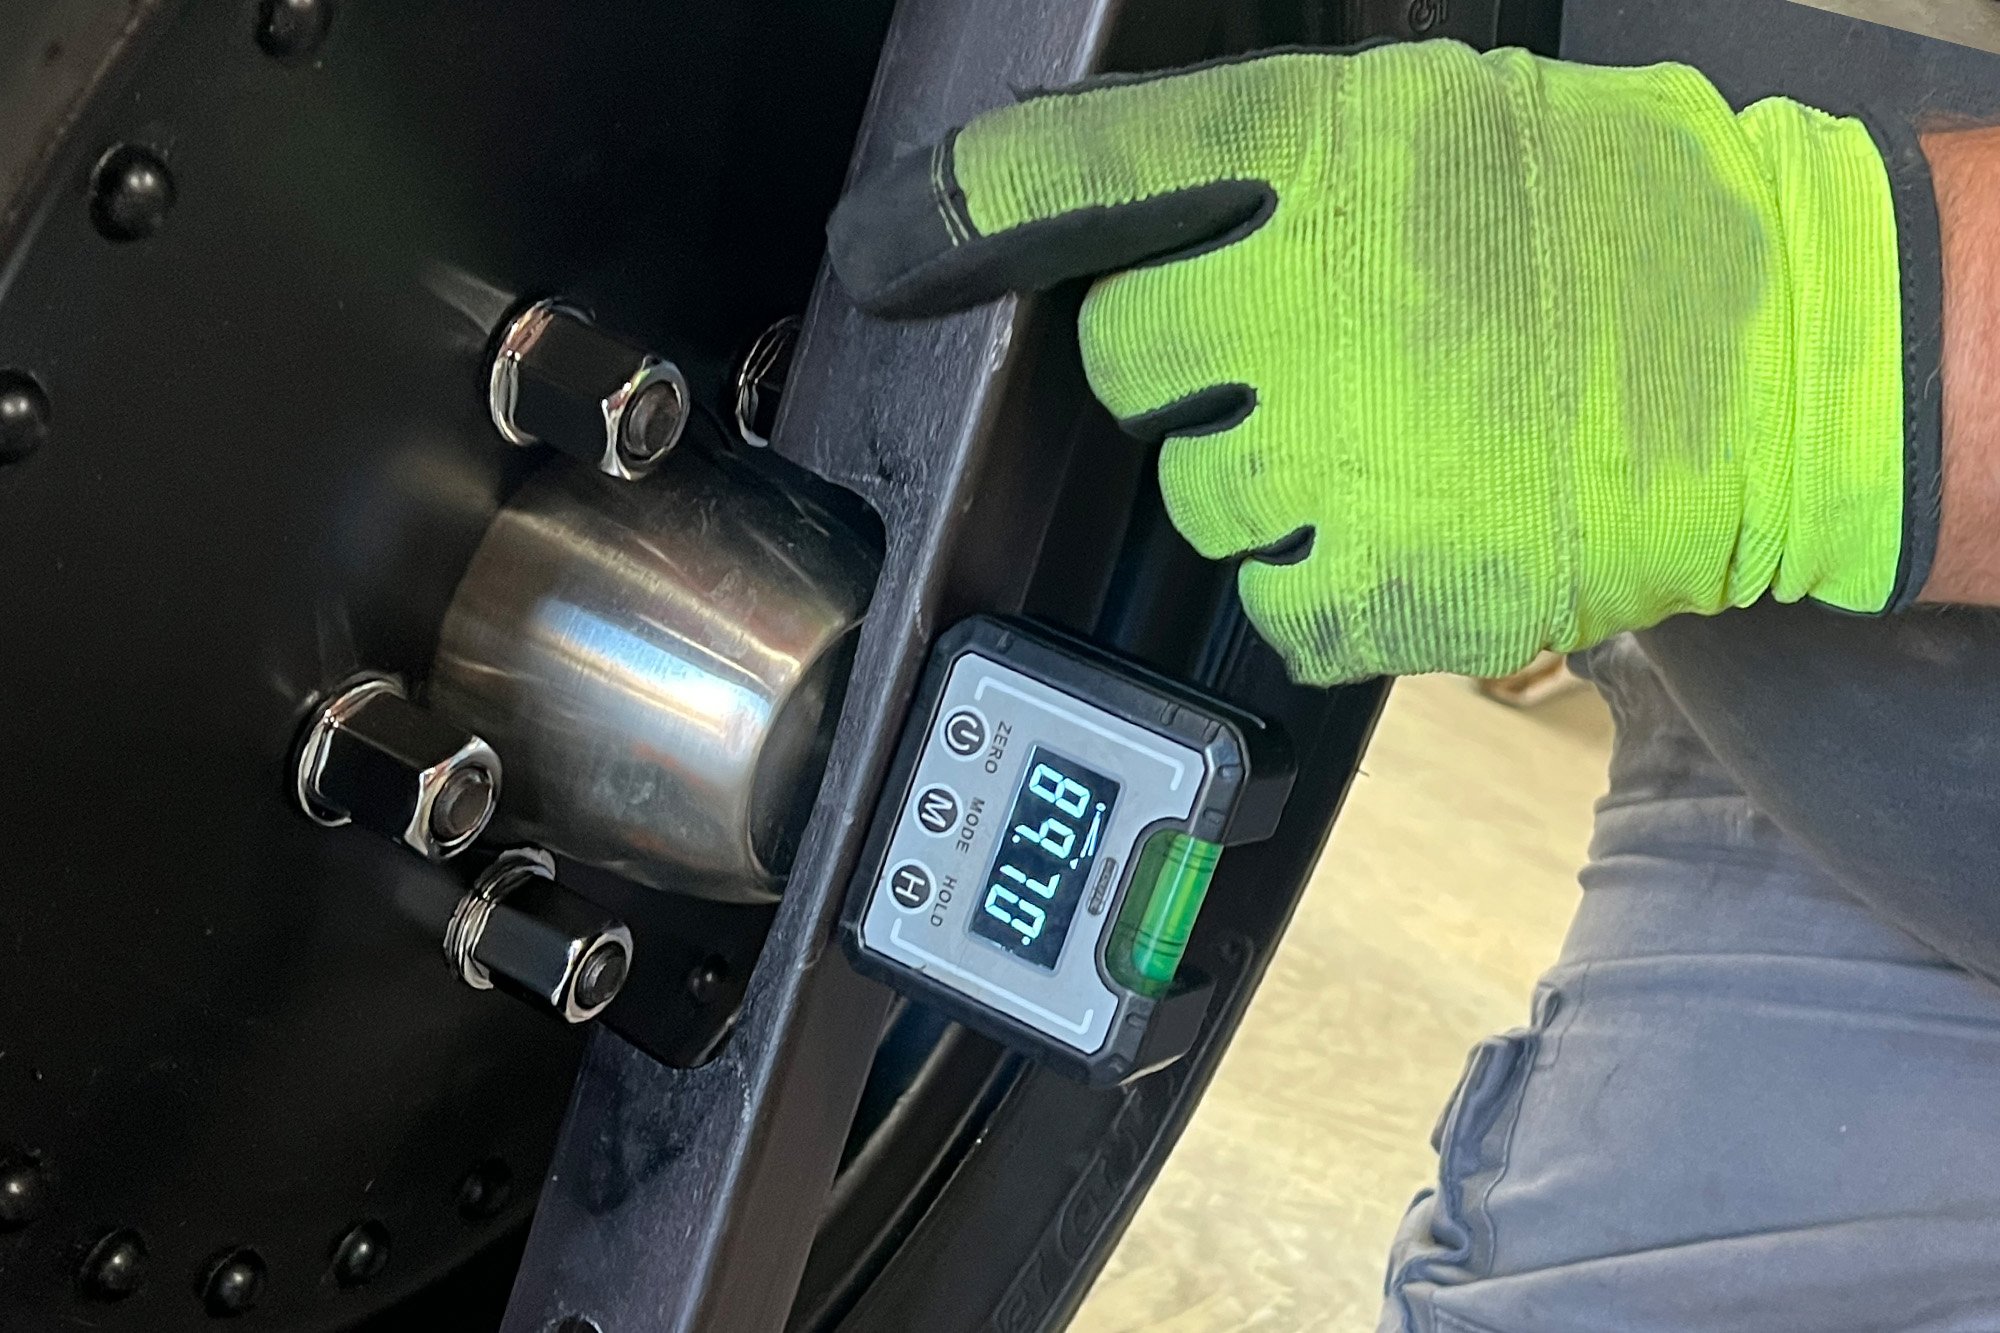
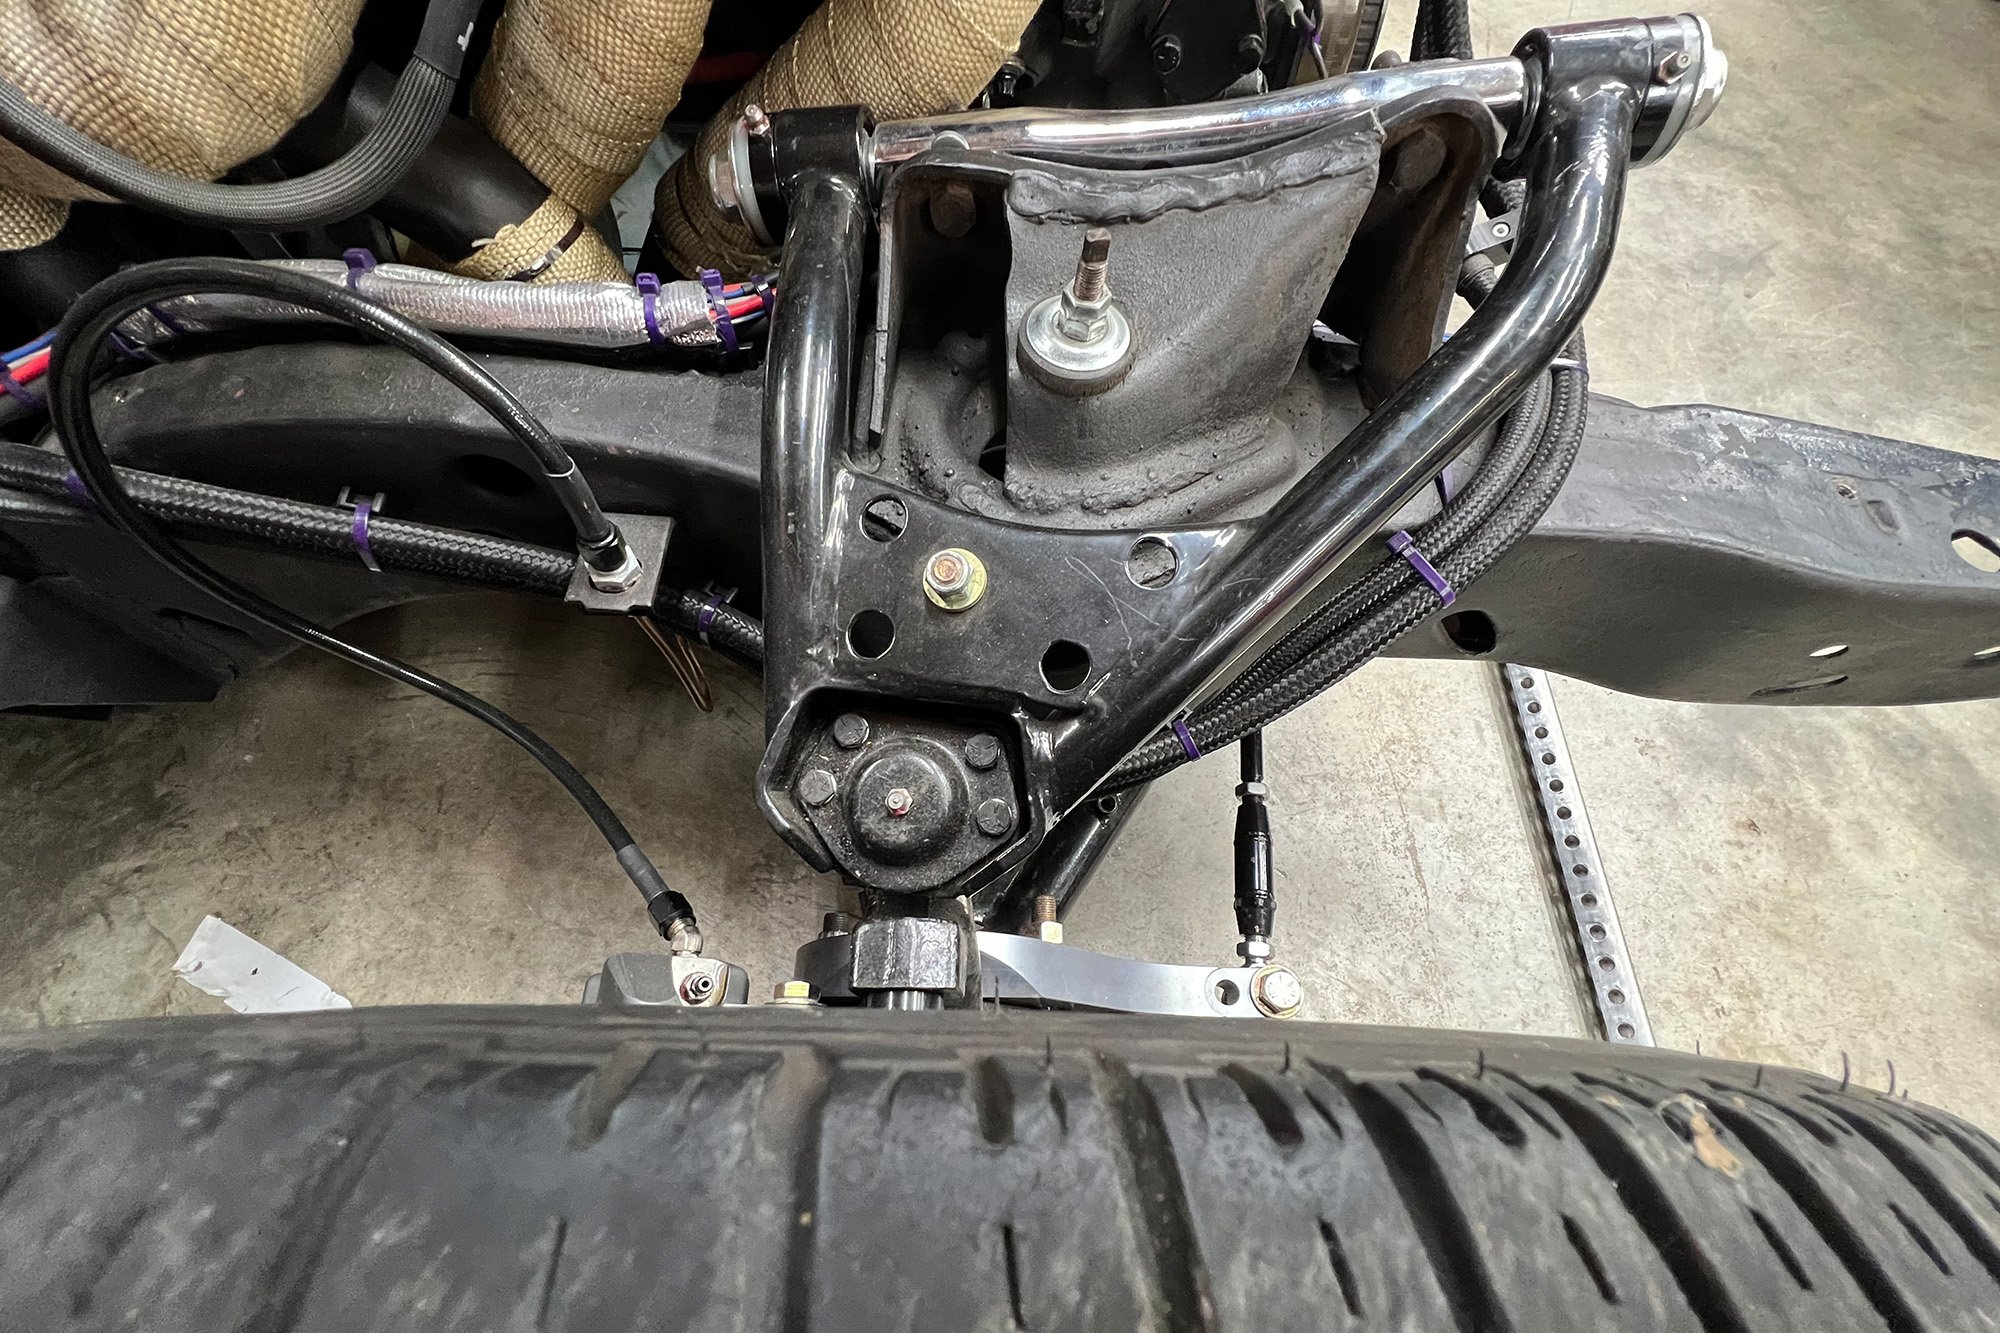
With proper shims on our new tubular A-arms, we were able to achieve almost 8 degrees of positive caster and zero camber (the wheel is perfectly vertical). With the two control arm bolts located perpendicular to our ball joint centerline, we could measure the caster angle from there.
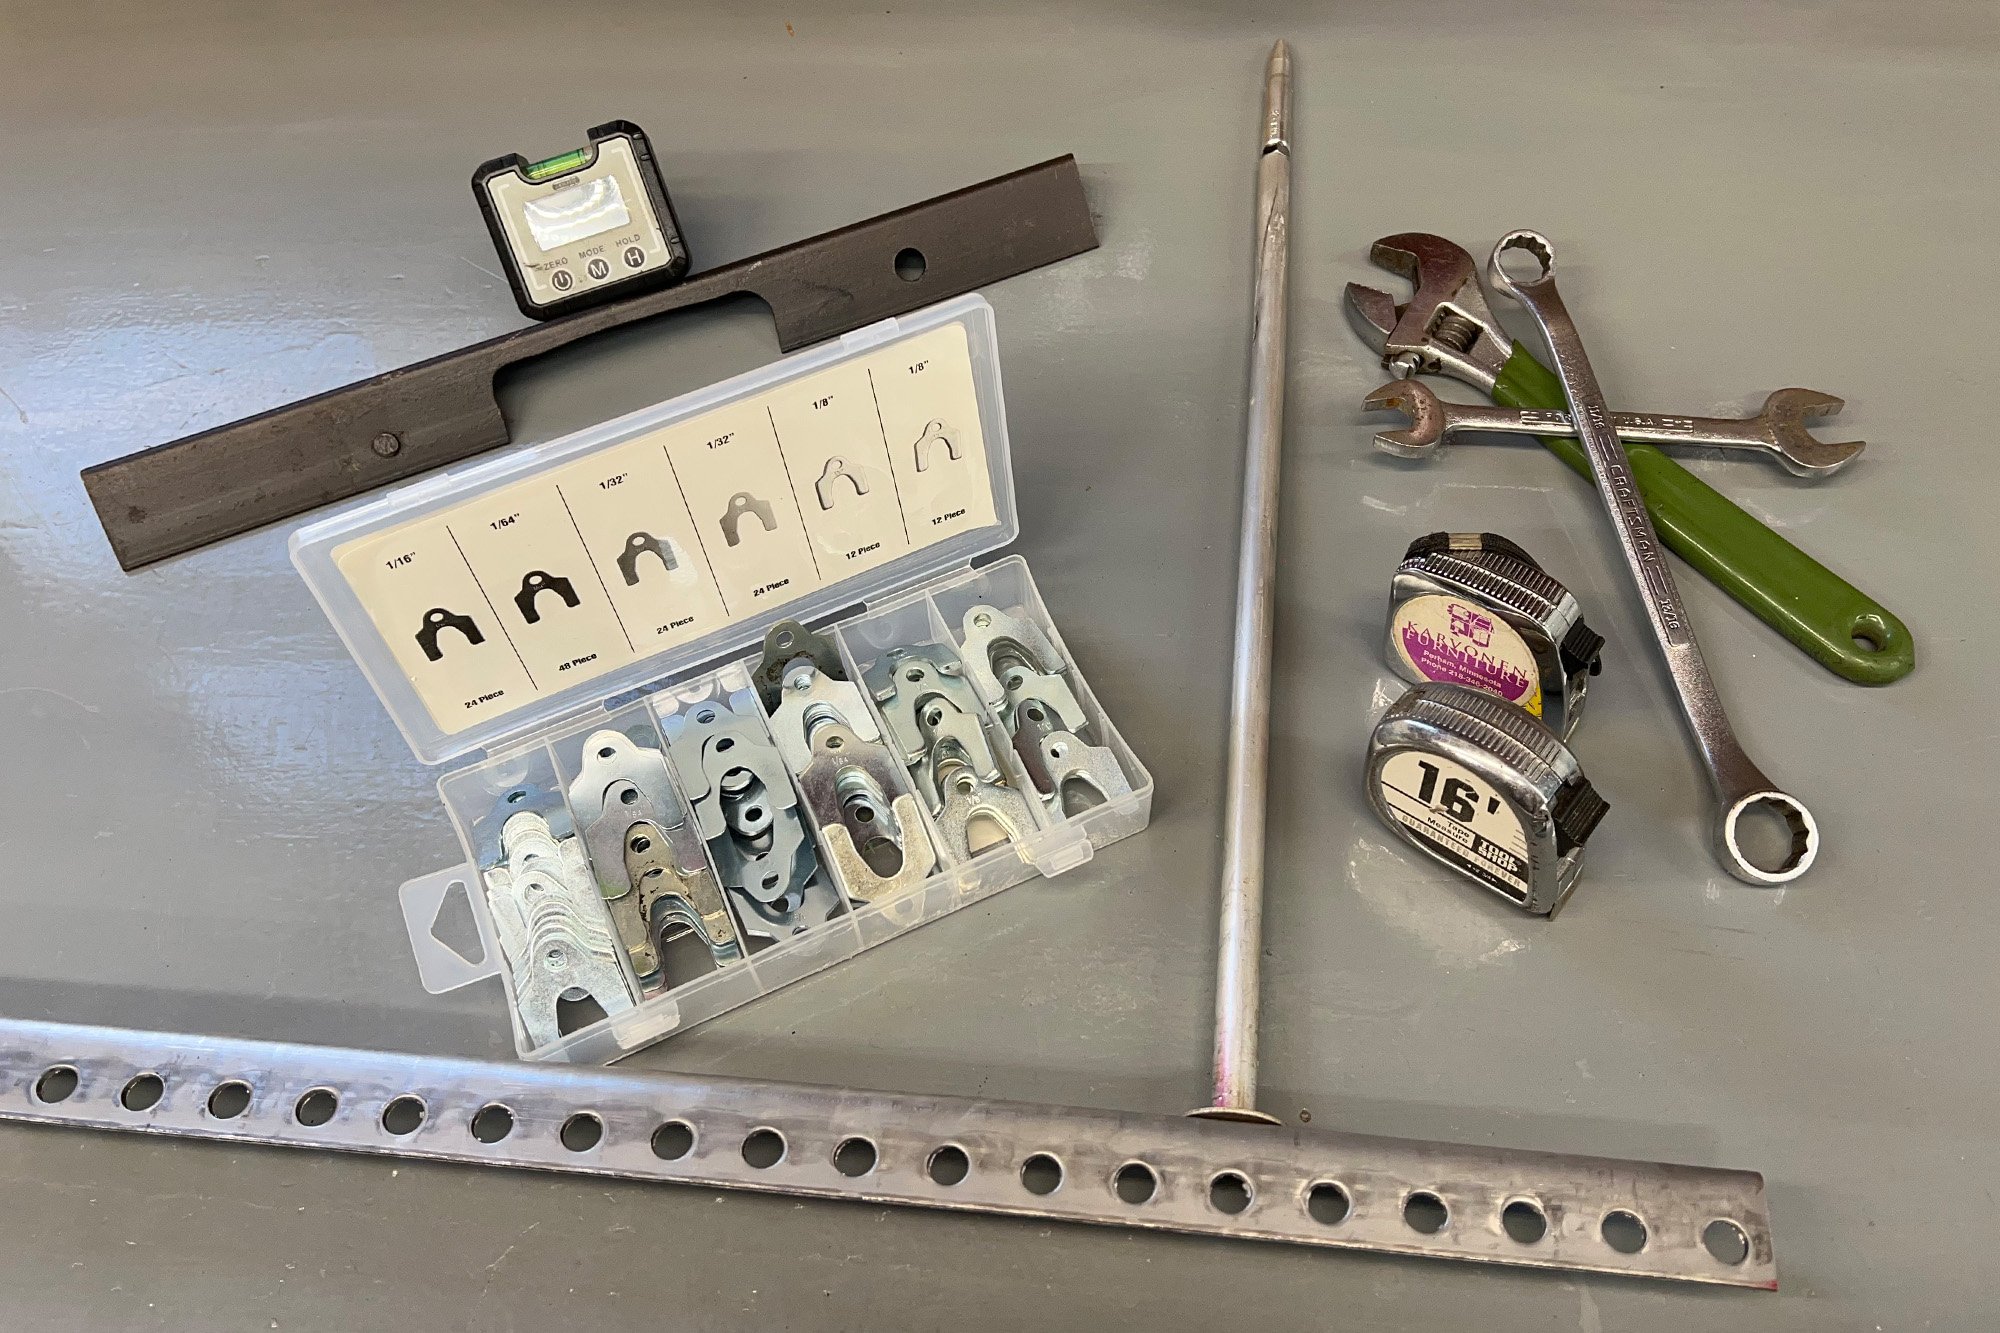
We used these basic tools, plus time and patience, to fully align our factory-style front suspension and steering. The digital protractor is used extensively, including a check that our coil-over shock heights had our frame exactly level.
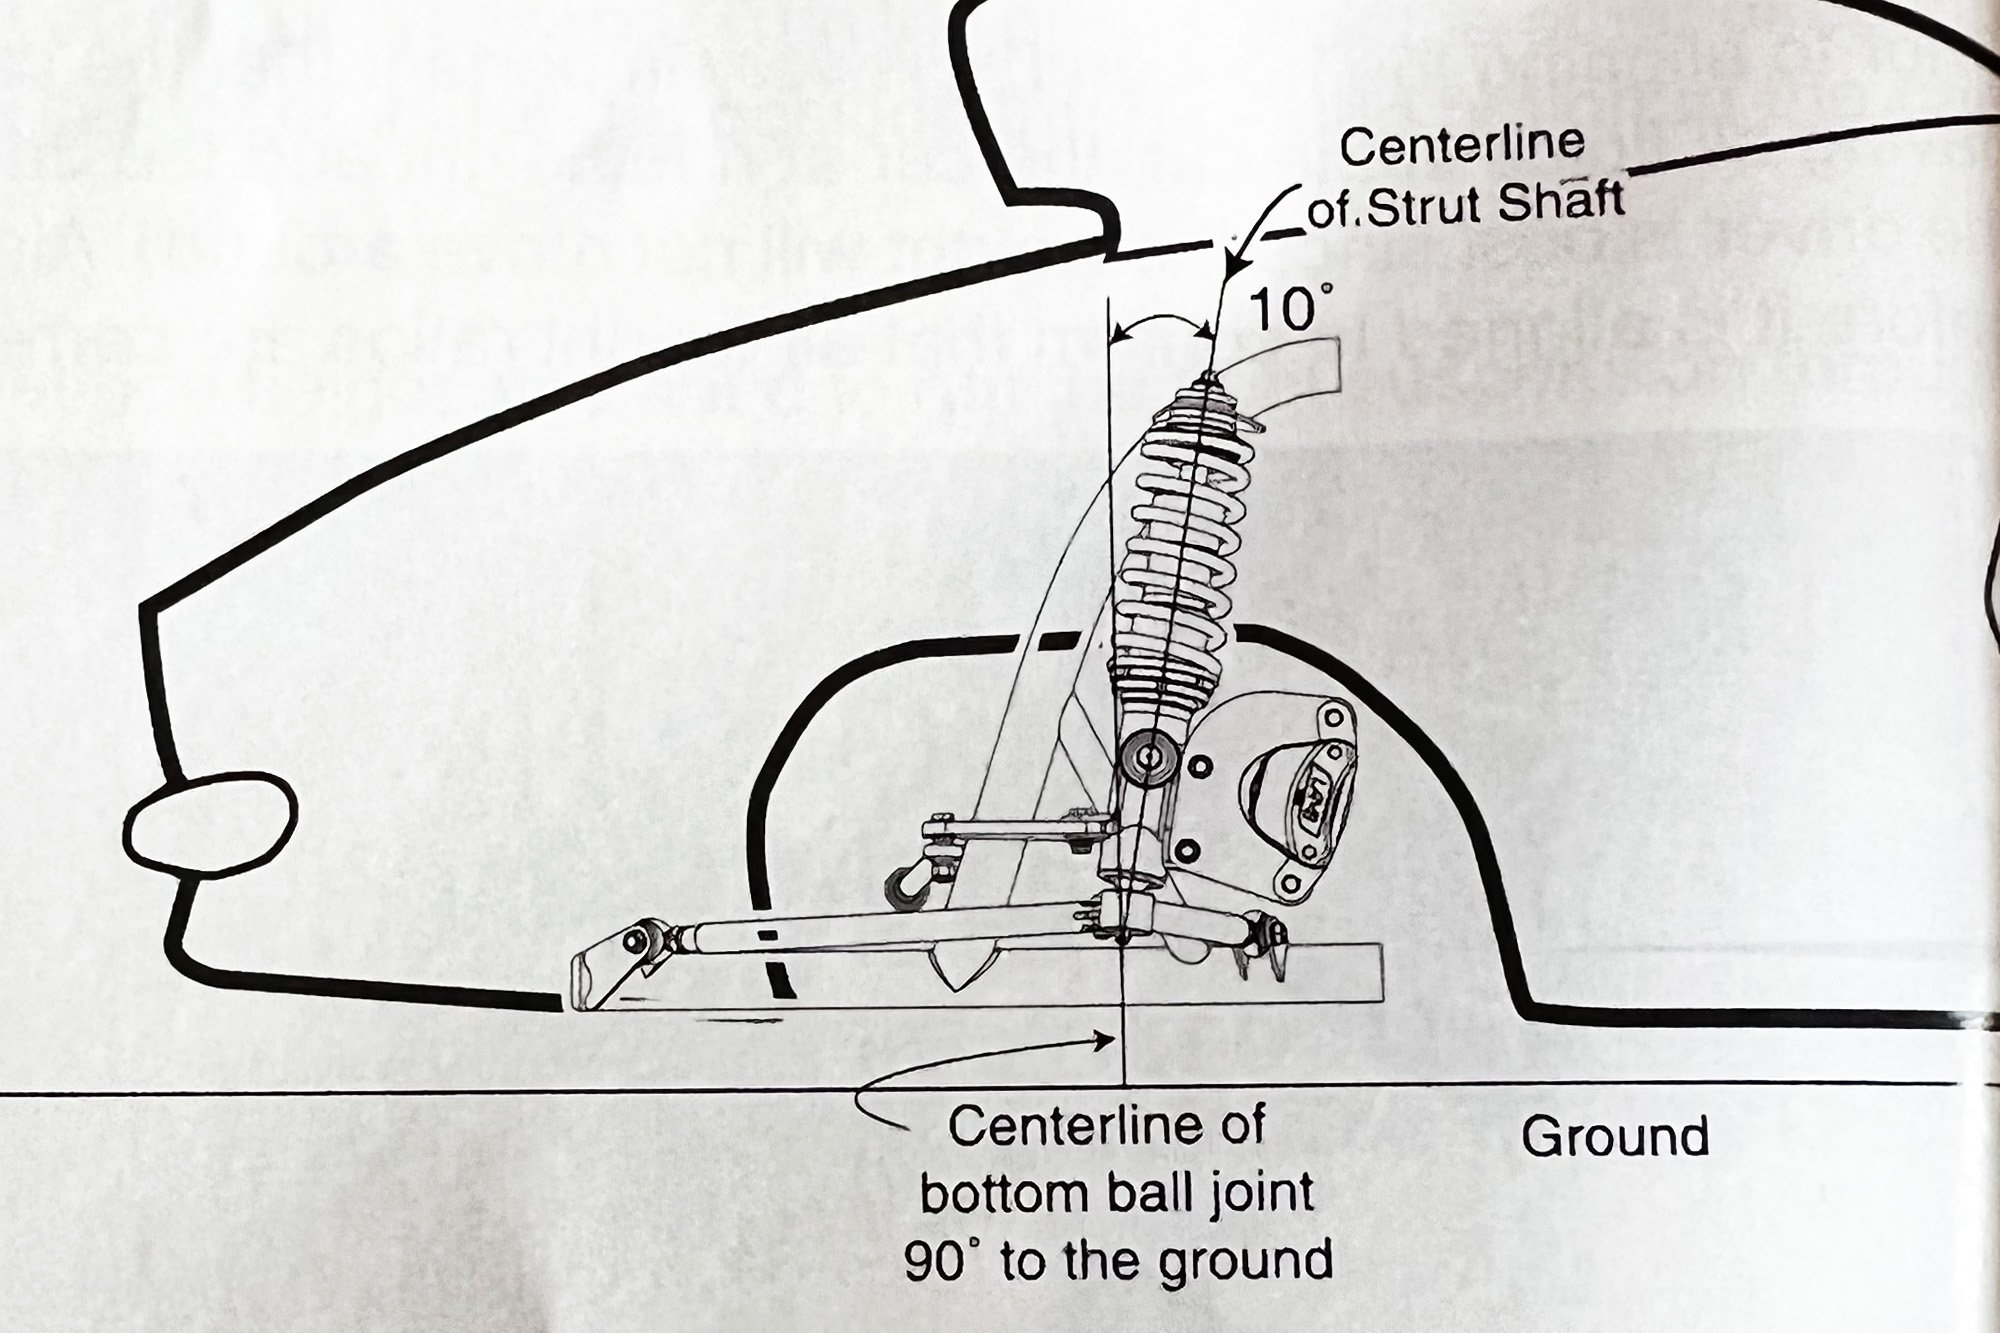
With a strut suspension race car, the caster is measured by the angle of the strut’s centerline. This angle is primarily fabricated into the struts on the chassis jig. Fine-tuning takes place on the rod-end of the lower control arm.
Among Team Z’s popular products are adjustable Mustang caster-camber plates that replace the top strut plate on the body. These allow adjustments beyond the OEM strut geometry. When modifying a Mustang to a lower ride height, these bumpsteer kits correct the steering geometry between your steering rack and control arms.
Camber
The camber is typically the second suspension adjustment. This measures the inward or outward tilt of the front tires as you examine them from the front of the car. An inward tilt is referred to as negative camber, outward is positive camber.

We achieved almost 8 degrees of positive caster when shimming our new tubular A-arms. With the two control arm bolts located exactly perpendicular to our ball joint centerline, we use a small section of light angle iron to measure the caster angle from there.
“Many companies offer adjustment plates for the top of factory-style struts to help achieve more adjustment of caster and camber with late-model strut cars,” Zimmerman explains. “Made from alloy steel and laser cut, our new plates allow a greater range of adjustment in caster and camber for lower-than-stock resting height, while also factoring in a higher ride height under acceleration.”
In drag racing, the camber should be adjusted where the tire is perfectly vertical at ride height. This zero-camber setting distributes load evenly across the tire. If one side of your suspension has a different camber angle than the other, it will cause the steering to pull toward the greatest positive camber.

Team Z's Mustang caster-camber plates are a popular replacement for the top strut plate. These allow adjustments beyond the OEM strut geometry. When modifying a Mustang to a lower race height, these bumpsteer kits correct the steering geometry between your steering rack and control arm.
“This is a critical measurement with a drag car,” says Jones. “A digital protractor is important to get camber exactly right and is handy for every measurement we are talking about today. With your tires set straight forward, you can place the magnetic base of the digital protractor on your brake rotor for angle measurement.”
When making all these adjustments, there are three fundamental heights to consider: resting ride height, acceleration height, and fully extended height when the front tires are off the ground. Most initial adjustments are performed at the acceleration height when your car is under hard acceleration. That may be a typical 2 to 3 inches of front chassis elevation in most instances.
Jones adds, “Check your camber change again when you jack your front suspension upward until it reaches its fully extended height. Check your camber here and then again at your resting height. There should be no variation with a properly laid-out suspension, or you have a geometry problem.”


The Rick Jones Chassis Tuning Guide offers 18 chapters and 98 pages about everything for door car suspension geometry, scaling, and of course, many pages concerning the squaring of your racecar and front suspension.
Toe
Toe is the difference of the side-to-side distance between the front and rear of the steering tires. If your tires point inward in the front, that is defined as toe-in. If the measurement is closer at the back, it’s called toe-out.
“Make sure your car is actually at its race-ready weight before setting toe,” recommends Zimmerman. “Good tools are important; when your car is complete and ready for final adjustment, your car will not typically have clearance to measure toe around the chassis, engine, and body panels. A good digital protractor and a toe measurement gauge that fits around your car and suspension are essential.”
The tire scribe process is the most popular practice utilized by many chassis builders and is described in detail in Jones’ chassis guide. A toe gauge rests on your level floor and has two pointers to measure the width of your tire’s face.
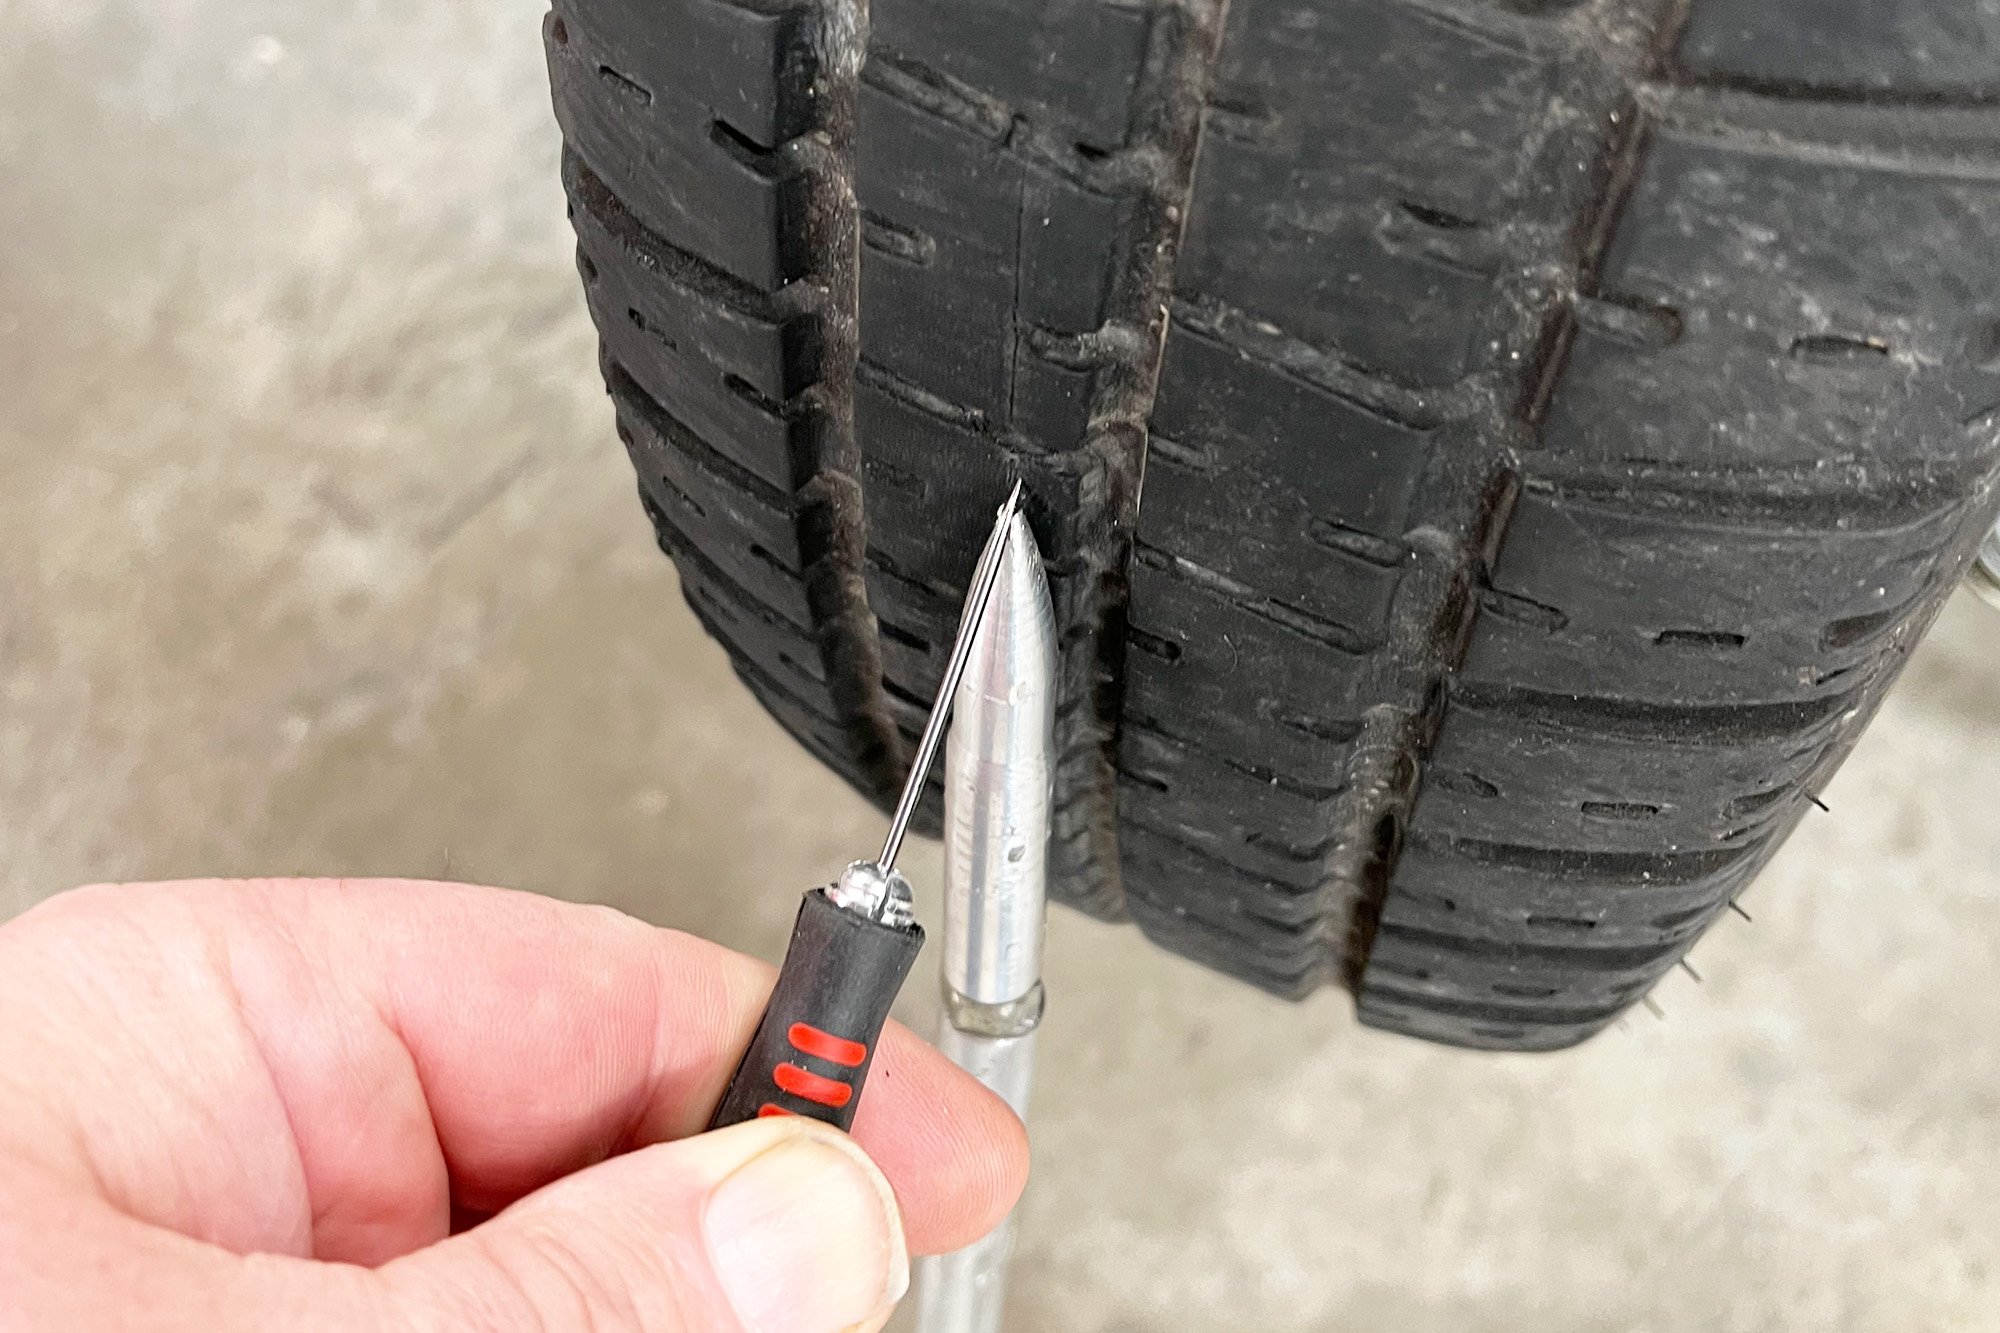
“Raise the tires off the floor and carefully scribe a line on the tread face of your front tires as you rotate them,” Jones explains. “Then, set your toe width between the two scribes with your front end back at acceleration height. Second, you carefully move the gauge to the front and measure the difference. We recommend a .125-inches of toe-in.”

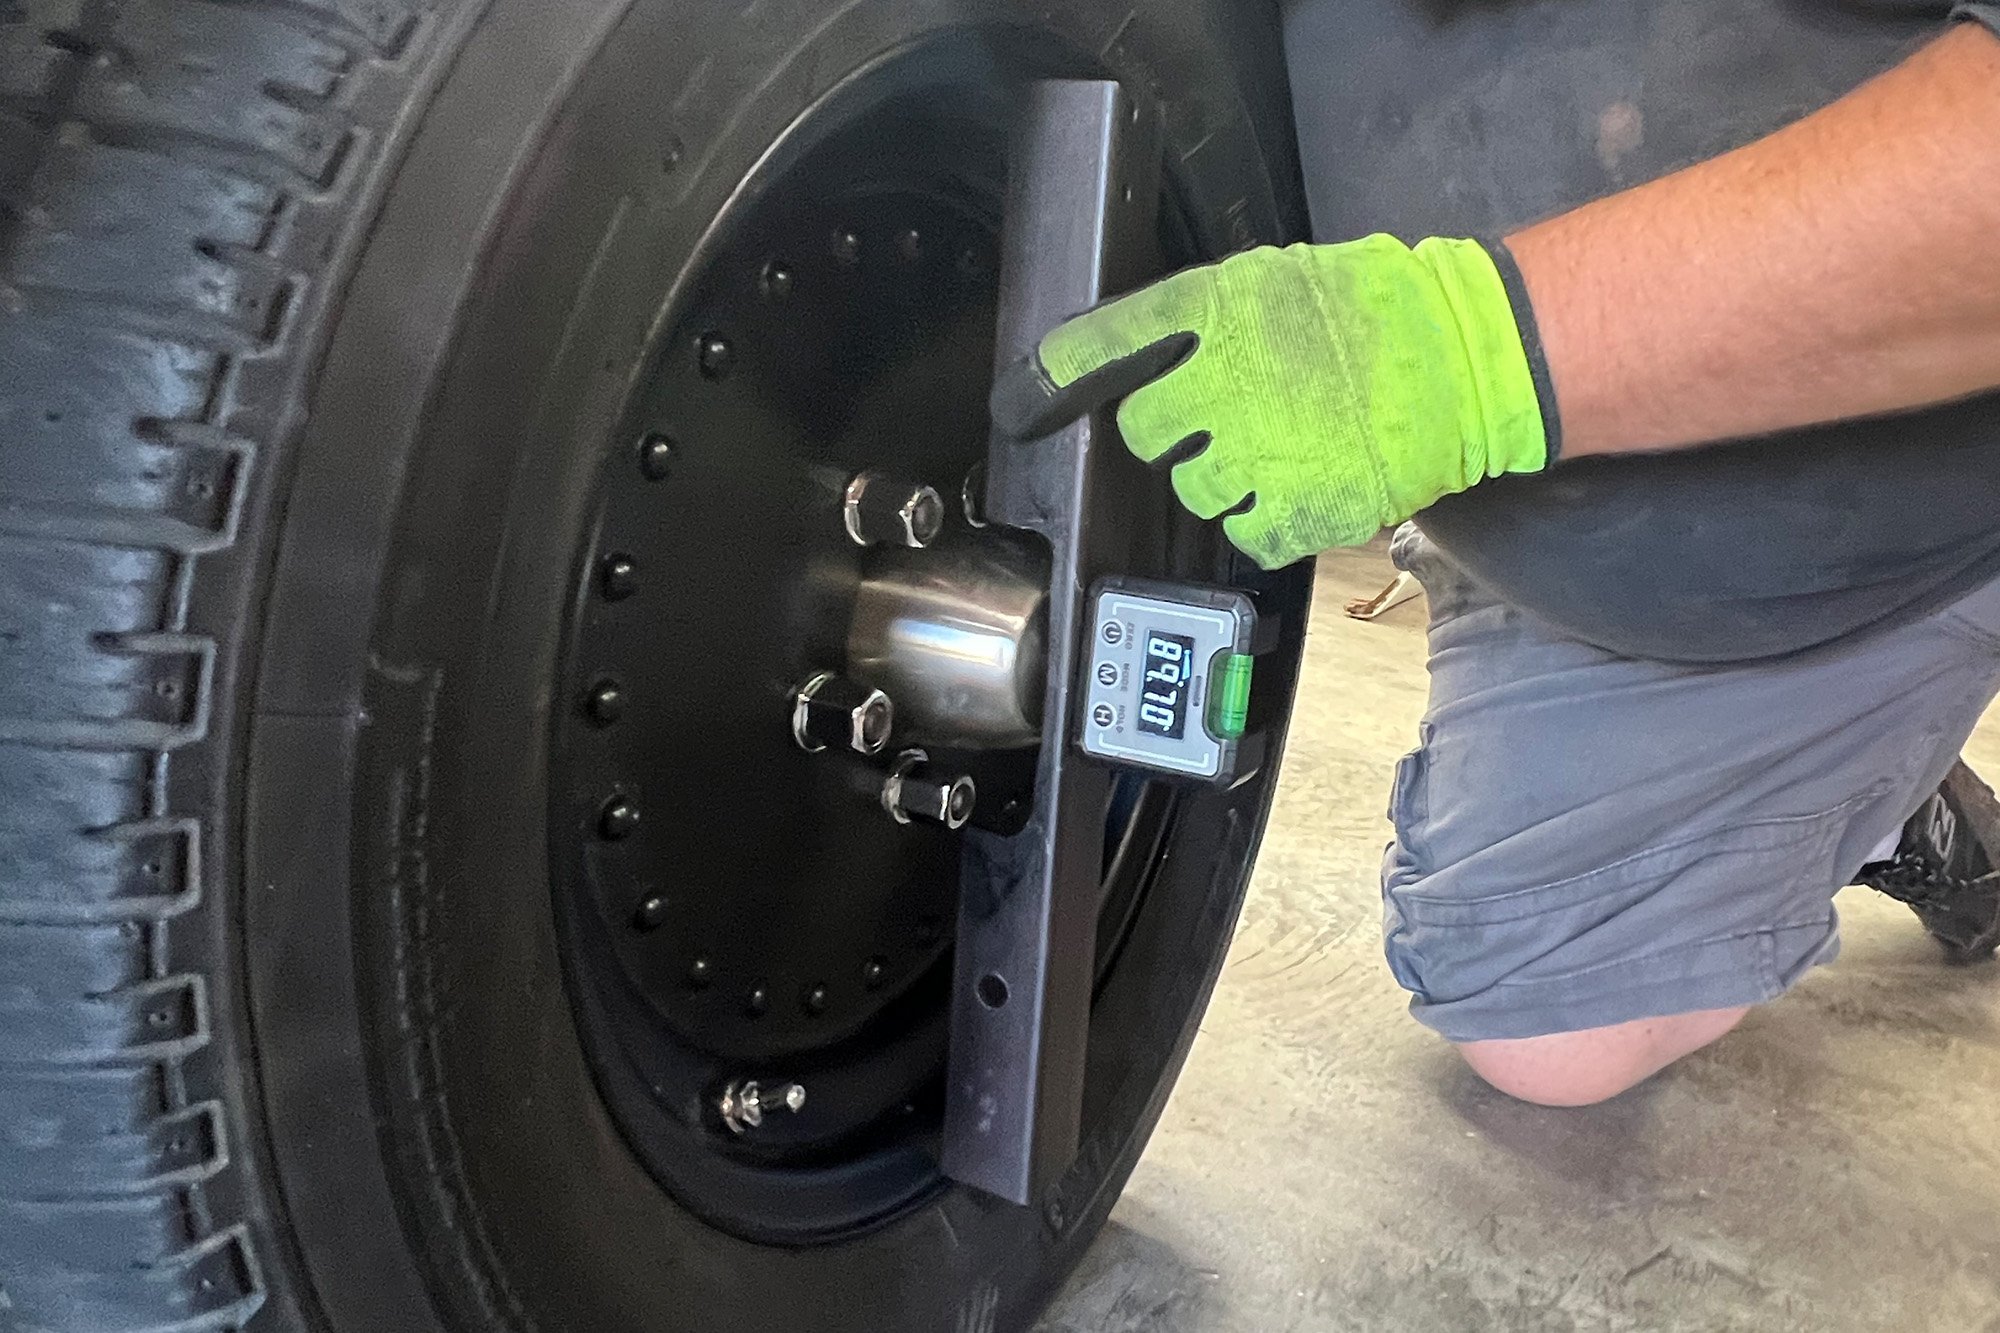
When examining camber or bumpsteer, you can mount your digital protractor to your disc brake face. Alternatively, we fabricated a handy section of angle iron that will clear lug nuts and dust caps yet still rest on the face of your wheel.
Toe-in is the specific measurement where, in this case, the distance of the scribes line on your tire is .125 inches narrower in the front than in the rear at the tire’s face. For example, let’s say your very first front-back measurement indicates you are a .500-inch wider in the front than the rear; that is .500-inch toe-out.
This measurement means you must adjust your toe .625-inch inward for your desired toe-in. If your tie rods are in front of your spindle, say with a typical rack and pinion steering, you need to remove half of that distance (.3125-inch) from each tie rod end to keep your steering wheel centered. Also, remember that when you are adjusting, you are also moving the rear tire scribe outward as you change the front face inward, so technically, you are adjusting each of your tie rods .156-inch to achieve your toe-in.
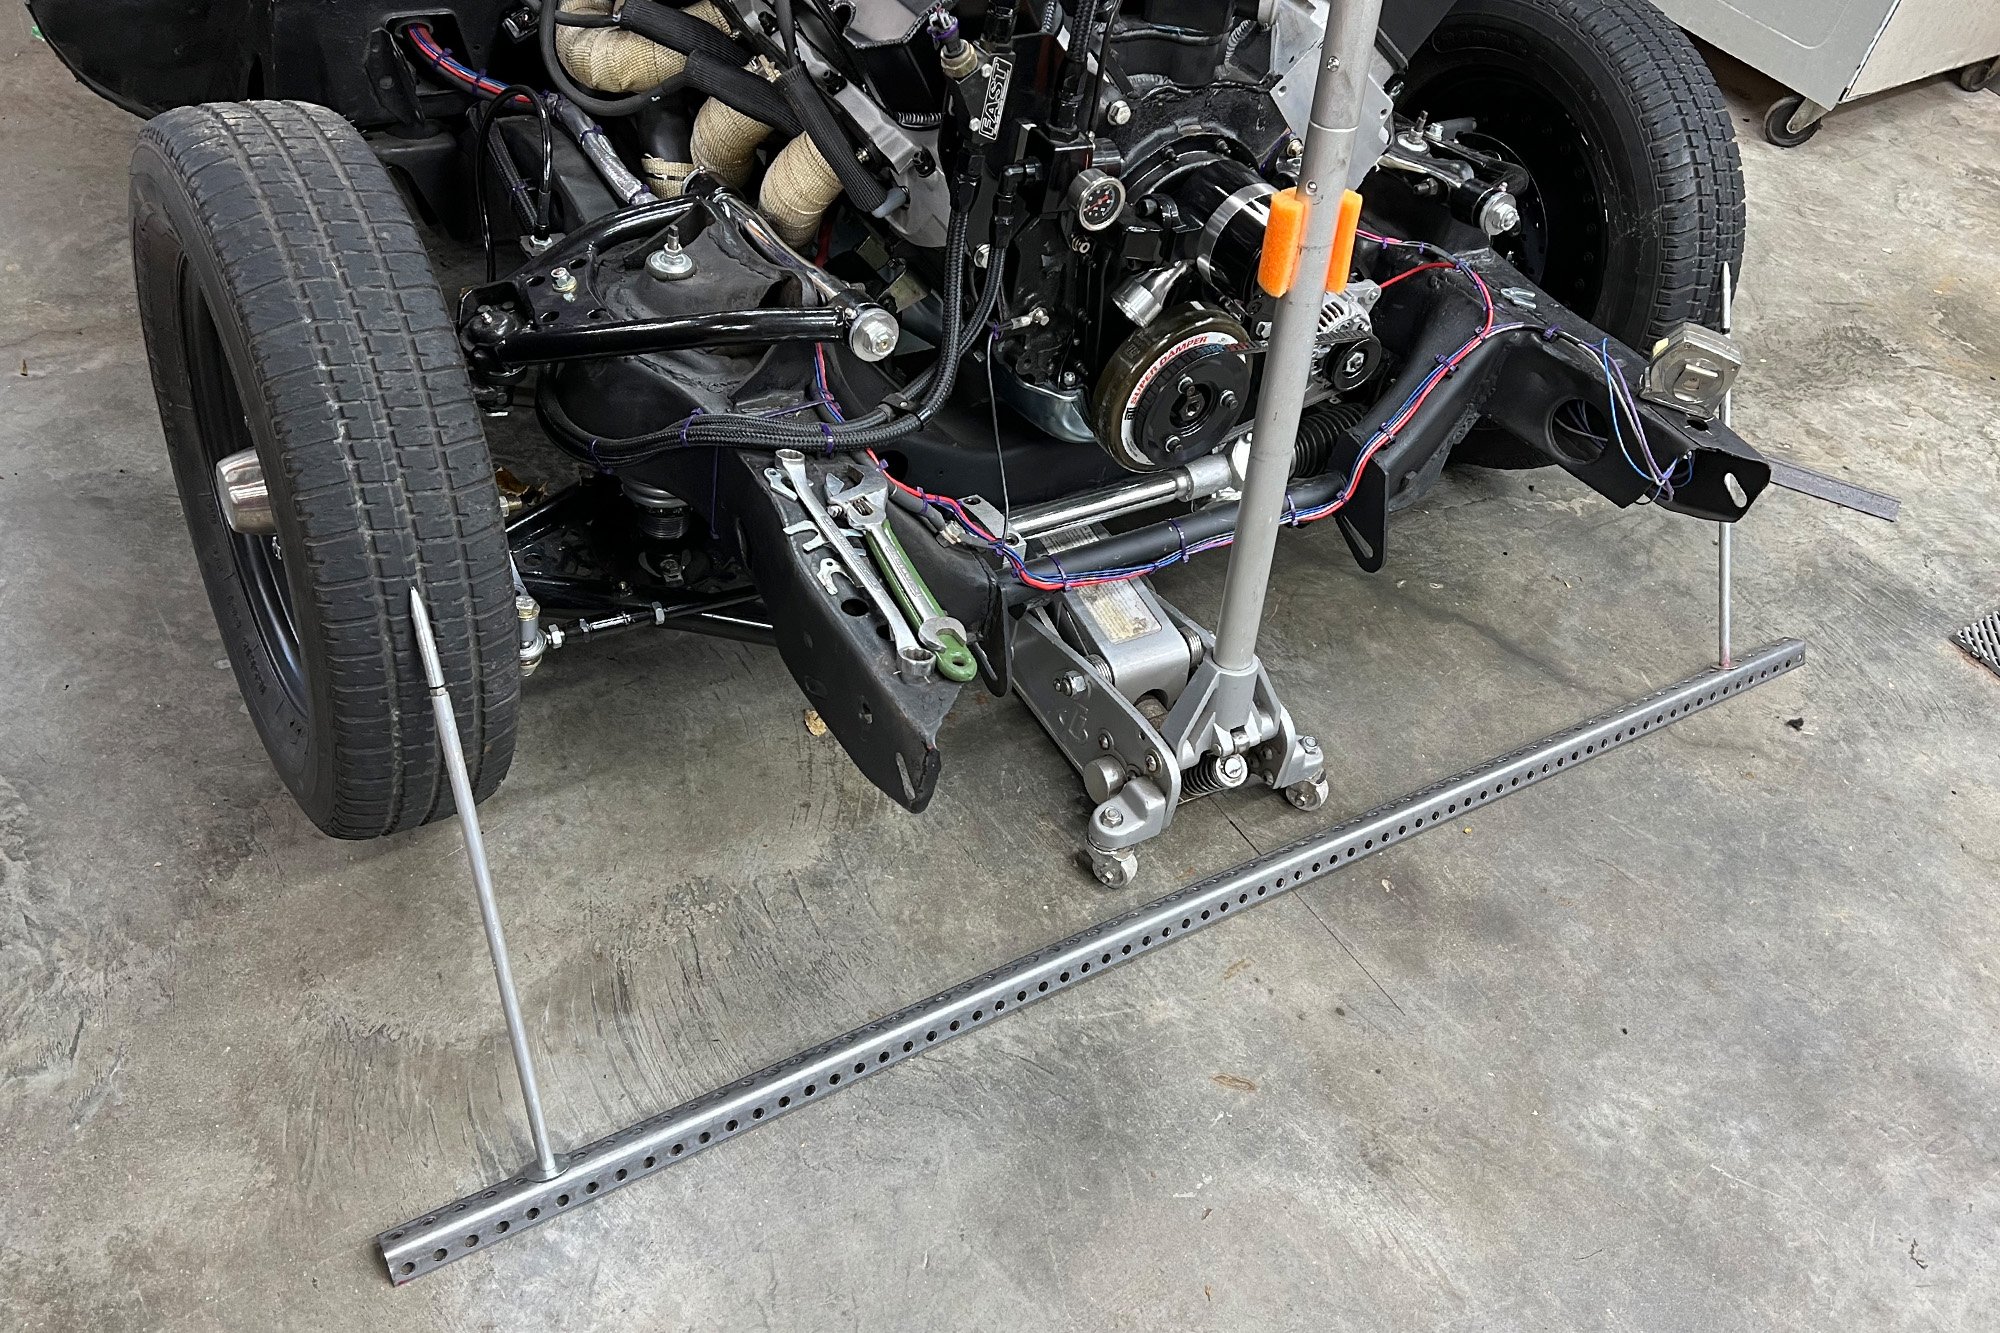
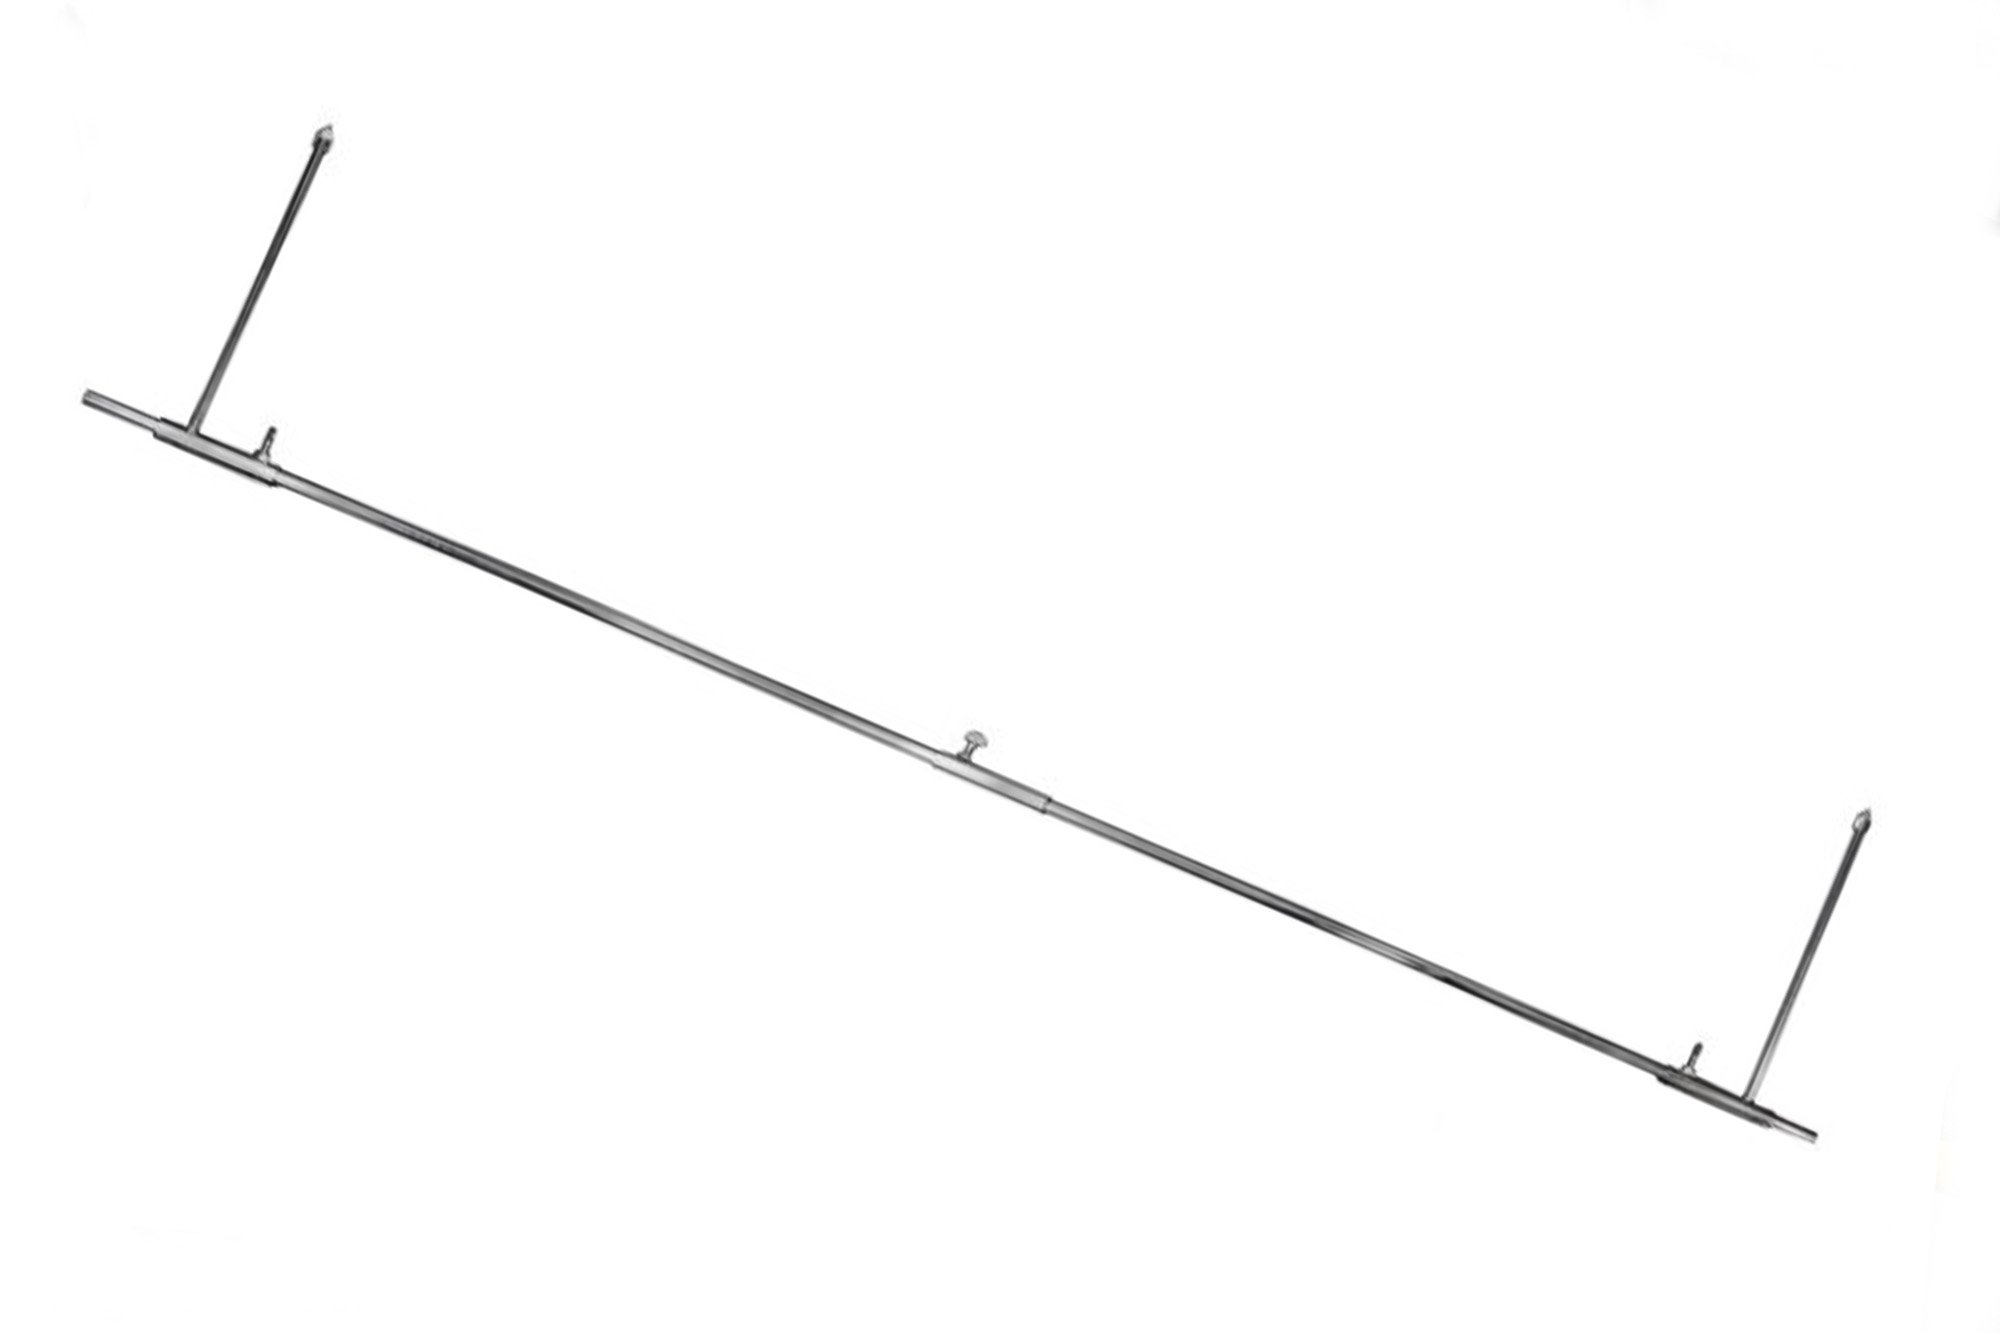
To set toe, the proven way is the tire scribe method with a fixture that can clear such things as your body, suspension, and oil pan. There are many such tools available, but I created this one from perforated angle iron and some aluminum pointers I fabricated in a lathe.
It is also recommended that you measure your toe multiple times during your adjusting process. An old-school practice I learned from my father is also to roll the car a few feet front to back before finally confirming your toe.
Jones adds, “Whenever you make any chassis adjustments, make sure to recheck your toe. When you do this a few times, it becomes very easy. It is always good practice to grab your gauges and protractor and periodically check your front end to ensure no changes.”
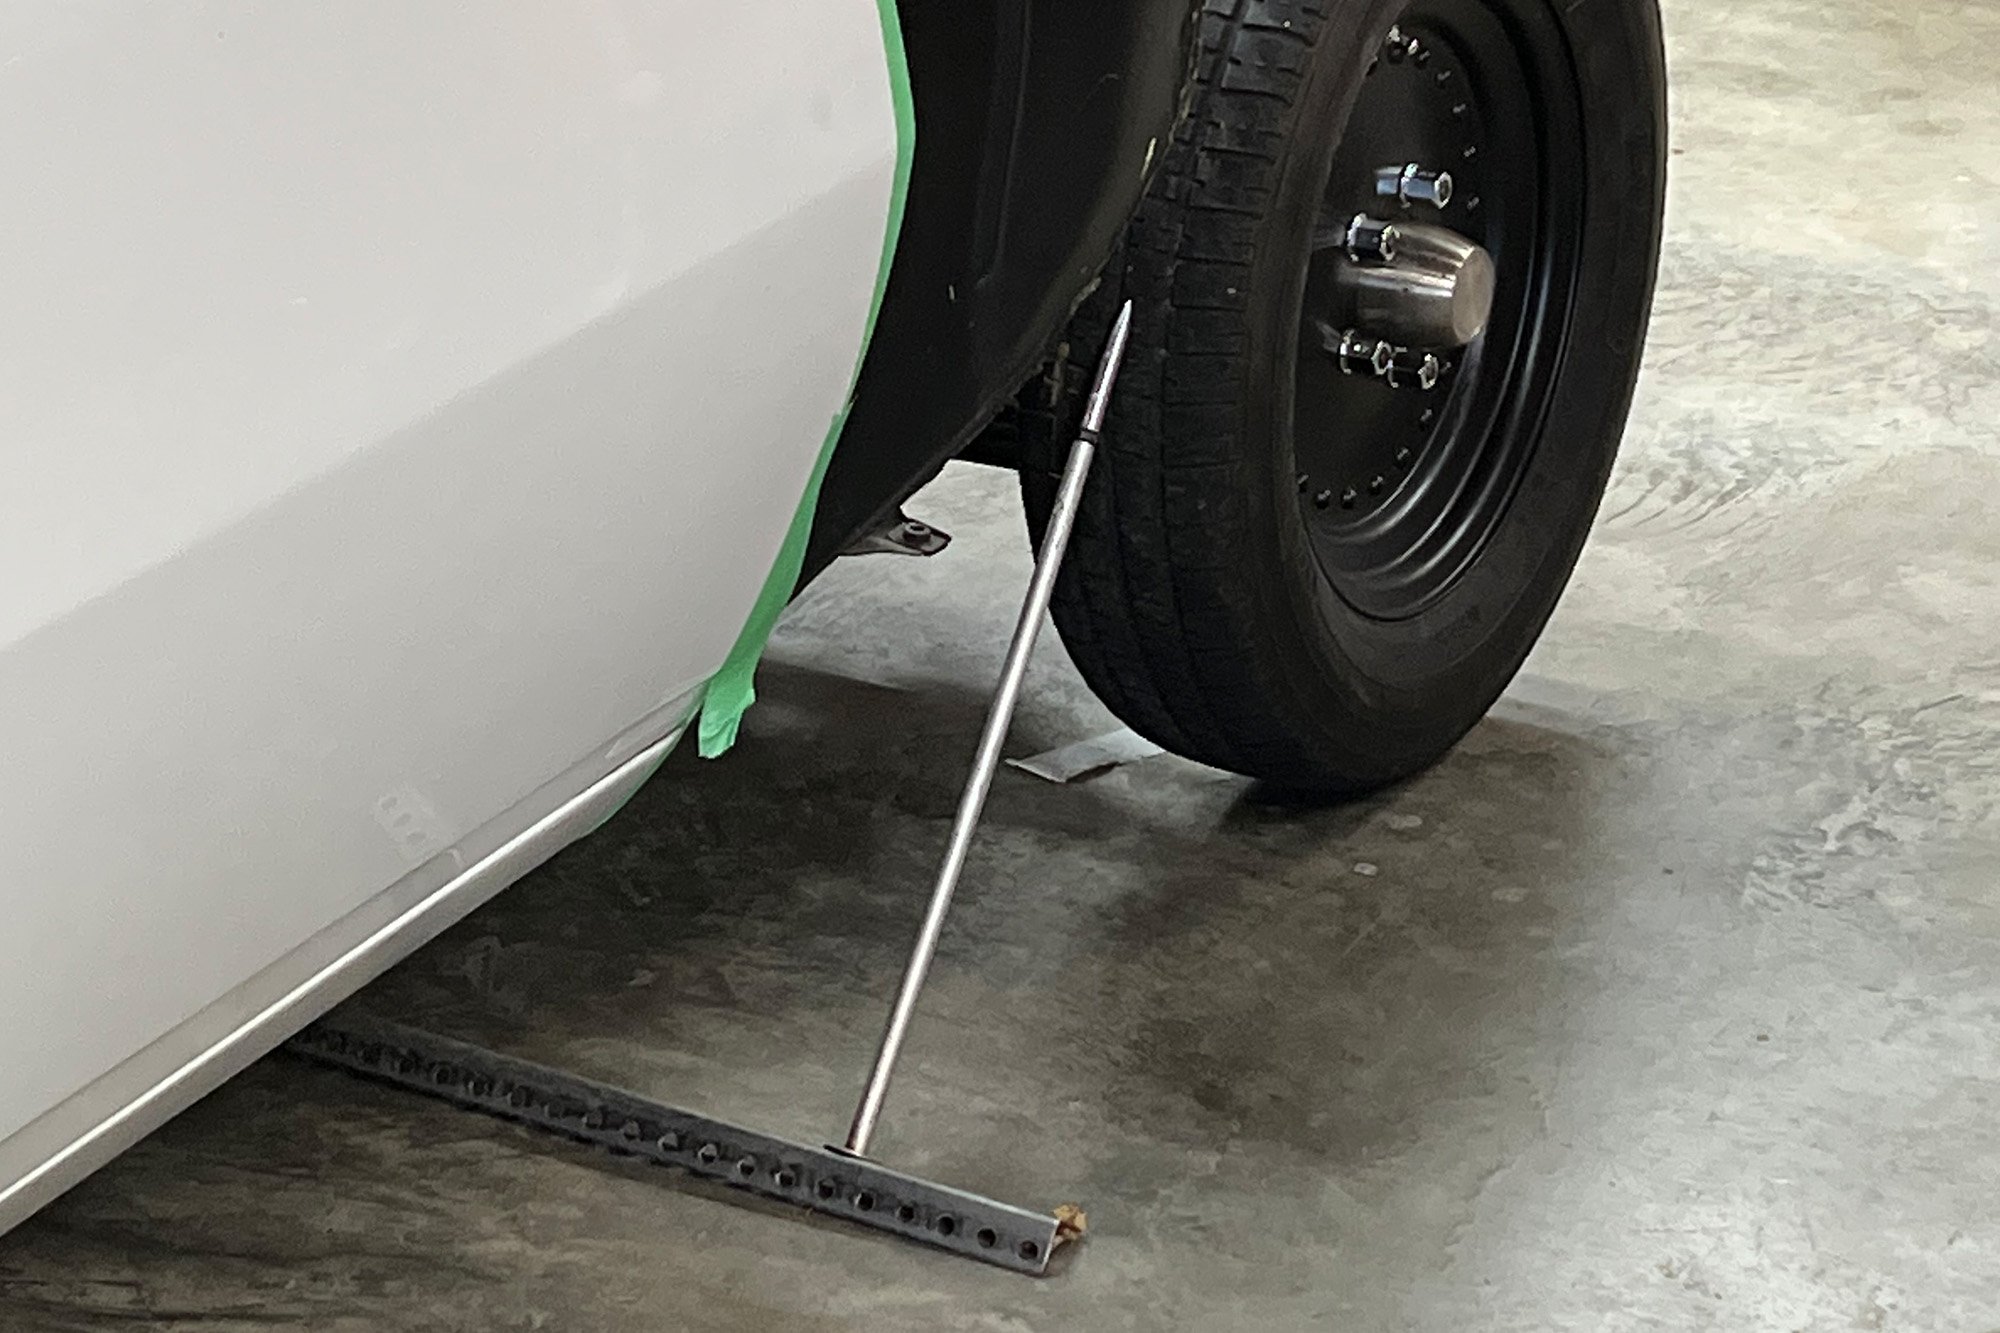

With each tire elevated from the floor, you slowly rotate the tire and scribe a line on each tire face. Each of the fixture points has a slot to hold the scribe securely. Once lowered to acceleration height, you simply move the fixture from front to rear, then measure and adjust your toe from the pointers.
Zimmerman also comments concerning these three adjustments. “If you have centerline scribe marks on your chassis, it is easy to record suspension measurements from your centerline as a baseline. You can quickly check for any changes, let’s say, during the middle of the racing season, or following some large wheelstands. If any of your recorded measurements differ, it’s time to go back through all of your proper caster, camber, and toe adjustments with your measuring tools.”
Another trick is to record your fundamental alignment measurements in your build book on your car. We have a heavy three-ring binder book for each hot rod or race car we own to record all engine settings, suspension settings, and instructions from every component.
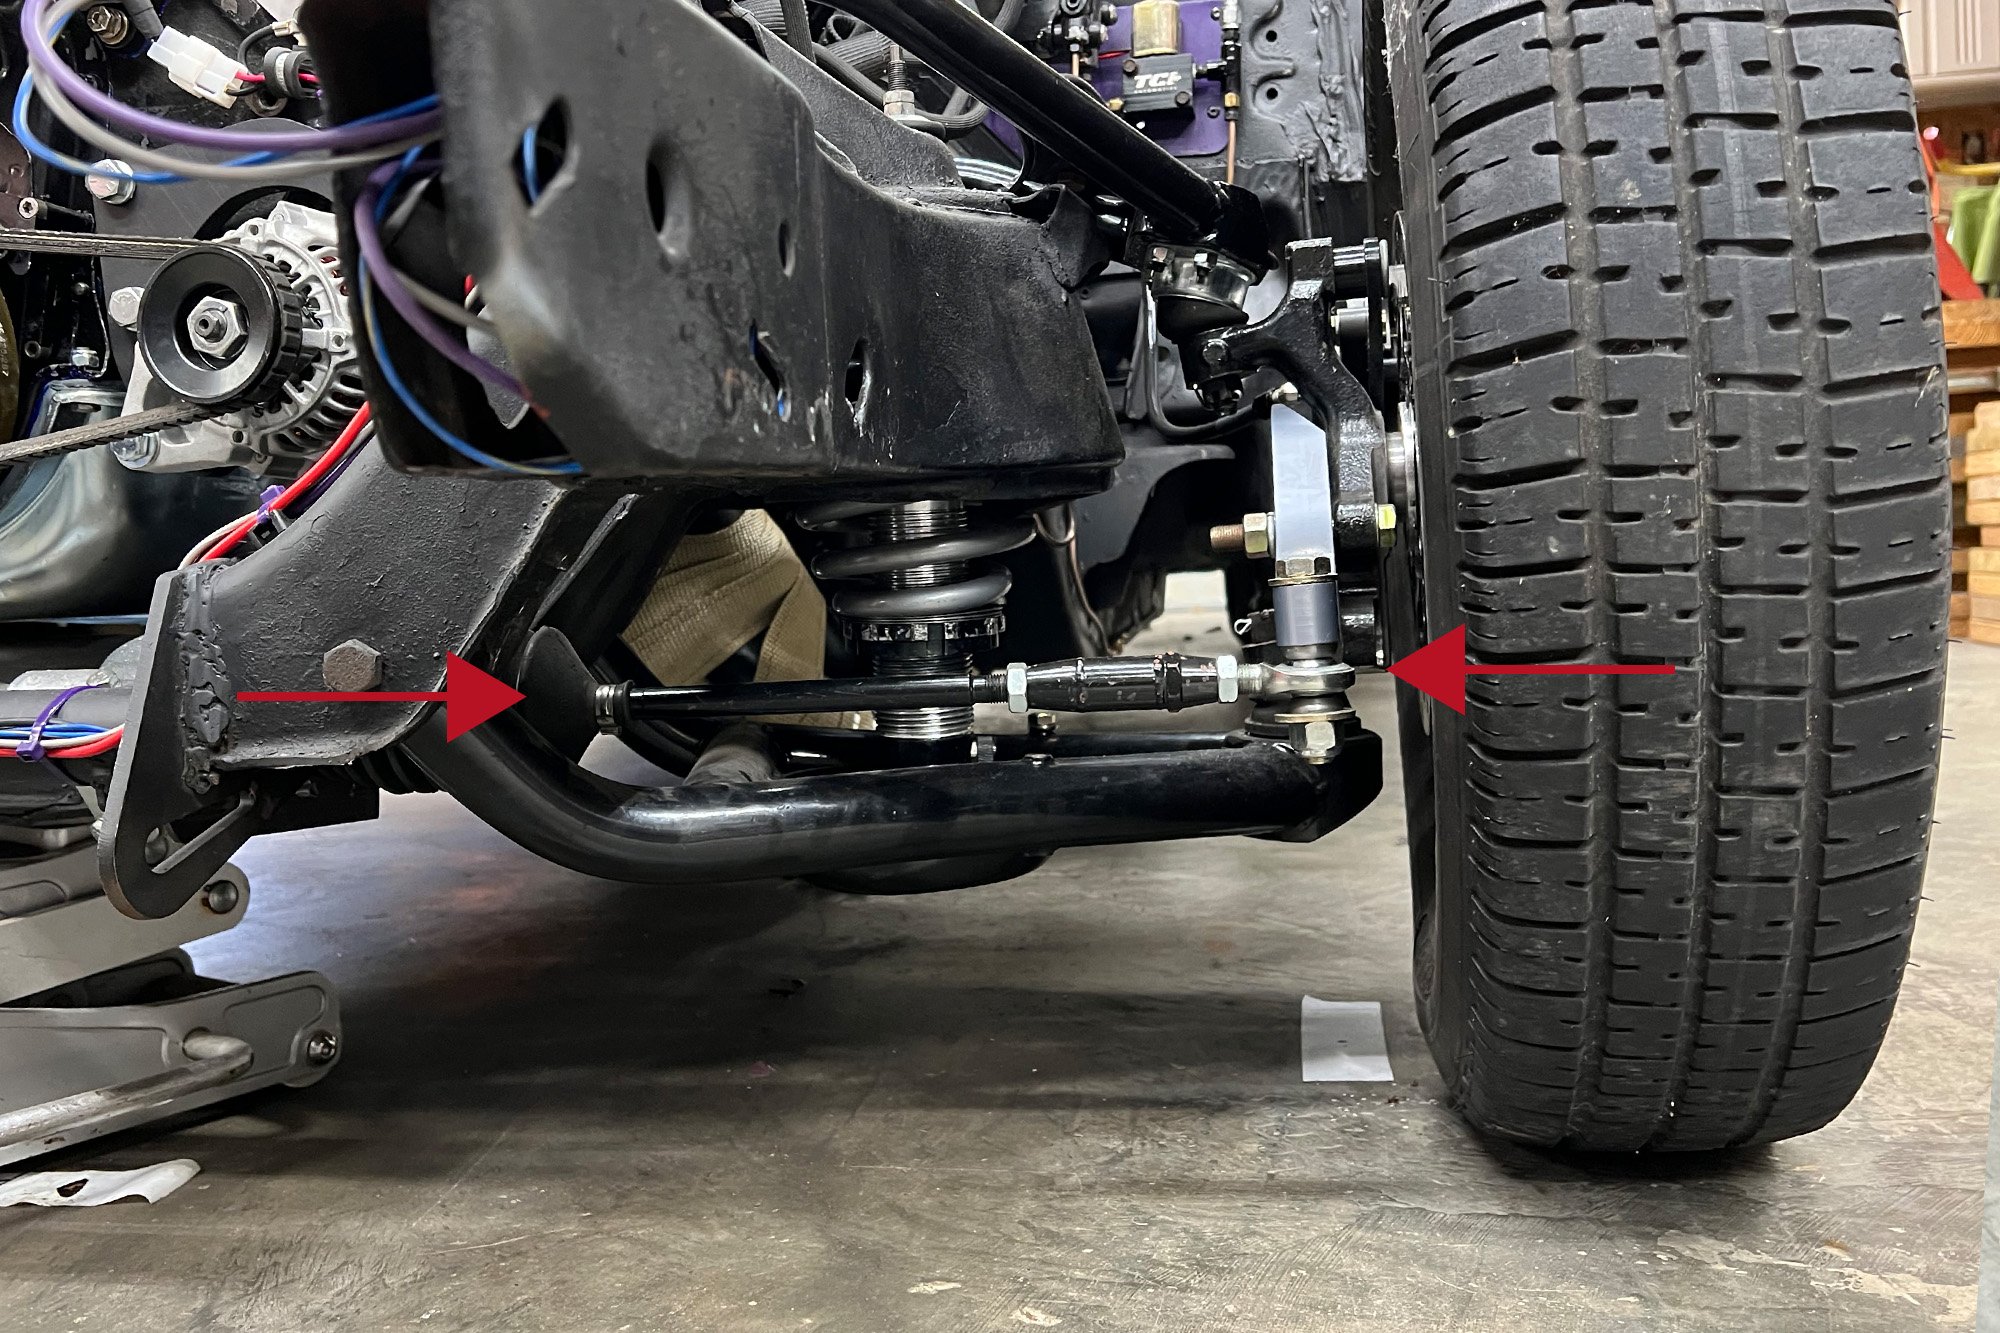
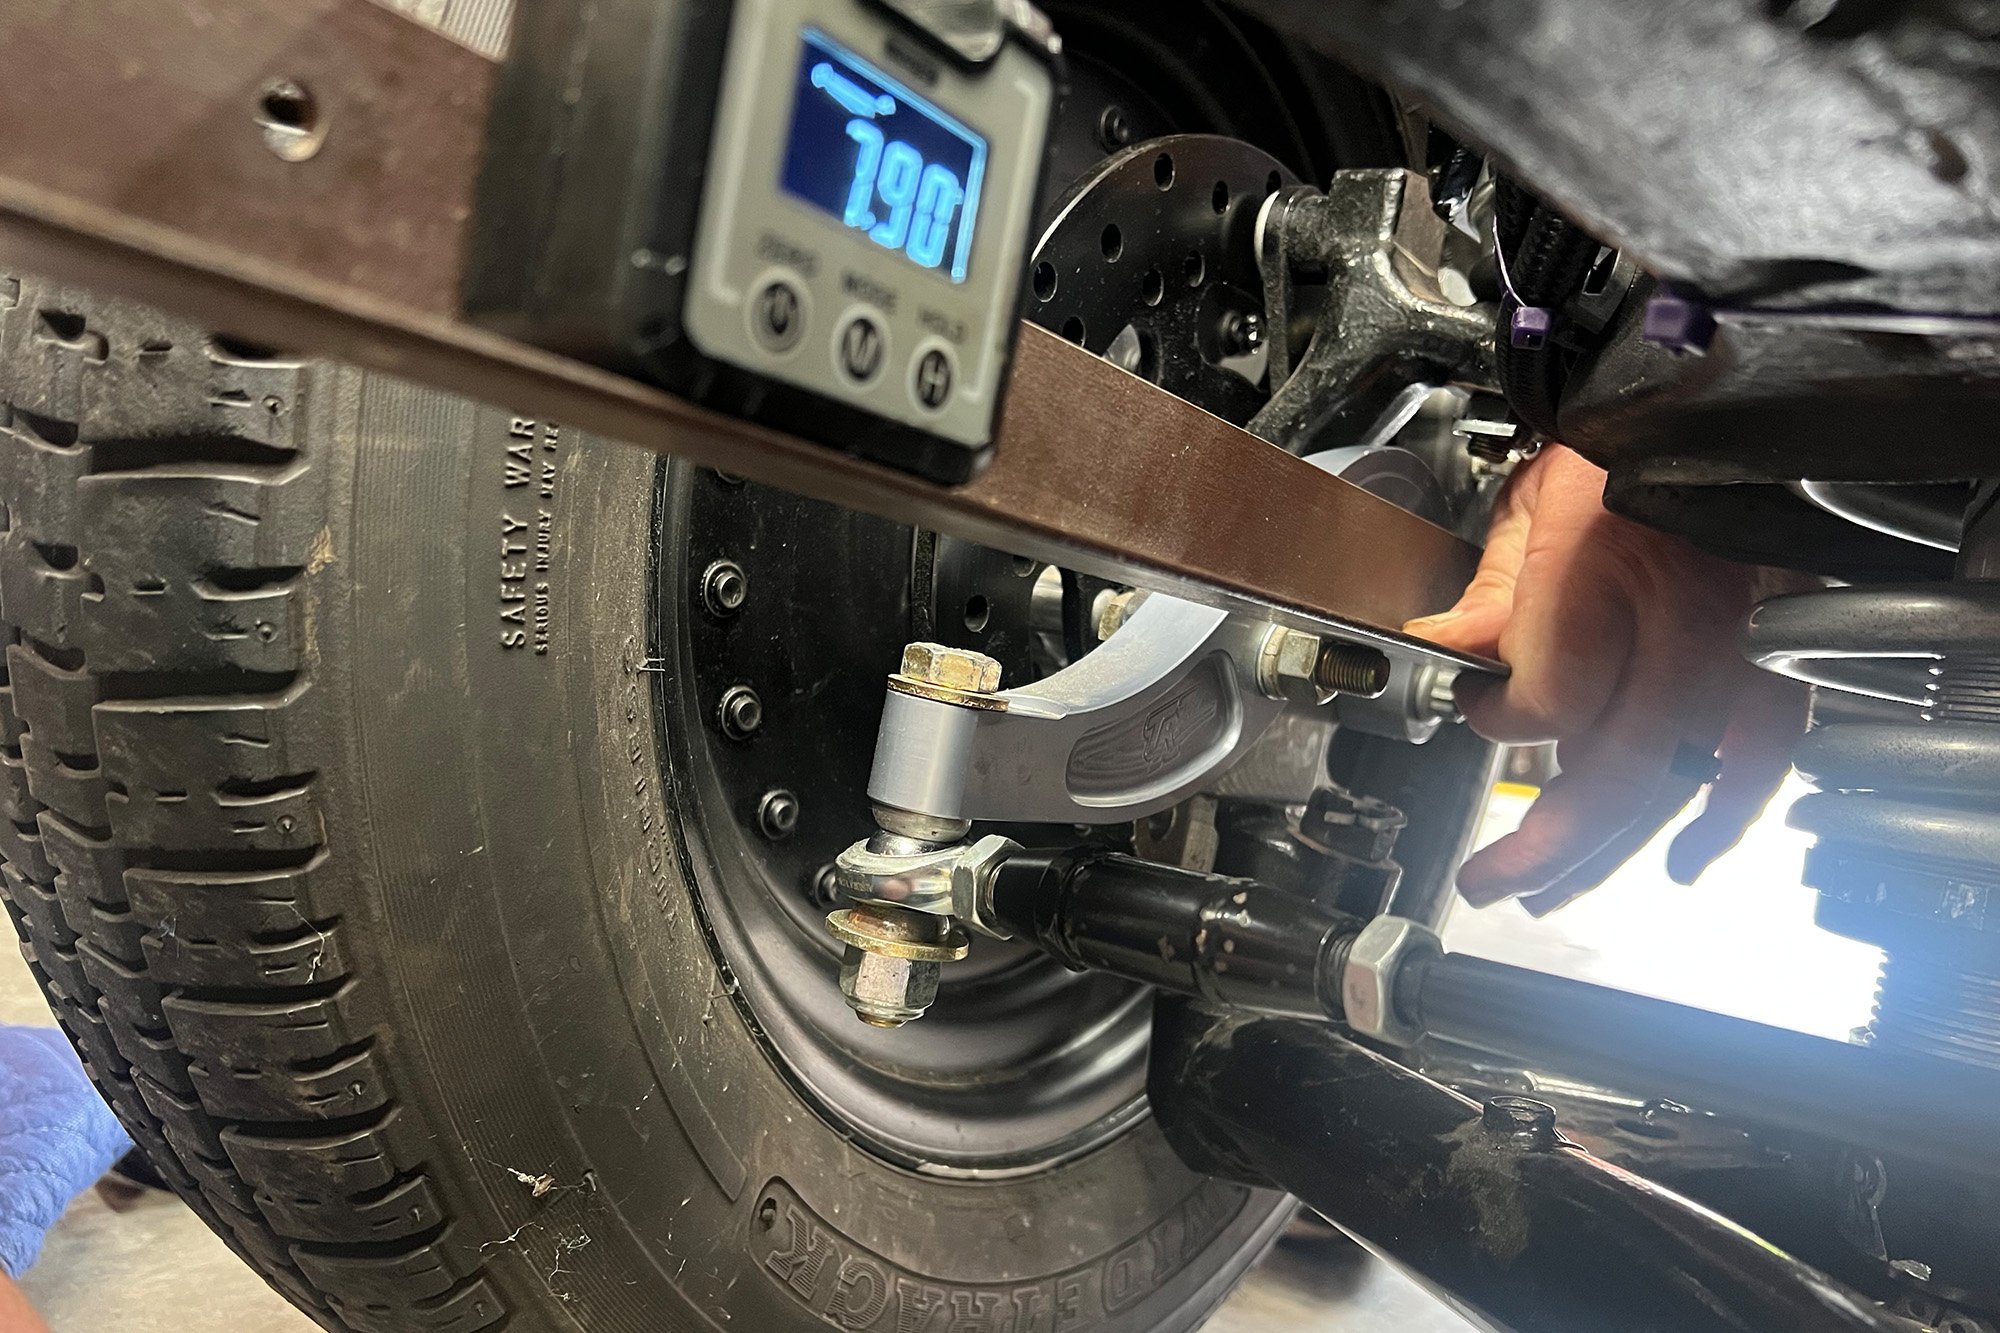
The most critical observation with bump-steer is to have your control arm directly aligned with your steering motion (arrows) at acceleration height. It would help if you cycled your suspension up and down, moved your steering from side to side, and then ensure by measurement again that your caster and camber do not excessively change.
Bump-Steer
What is bump-steer? It is how your three previous adjustments—caster, camber, and especially toe — change as your suspension travels up and down.
Since we are mostly referring to either a tubular or OEM chassis that uses a rack and pinion steering assembly, you want to keep caster, camber, and toe adjustments as close to the same measurements as possible to the the suspension motions up and down.
The toe setting is the most critical. For example, if the front of your car rises high or wheelstands, as your front end comes down and toe-in moves, you could experience irregular forces within your suspension and steering as your suspension moves.
Adjustment points are not universal. Factory suspension, such as our Camaro, adjusts from the upper A-arm. The Rick Jones chassis book illustrates a racing strut front suspension that adjusts from the lower control arms.
Jones says, “If the toe-in does change when moving the suspension, it can be adjusted by adding or subtracting shims between the tie rods and steering arms. In some cases, you may need to remount the rack or reposition the steering arms to cure bump steer problems.”
The ultimate adjustment process is to set your tire pressure, and at your race-ready weight, record the compressed tire height from your shop surface to your spindle. Then with your racecar’s front springs removed and your spindle resting at that height, you can easily adjust your caster, camber, and toe at compressed tire height. Once the adjustments are made, you can then move the suspension easily to its high and low extremes to measure bump steer.
Steer Yourself Straight
“I don’t believe in using alignment racks to align race cars,” comments Jones. “I see many of these shops with big alignment racks that look really fancy and all that, but they like to reference off of the rear axle, which is fine for the family SUV. I like to measure each side of the front suspension on your caster and camber to ensure it’s correct.”
A front suspension and steering geometry can be magnified or even nullified if something is even slightly out of adjustment. You can experience strange handling at the steering wheel when there is none, or on the other extreme, not having the proper steering “feel” to gently correct the car at speed.
Small steering adjustment deviations affect you as a driver when launching hard and powering down the track. A day in your shop with some practical tools can set your steering straight and provide you with the steering wheel sensitivity you want when driving at speed.