One of the best things about a late-model Corvette is how good it is right “out of the crate.”
Mighty General Motors is knee-deep in engineering talent and the Corvette has been it’s magnum opus, the recipient of all the technological know-how it can muster.
Only the good stuff here.
Most folks consider the C5 as a pivotal moment in the Corvette’s history (although we think it was Dave McLellan’s C4,) when it went from Duntov’s comparatively primitive peacock to the modern day, world-spanking machine it is today.
If fact, the latest Corvettes are so good, messing with the formula might be considered superfluous. On the other hand, all that baked in, off-the-shelf goodness can sometimes translate into ho-hum and ordinary.
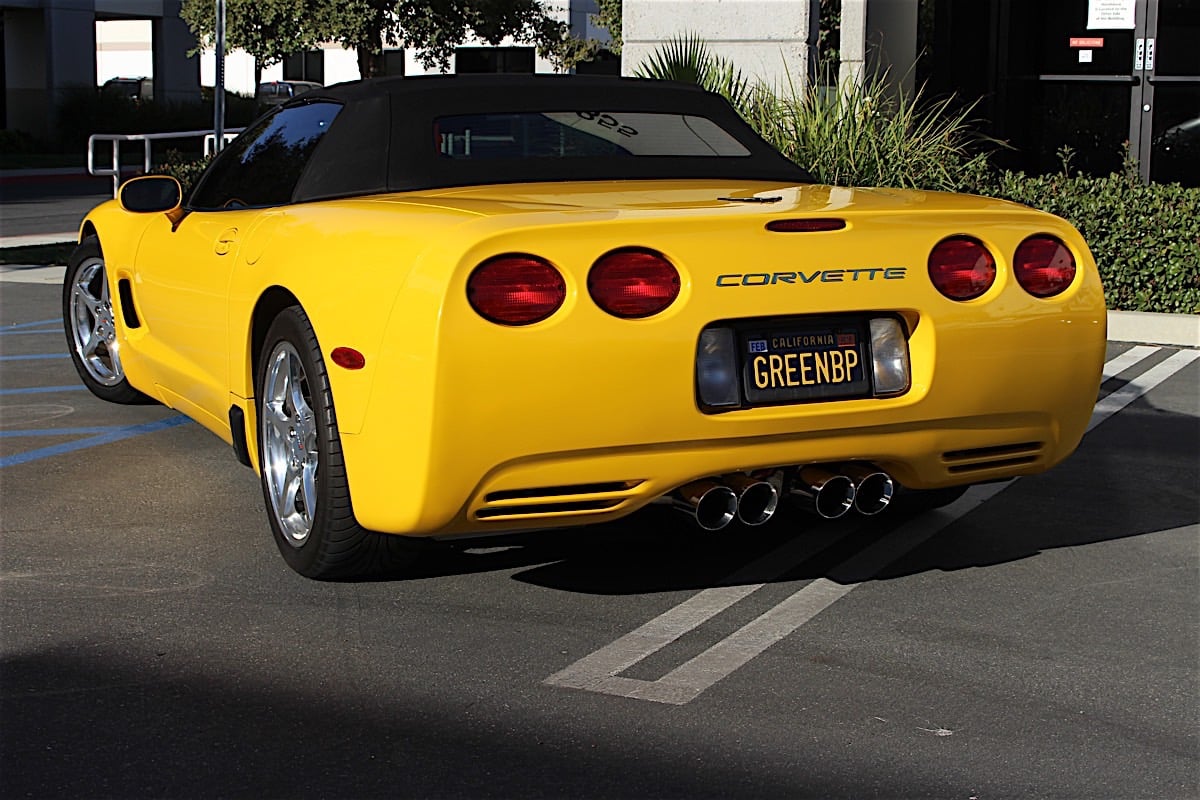
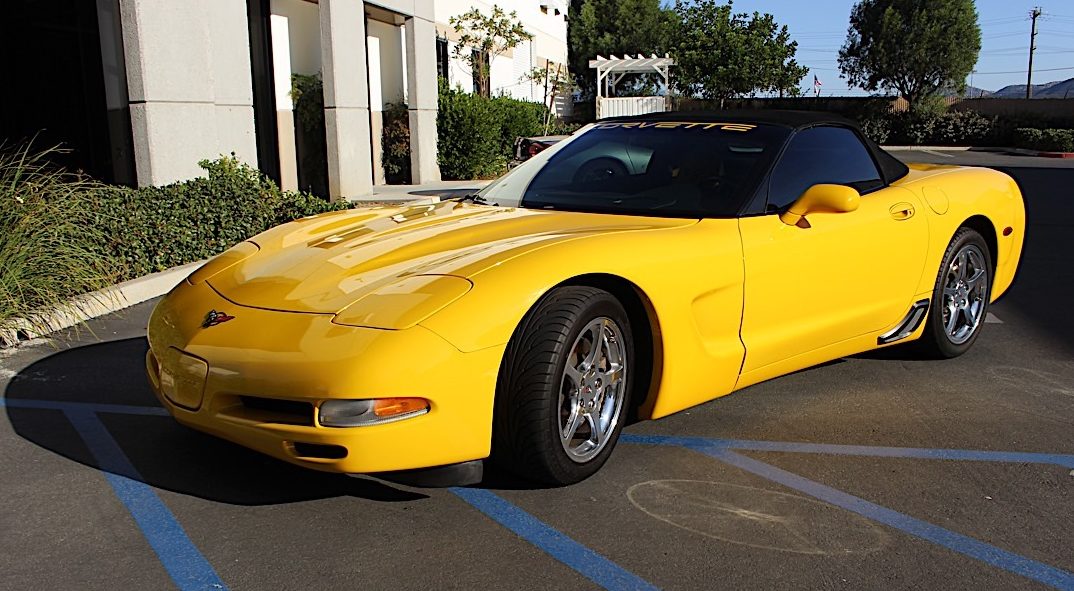
Which leads us to Mel Schilling and his Millennium Yellow, Corvette roadster. A 2002 model with an LS1 V8 and a six-speed transmission, he already spiced things up with custom seats, a Hurst short throw shifter and a K&N cold air intake.
From there, he wanted to add some visual and aural zing to the exterior and take what GM created and make it severals clicks better.
One of the best ways to add some frosting to your sweet treat ‘Vette is a cat-back exhaust system bestowing some eye candy and new baritone soundtrack to the mix.
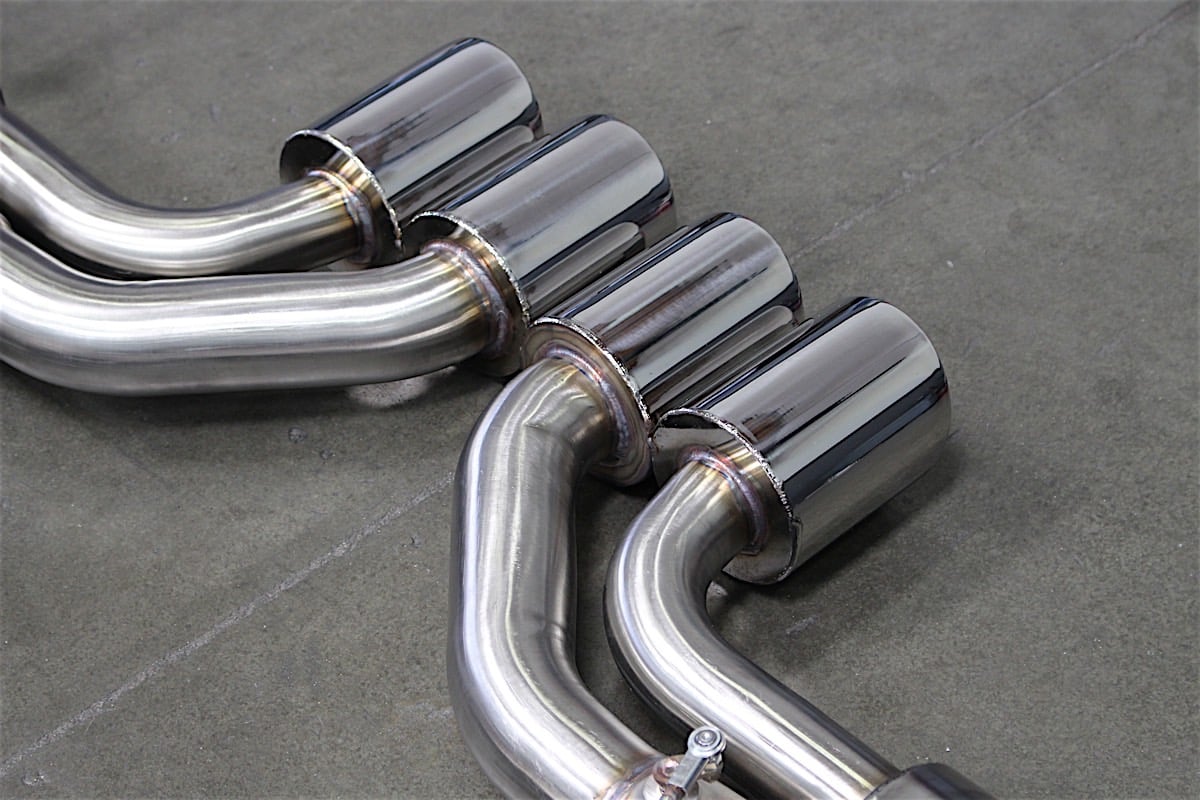
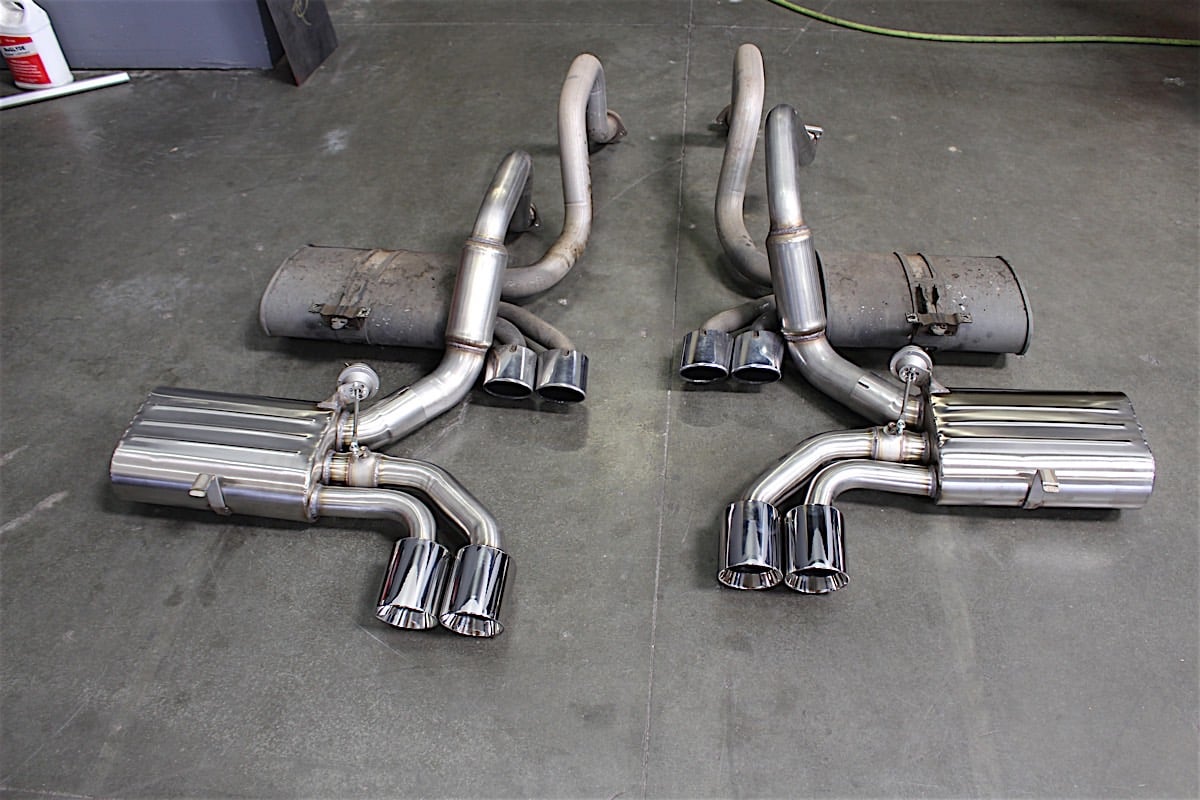
And when it came time to pick from many exhaust systems manufacturers on the market, Mel went with Billy Boat Exhaust’s C5 Corvette Fusion Axle Back Exhaust System with round tips, PN #FCOR-0150
This system comes complete with butterfly valves that offer a two-mode system with anti-drone technology that provides smooth musical notes when you’re cruising and a thunderous sonnet when you’re feeling frisky. Your mood, your choice. All easily switchable with the touch of a button on a FOB, which is included with system. Because it’s a cat-back system, no harm no foul when it comes to smog time.
Your humble editor has a C4 that has a hell of a drone at around 70mph, so I understand.
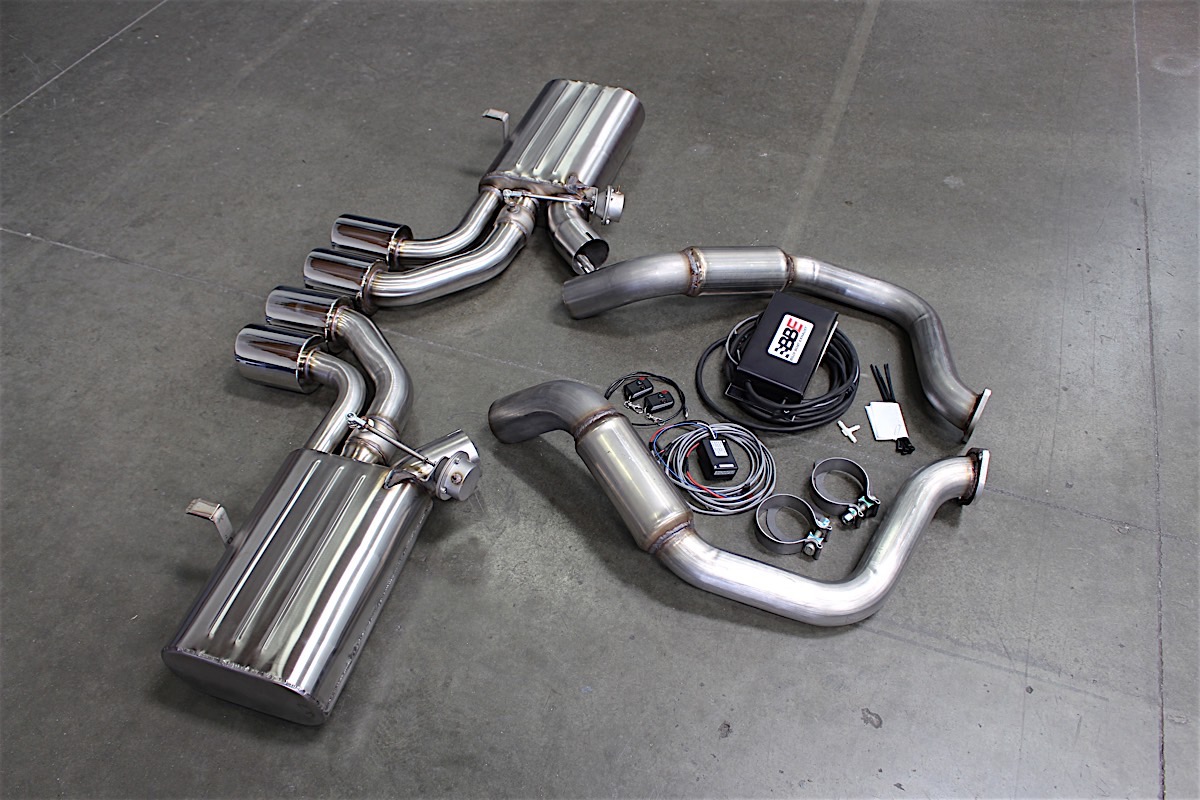

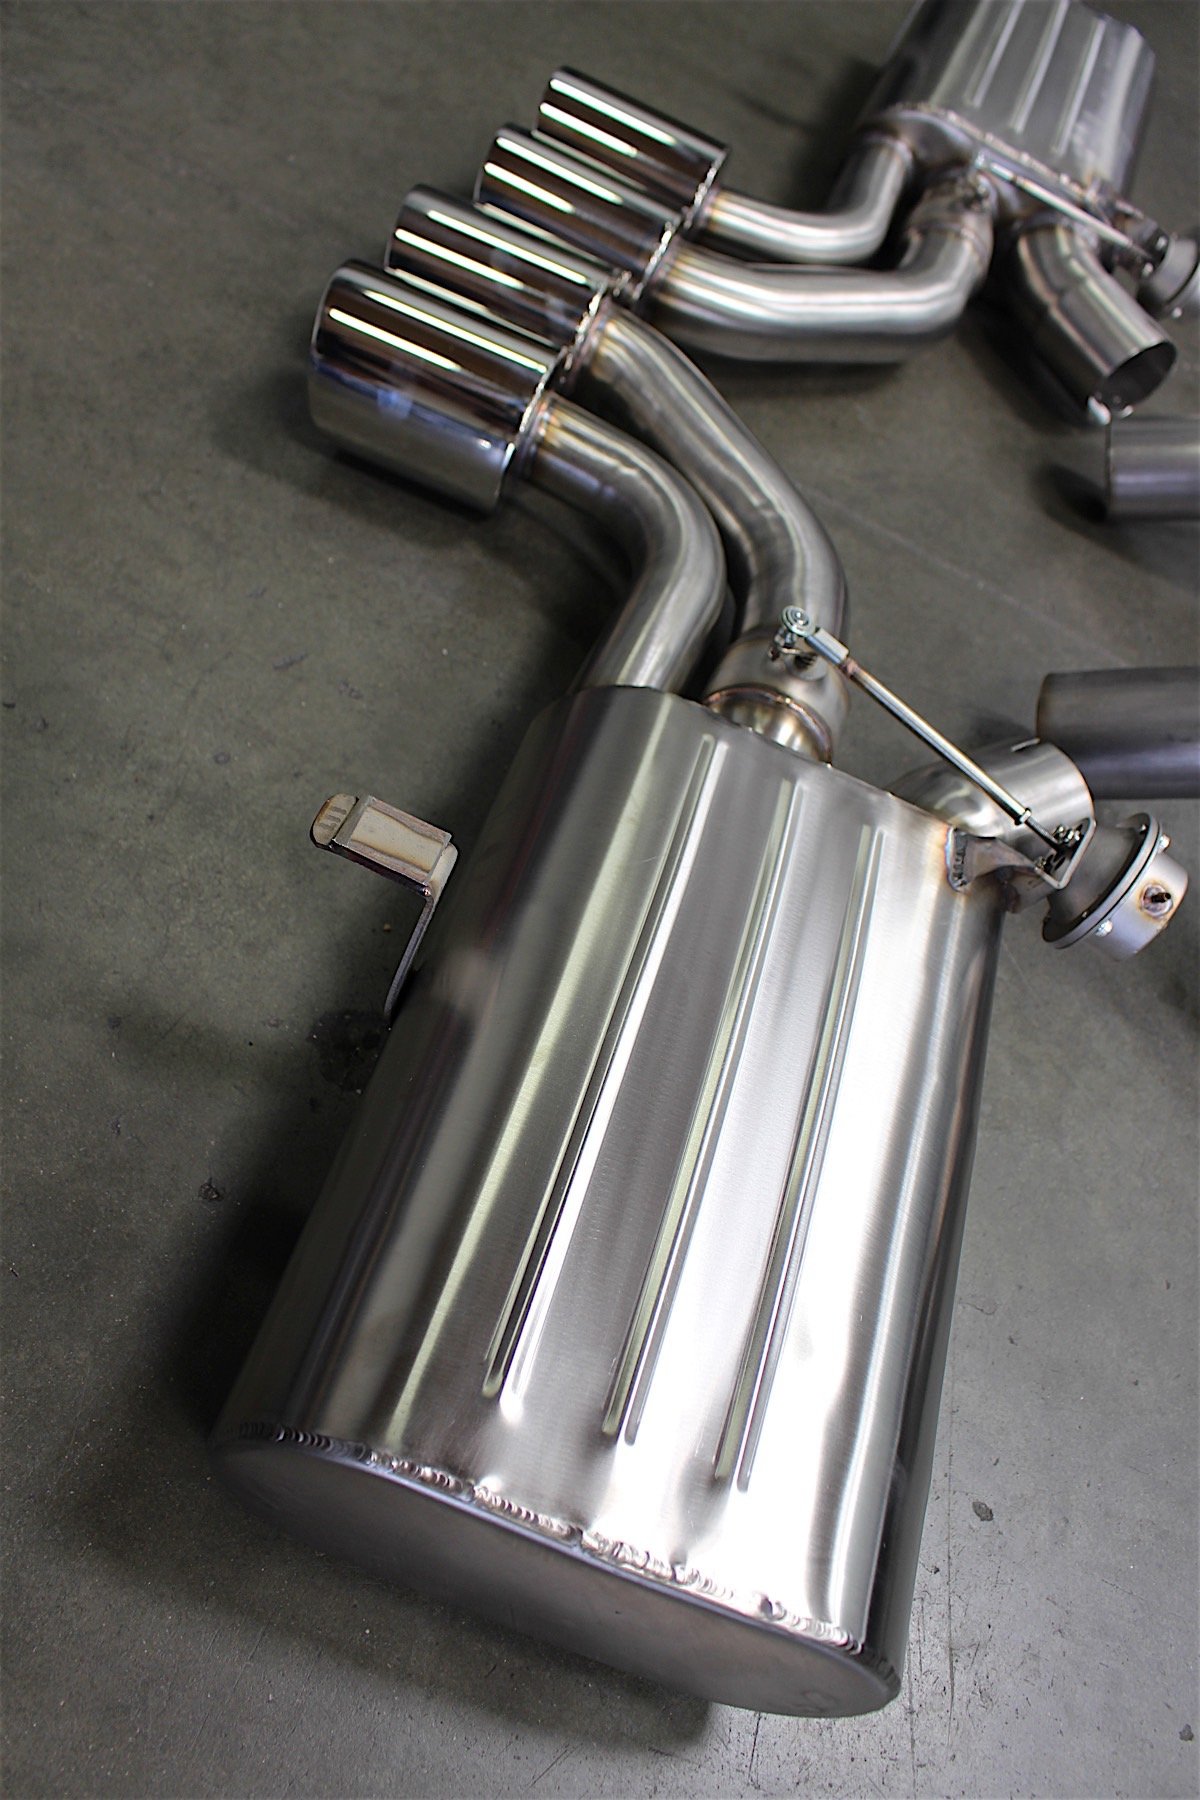
Billy Boat Exhaust's C5 Corvette Fusion Axle Back System is mandrel bent from the highest-grade T-304 stainless steel. Designed, tested, and built to the finest hand made integrity found in any exhaust system with a limited lifetime warranty. This is a high quality system that is dazzling it it's design, materials and execution.
Reduced to it’s simplest terms, the system consists of two installation segments. Removing the old exhaust and installing the new Billy Boat hardware and plumbing, and the vacuum actuated, electronically-controlled, two-mode system.
FIRST UP, OUT WITH THE OLD AND IN WITH THE INCREDIBLE, STAINLESS STEEL, GORGEOUS, BILLY BOAT NEW.
This part was super easy, requiring only basic hand tools. Be sure to disconnect the battery, wear protective eyewear and read the included instructions. Billy Boat Exhaust has great support too if you have any particular questions and concerns.
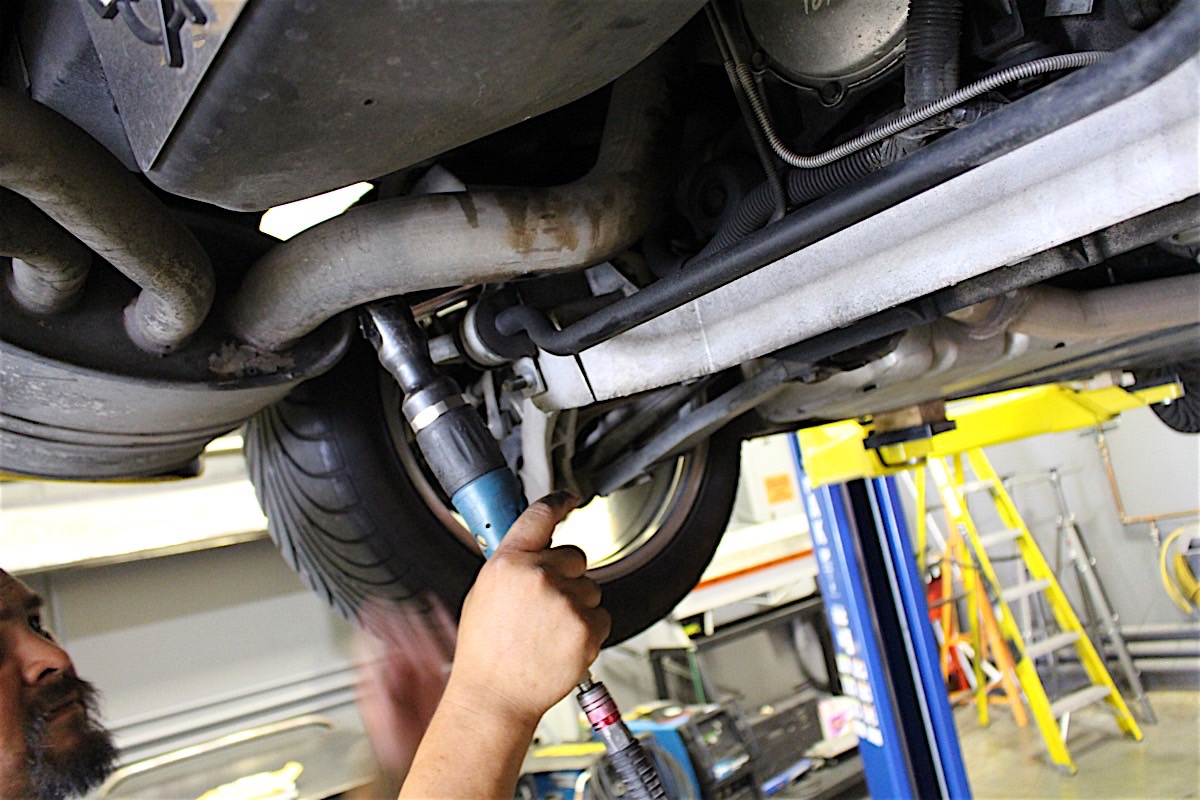
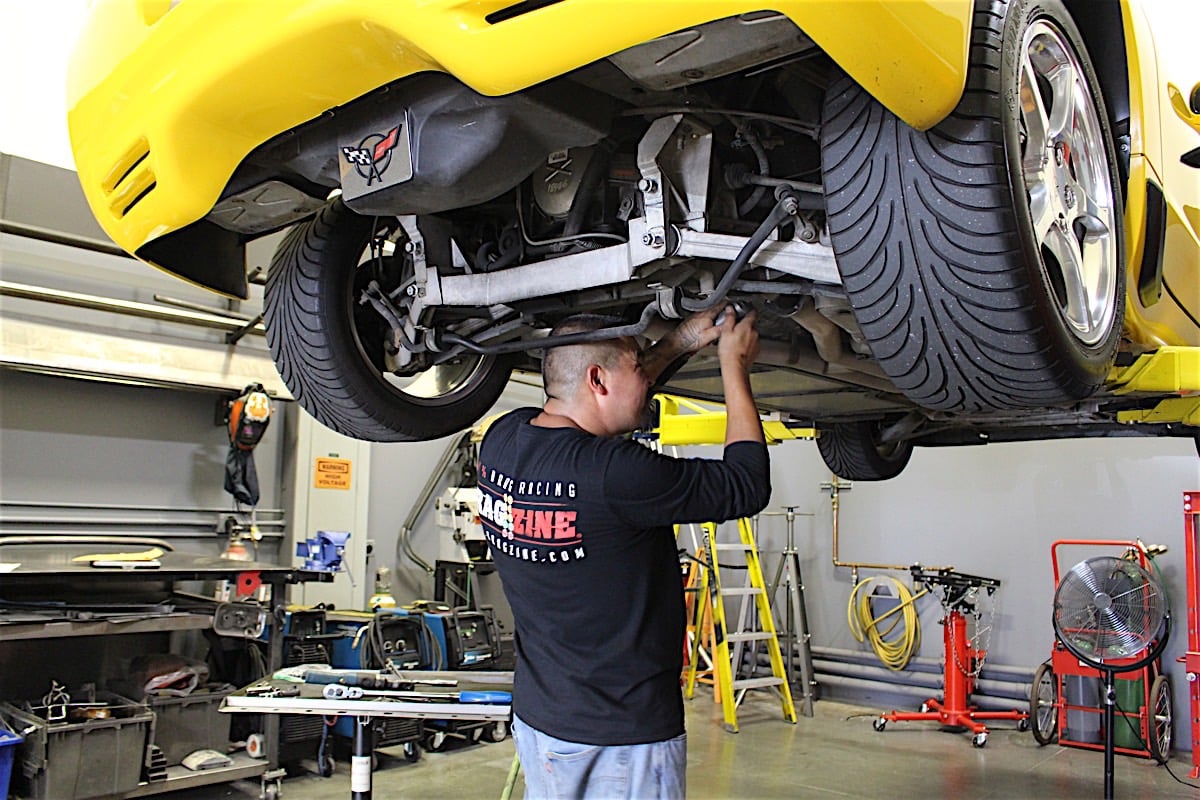
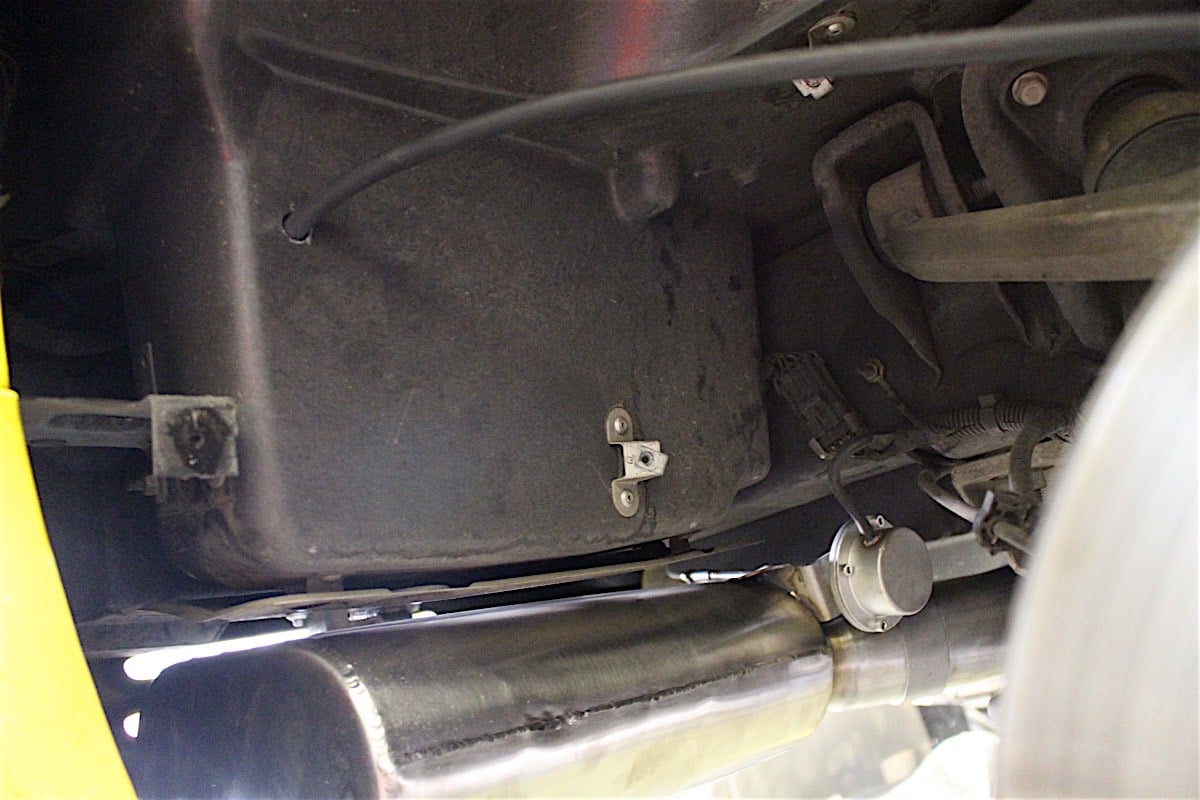
We had the old GM exhaust system out in roughly 30 minutes. We removed the rear sway bar u-clamps, two exhaust hangers–one behind each pair of taillights–and broke two retaining clamps free, releasing the old exhaust at the H-pipe crossover.
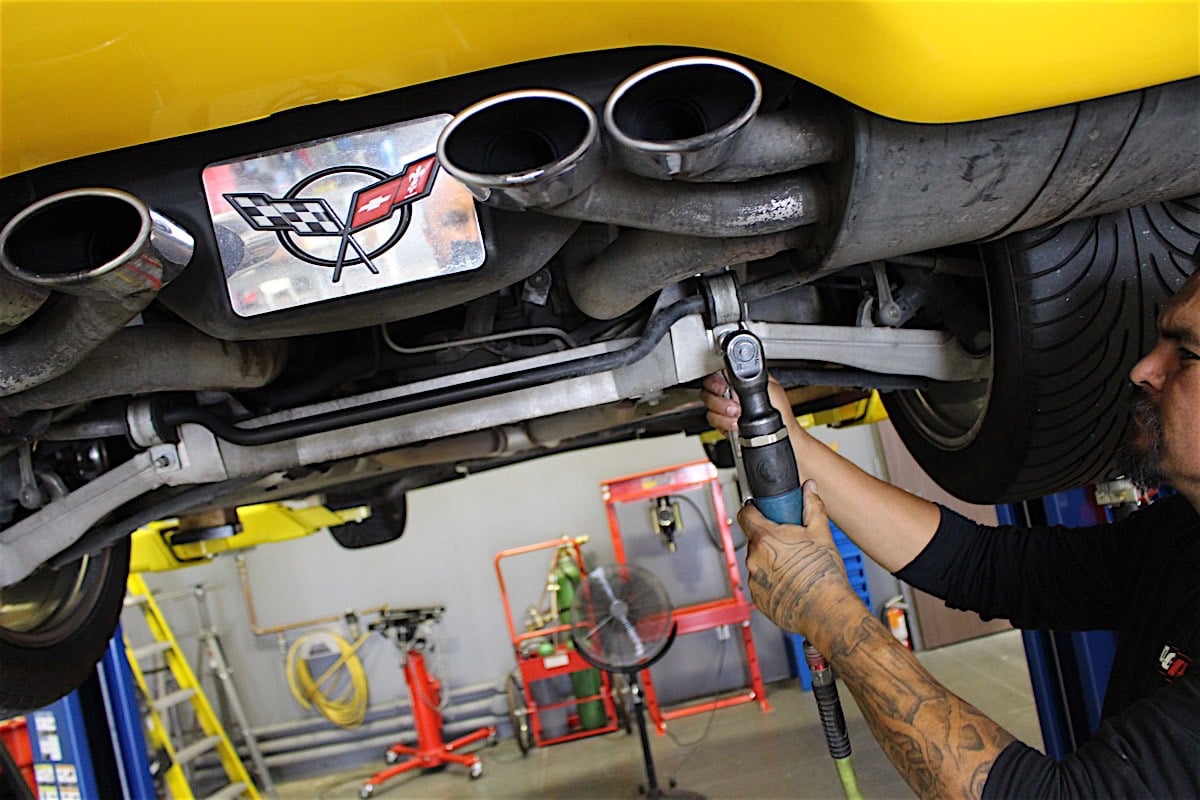
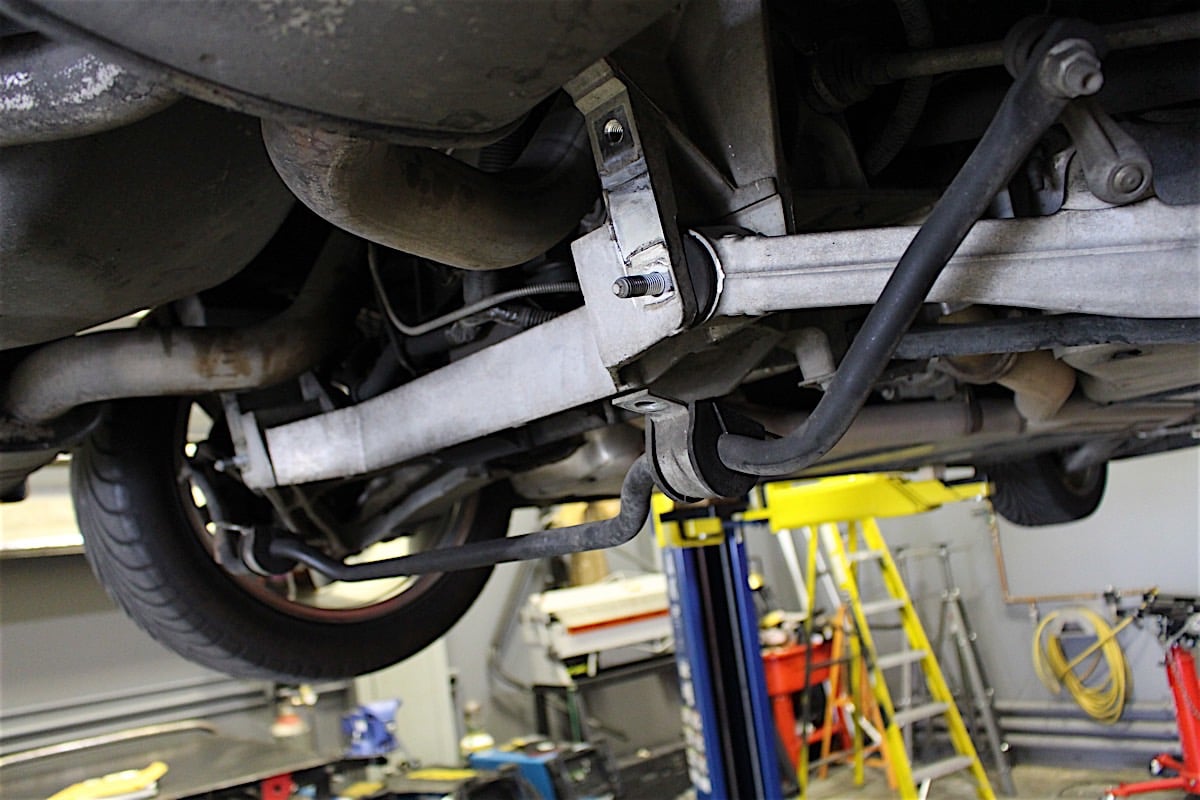
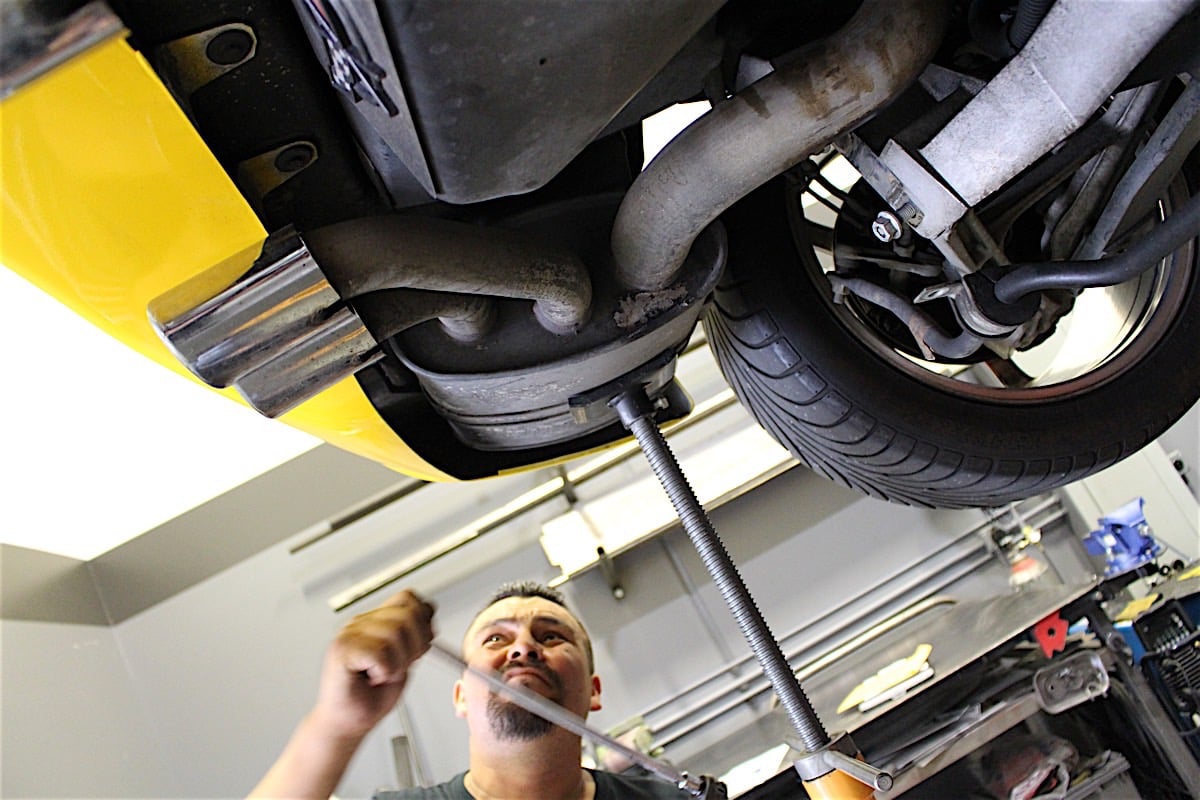
UPPER LEFT AND RIGHT - Remove sway bar U-clamps on each side to remove unit. We have a lift here at Power Automedia, but this could be done at home with jack stands as well. LOWER LEFT AND RIGHT - Hangers for mufflers are easily located and loosened from their location on frame behind the bumper cover.
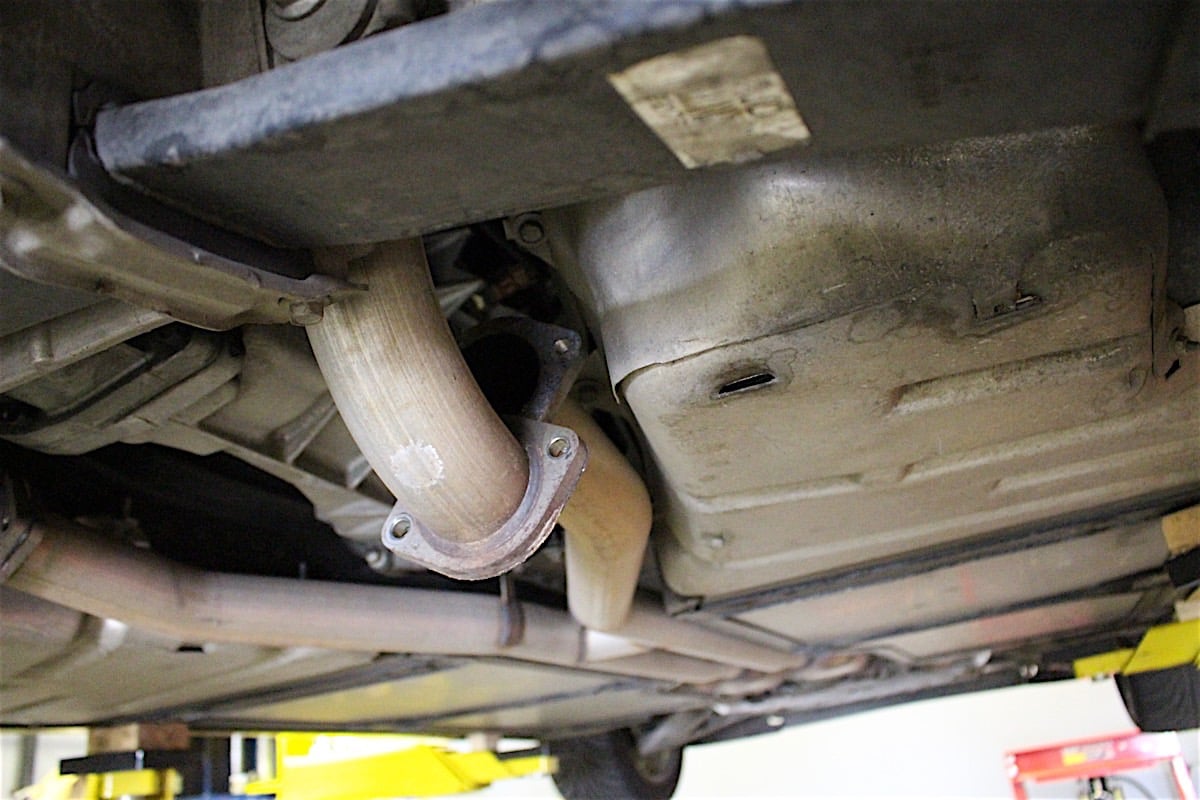
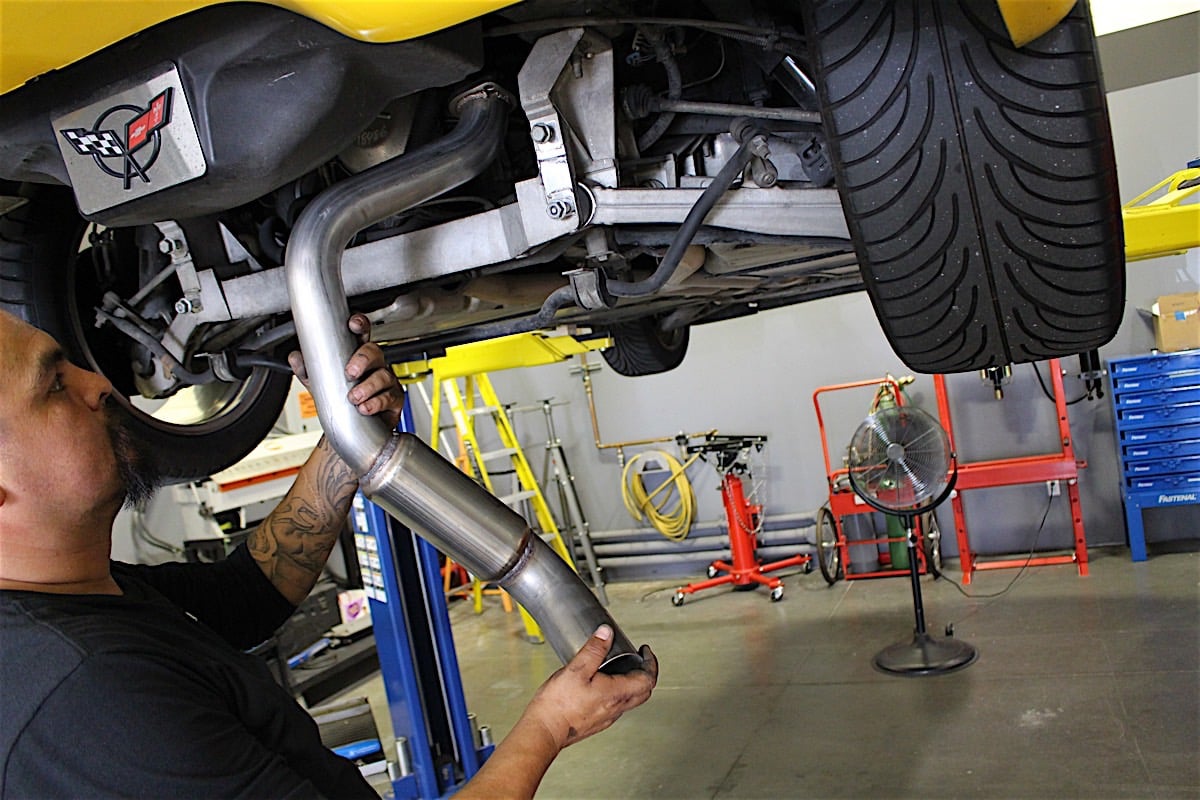
With the sway bar and the hangers freed up, we turned our attention to freeing the system up-stream at the X-pipe BOTTOM - Removing clamps from each side of X-pipe went smoothly, despite 75k mile of heat, crud and use.
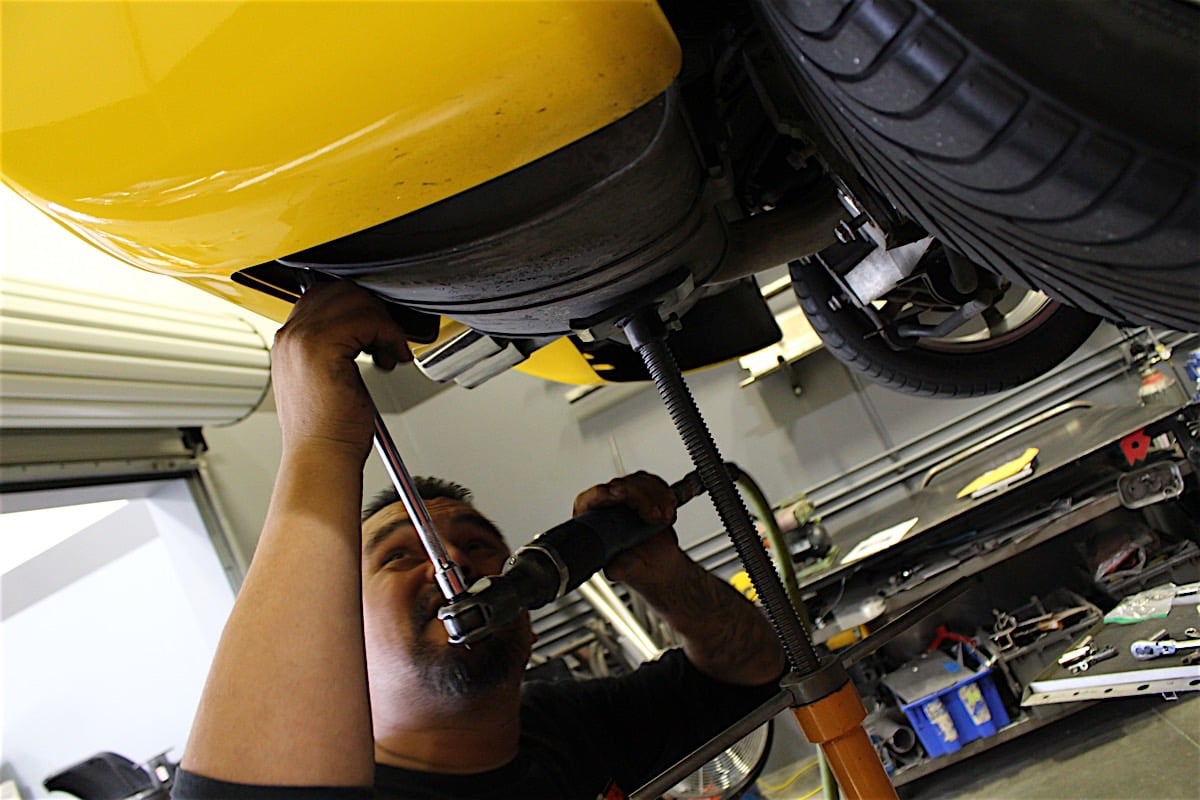
After 15 years of duty, we lowered the old GM system down and out of the way. You can see what a difference in quality there is between the stock system and Billy Boat. The stainless steel and quality fabrication is top notch. The burbling exhaust note is just the icing on this stainless steel cake.
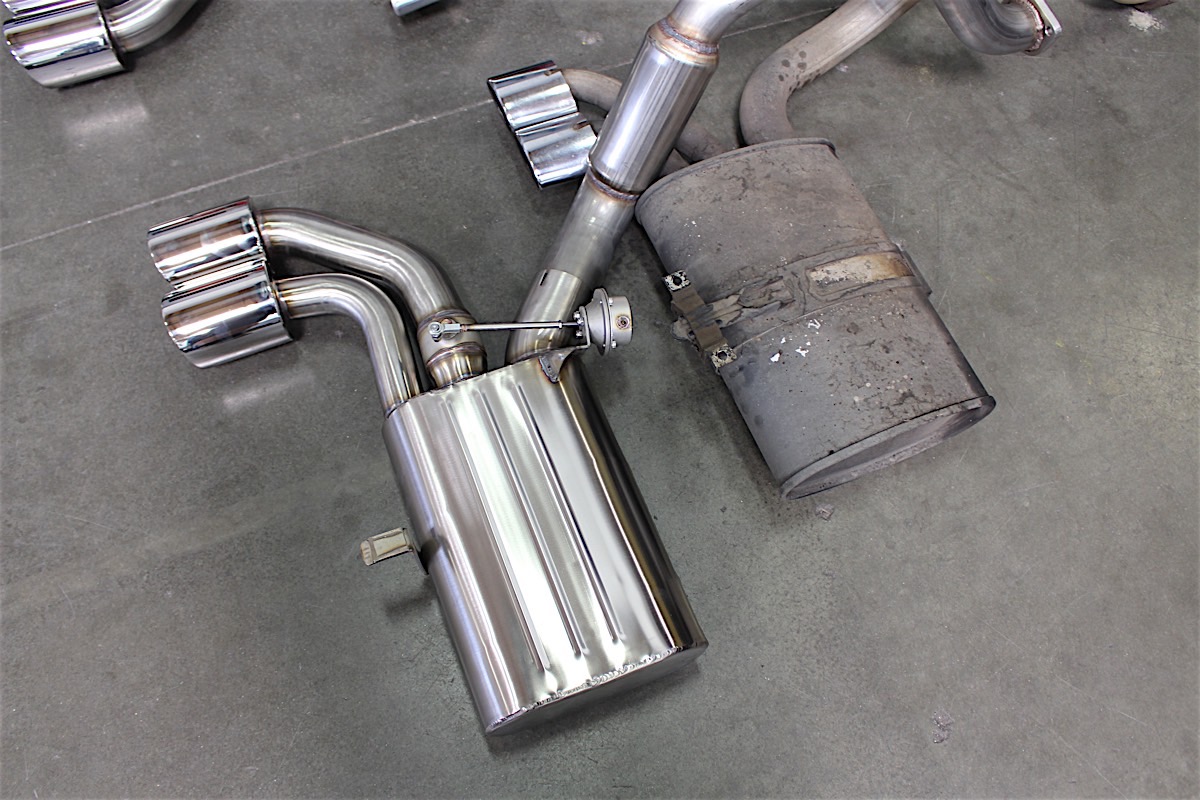
Quality wise, the difference is night and day. You can clearly see the two-mode, butterfly actuator valve here as well.
Aaaand, the old system is out. Really simple and most guys--and gals--can handle this part easy breezy.
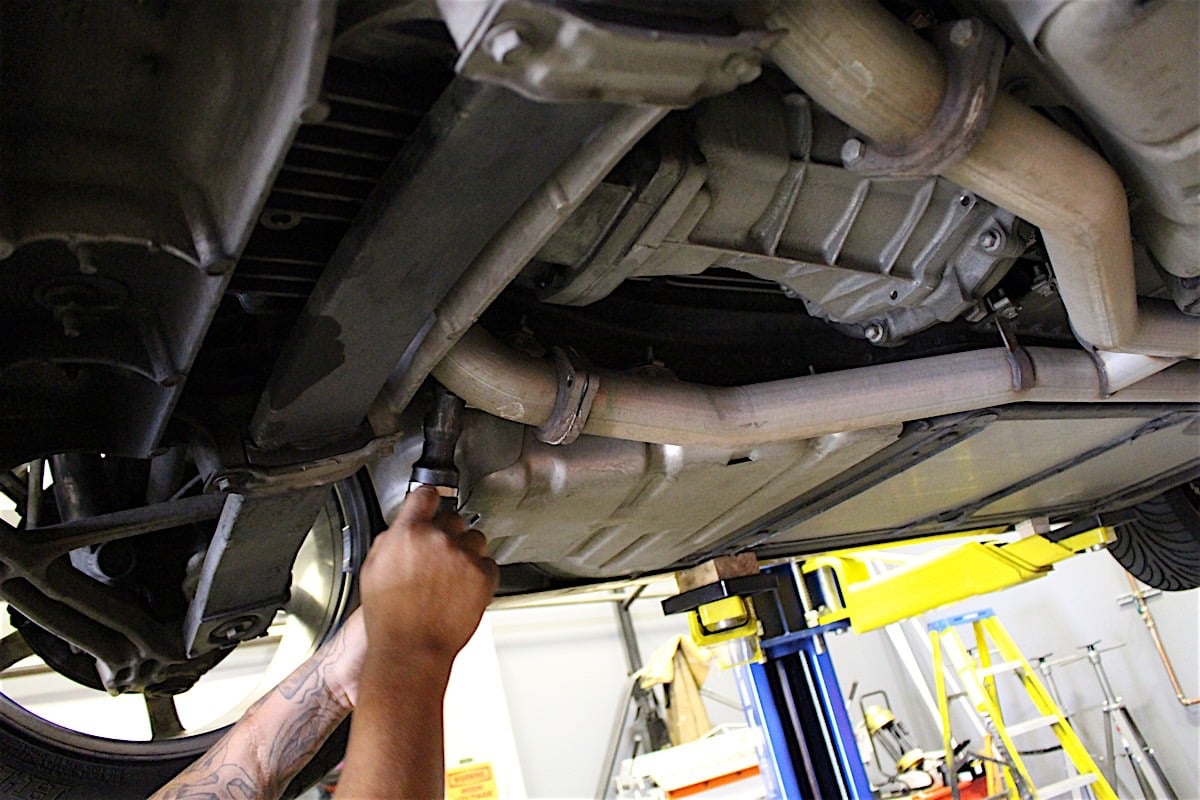
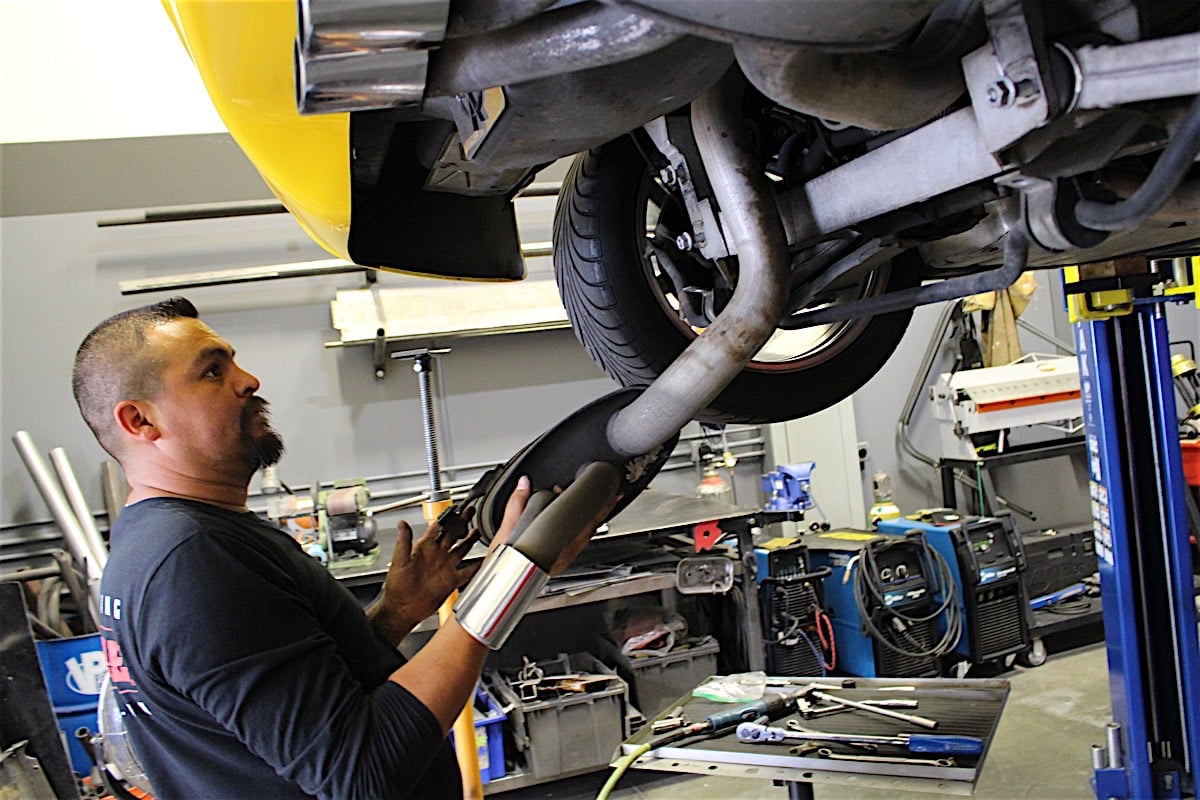
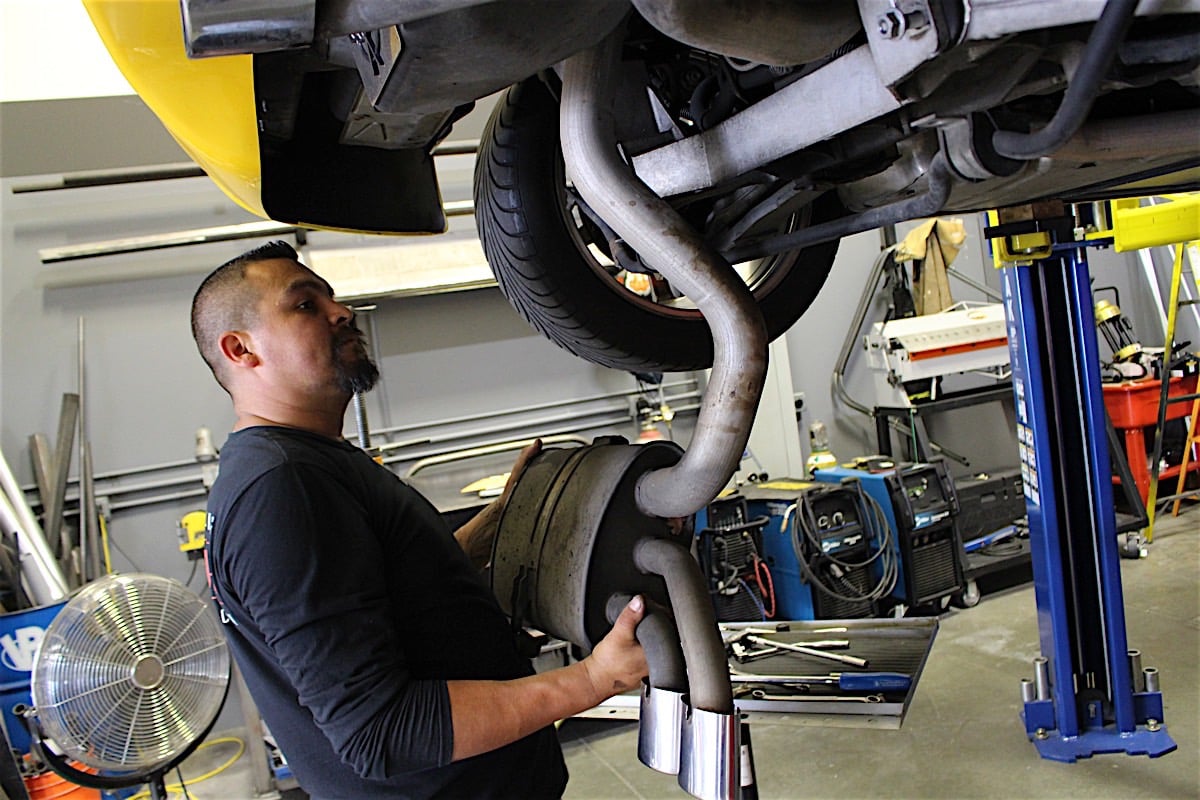
Now we reverse the removal steps and fit the new system. We really liked the no-fuss fit of the Billy Boat Exhaust system and as the old saying goes, “You get what you pay for.” Many of you have experienced ill-fitting parts that are a pain in the rear. The precision build of Billy Boat’s system was reflected in the simple hassle-free install of the shiny new stainless tubes. They fit like they rolled off the assemble line with the car from Bowling Green.
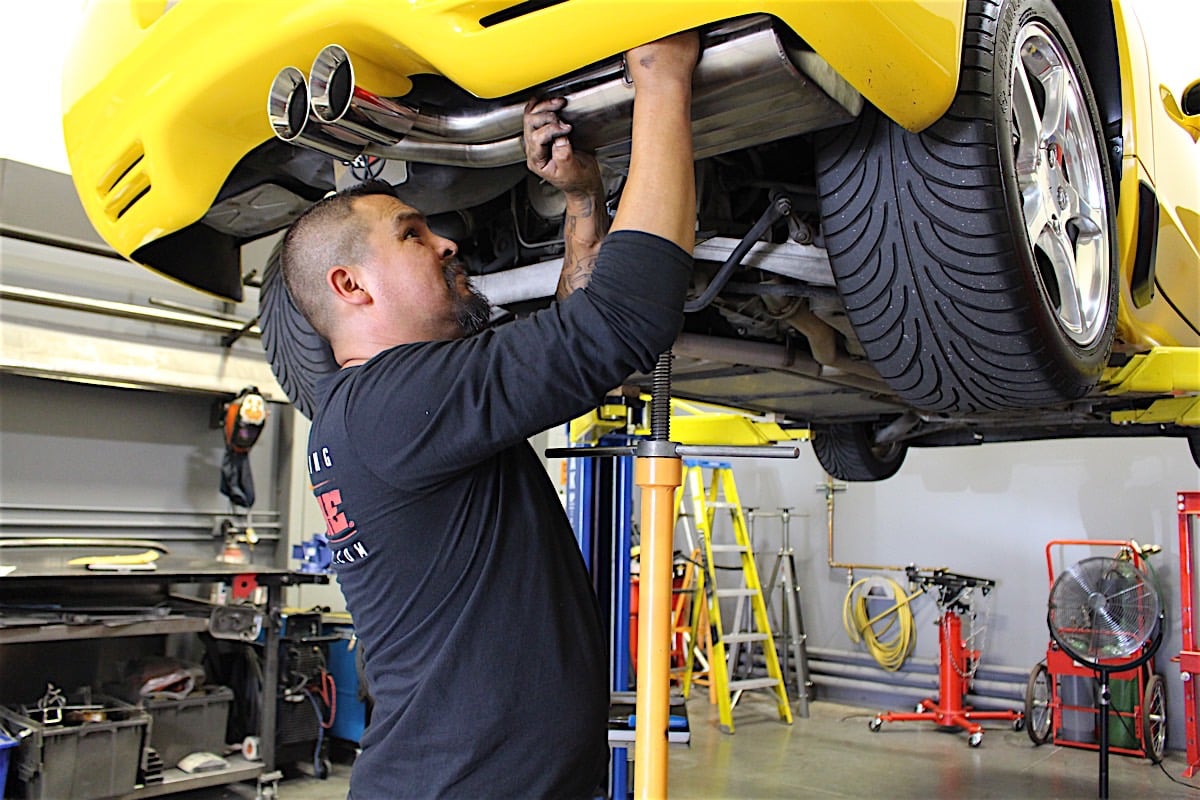

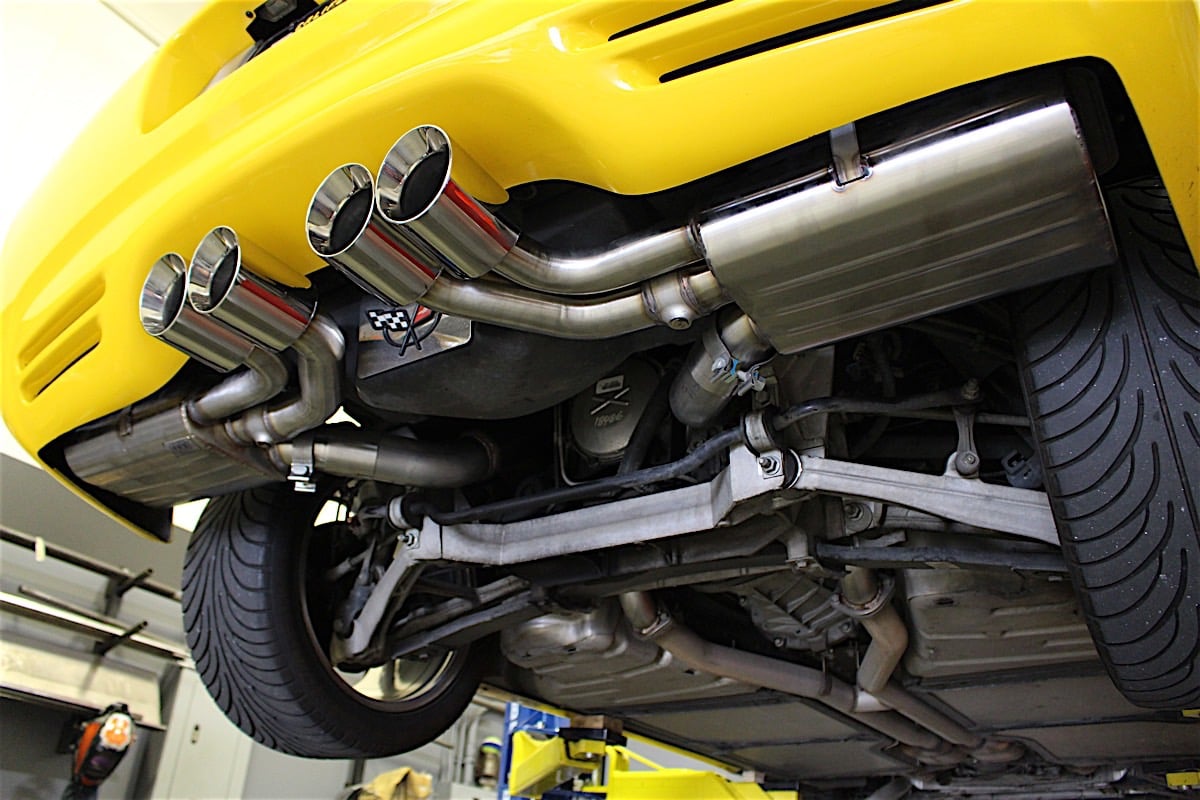
BOTTOM – New jewelry for your C5. From “blah” to breathtaking. If you don’t feel comfortable taking on the next step–wiring up the control module–you could install the new hardware and have a shop hook up the various sundry lines and hardware. UPPER – Clamps and an old piece of metal bar help level the new exhaust tips.
STEP TWO: PLUMBING THE ELECTRONIC CONTROL MODULE, THE VACUUM LINES AND THE ELECTRICAL LINES.
As we mentioned, this is essentially a two step process, and with the hardware installed we move to plumbing the system to actuate the butterfly valve for the two-mode sound.
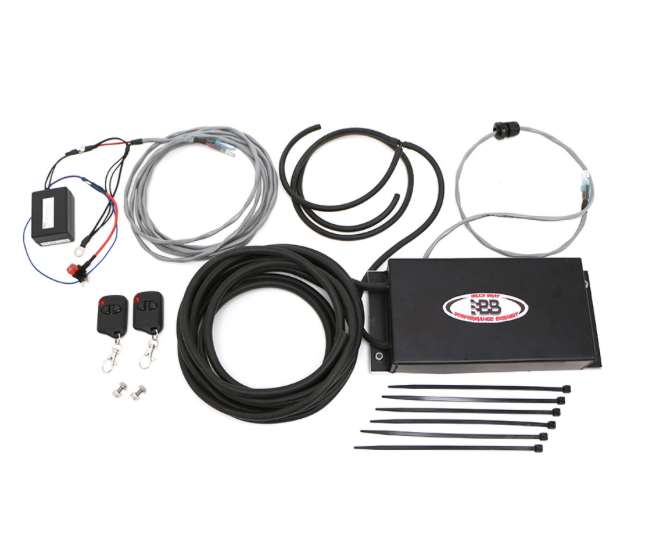
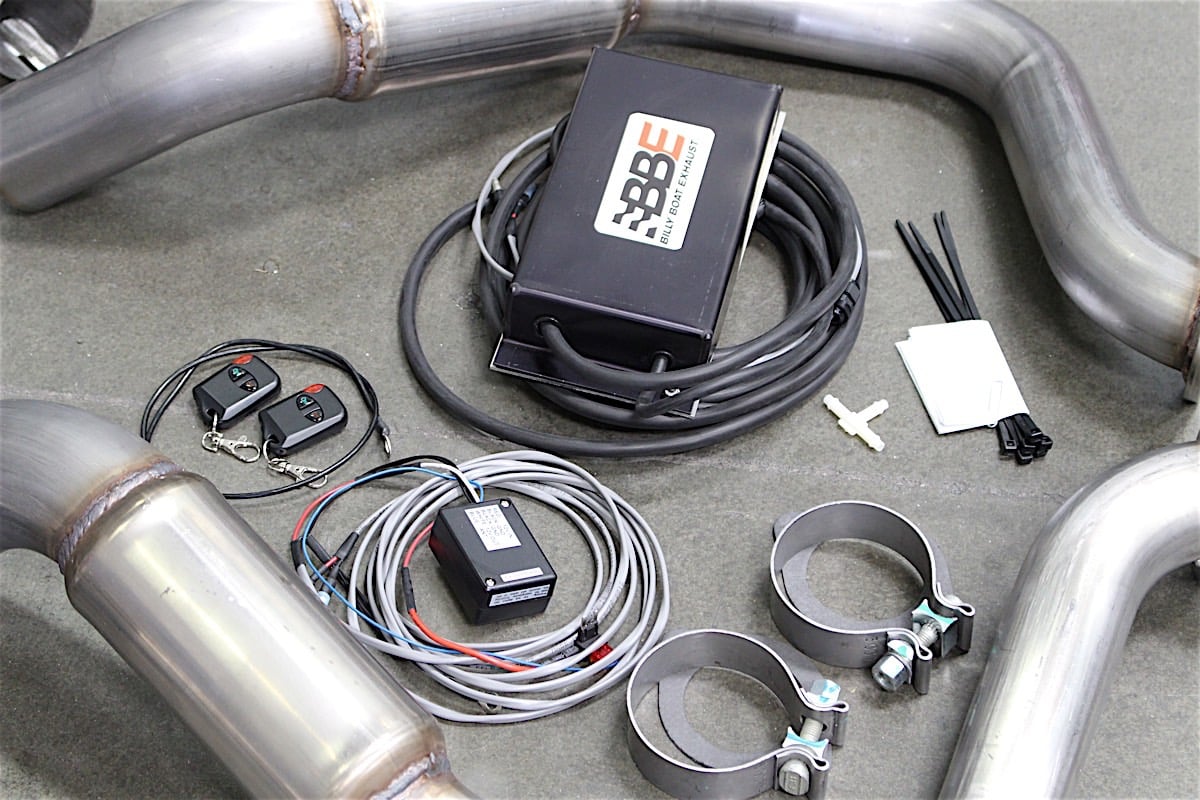
We used Billy Boat’s Retro Control Kit #FCOR-0468.
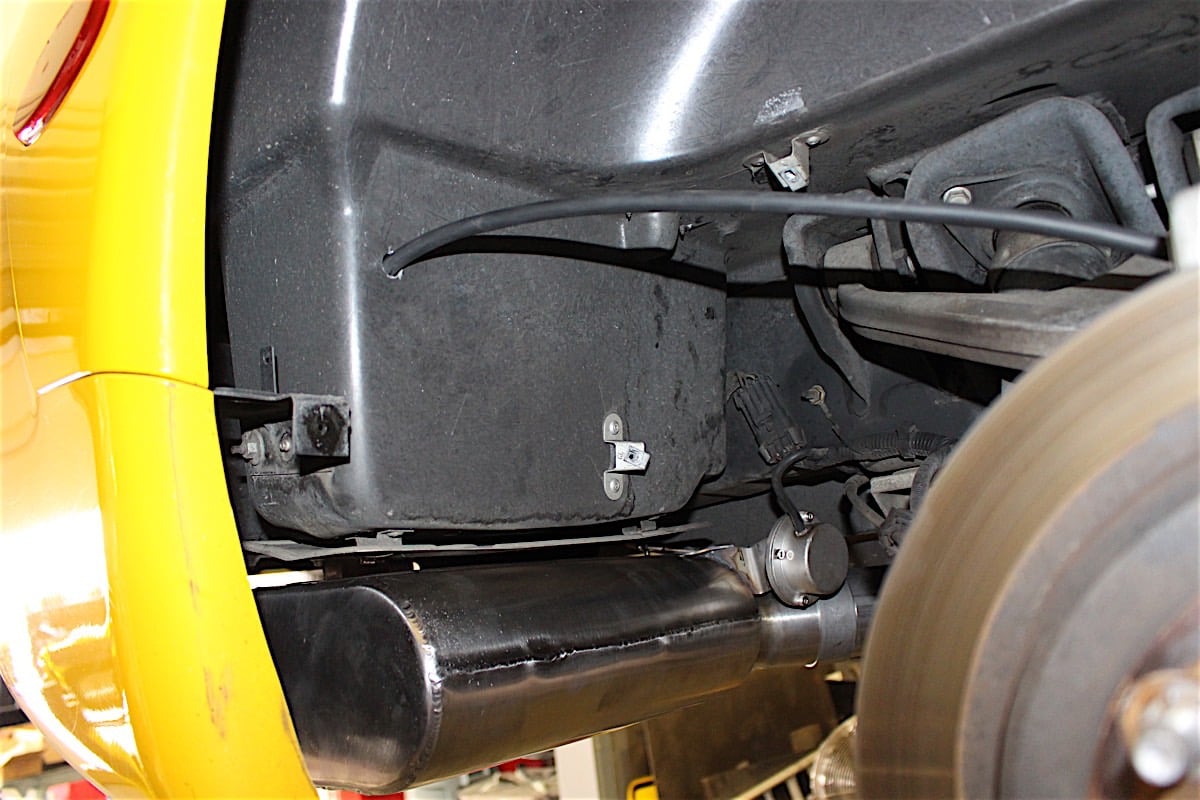
Next up is locating a vacuum source to acuate the butterfly valves. Billy Boat Exhaust spent months developing a stand-alone set-up which allows any C5 to take advantage of the bi-modal system. The kit comes complete with all the wiring, remote switch, vacuum line, vacuum accumulator, and vacuum switch needed for installation. We have used the engine as the vacuum source (it is the same port the factory uses for the NPP) and the installation is simple and straight forward.
Here’s the trick: running the vacuum lines to the butterfly valves requires plumbing in several linesbilly stretching from the engine all the way back to the bumper cover.
Similarly, wiring the electronic controller for power requires another run of wire from the fuse panel in the passenger footwell, back to it’s new home in the storage compartment behind the passenger seat.
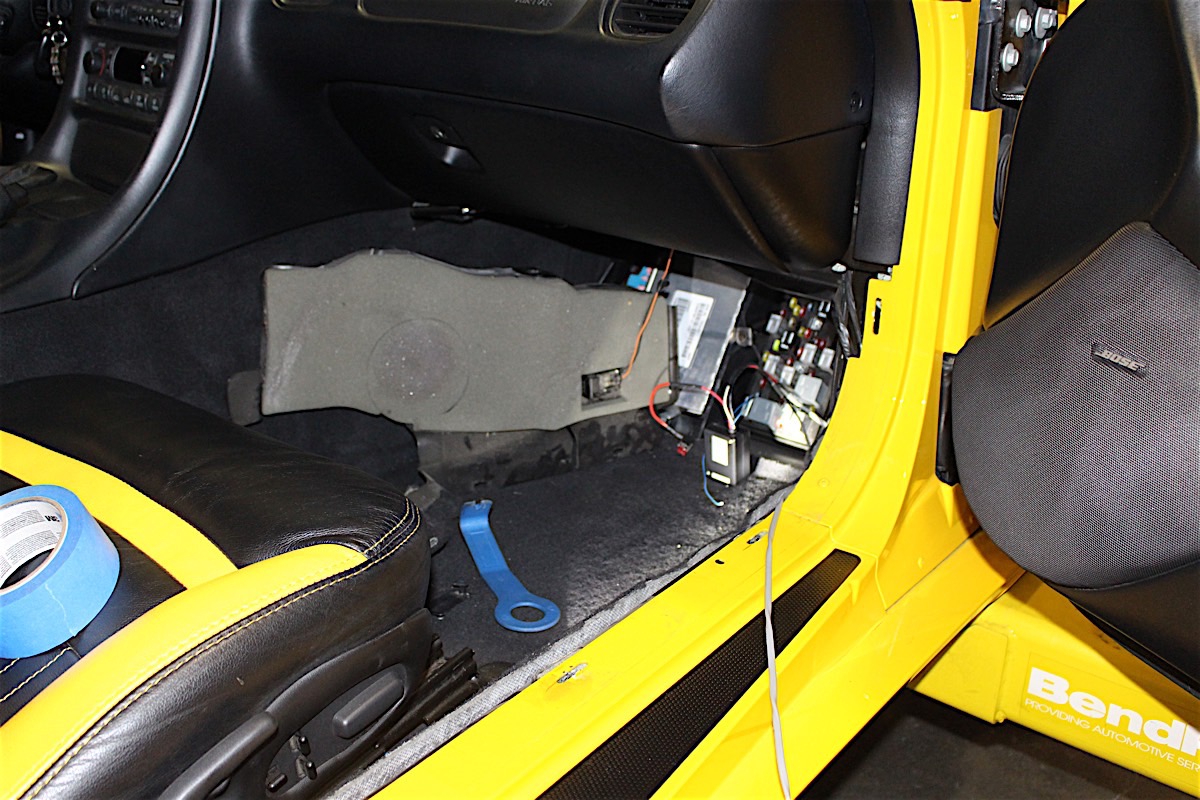
Power for control module is tapped into at fuse panel in the footwell.

LEFT - Vacuum line under fished through rocker panel from engine compartment. RIGHT - Power keep high and dry in passenger compartment under door sill. Both will terminate in the rear of the car.
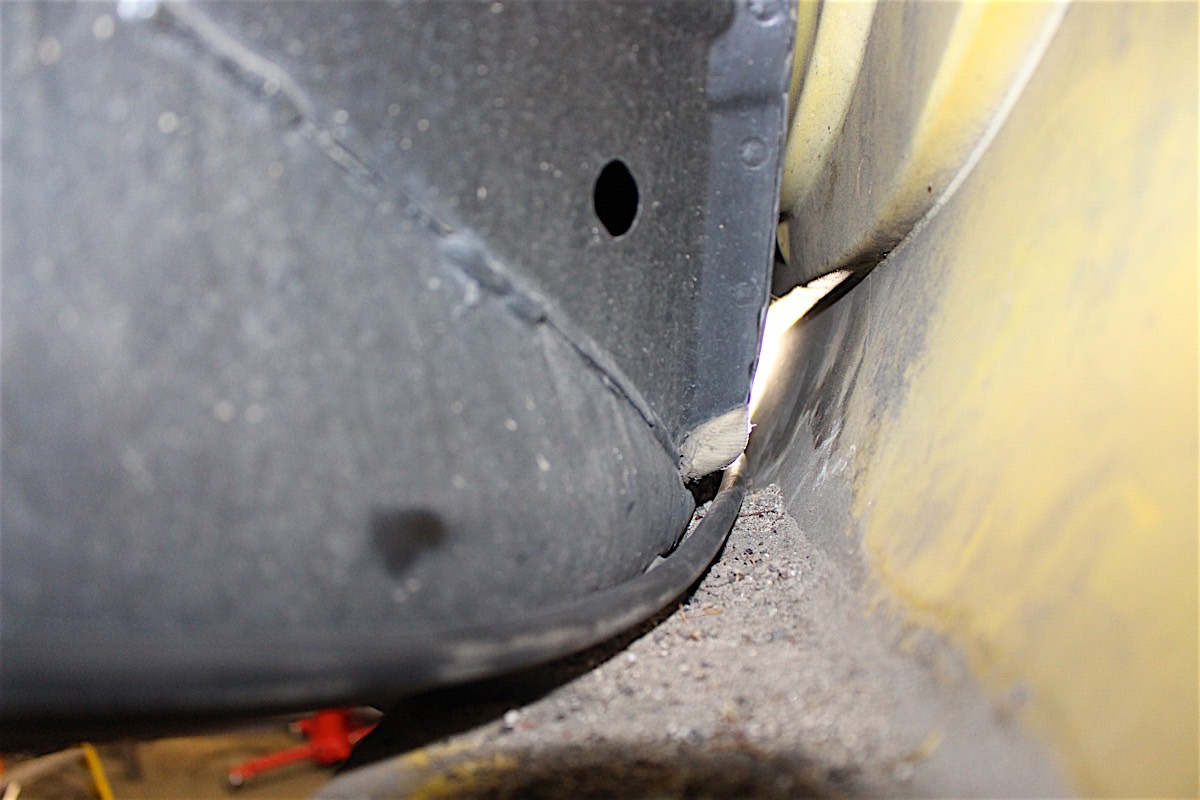
The vacuum line easily slid through rocker panel crevice
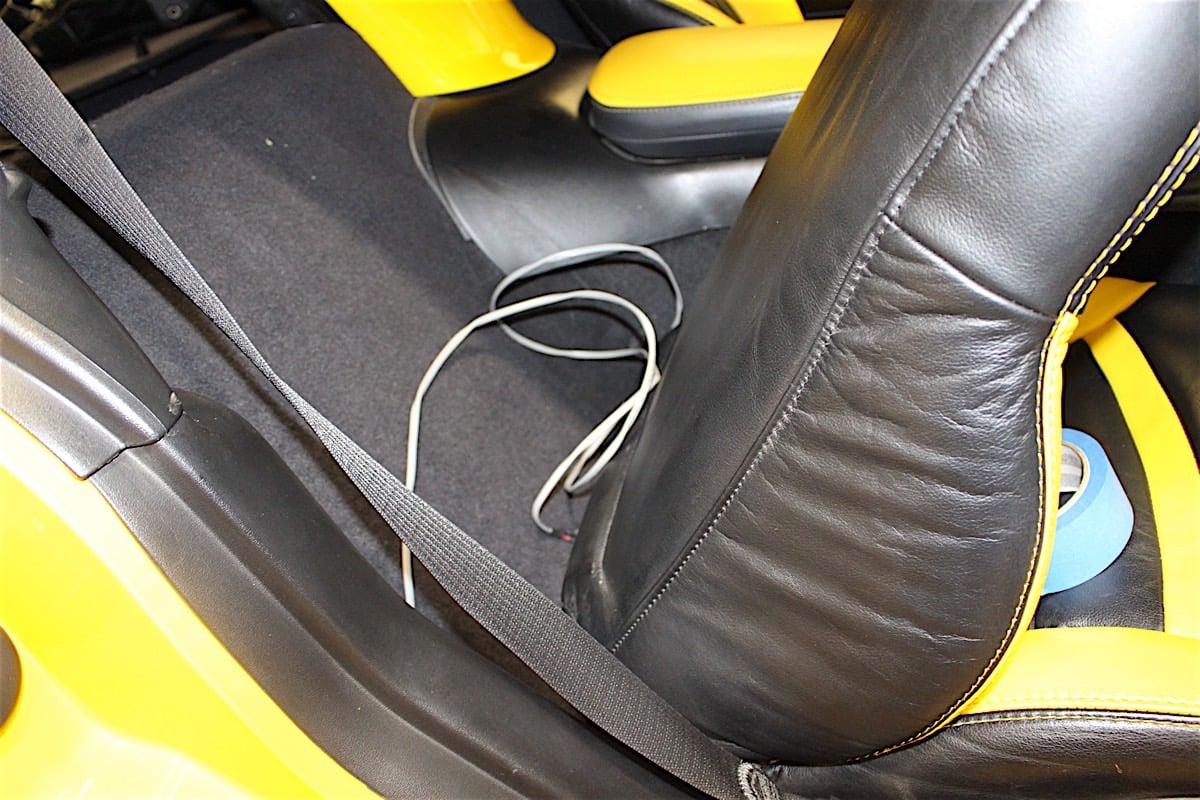
We ended up fishing the power line through the passenger side sill and the vacuume lines through the small cranny in the rocker panel while carefully drilling access points to tie everything together.
LEFT - Power line--now with rubber sheathing for wheel well area-- is routined through hole into storage cubby behind passenger seat. RIGHT - Lower right in picture, you can see vacuum line plumbed to passenger side butterfly valve. We used a splitter to plumb both actuators.


The Control module found a nice home in cargo area in passenger storage area.
From there, we closed up the fuse box, reattached the sill plates, reconnected the battery, checked for exhaust and vacuum leaks, and confirmed the two-mode system worked with the remote control FOBs. All in all a very easy install and a treat that everything worked as promised, first time.
Now, this C5 now has some killer jewelry and is singing a new tune. Be sure and check out Billy Boat for details and a system to fit your car.