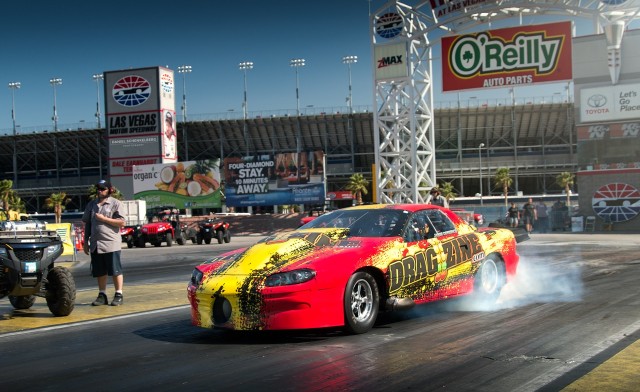
When you end 2015 on the high note of running your best ever elapsed time (a 4.38 at 169 mph run) on the infamous “Strip” at Las Vegas Motor Speedway, the last thing you should probably do is start over with your engine combination. Yet, that’s exactly what we did.
For those of you that aren’t familiar with BlownZ — this is our iconic 2002 25.3 Camaro that we have been racing for the better part of four years in various different radial tire classes. It started life in PSCA Limited Street, morphed into a 275/Street Outlaw car, and then, finally, we settled on the Outlaw Drag Radial/Limited Drag Radial class.
Before we talk about our 2016 upgrades and changes, you might want to familiarize yourself with the build history.
Cha-Cha-Cha-Changing
Our “2015” conversion to the Outlaw Drag Radial class was relatively simple. We installed the larger ProCharger F3-121 Supercharger on our Late Model Engines 441 Dart LSX, and we strapped some larger tires on the old girl. Mickey Thompson’s 29.5 Pro Drag Radial (PN #3062R) got the call, having proven themselves to be able to run in the high 3-second range in Radial Vs. the World.
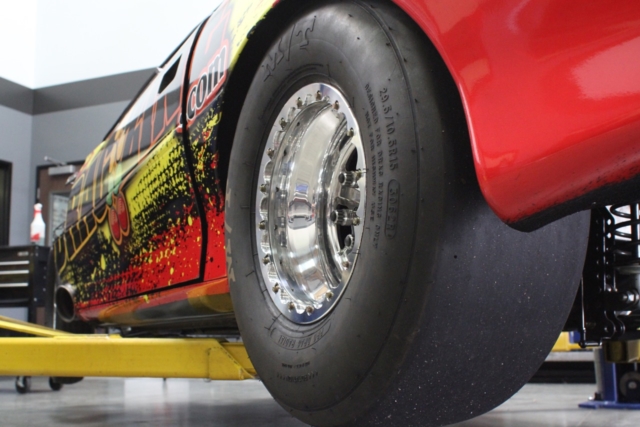
New shoes got the call for 2016, as we utilized Mickey Thompson’s 3062R 29.5×10.5 Pro Drag Radial. They were wrapped around Mac-Fabs trick new beadlock design which provided significantly stronger strength and less deformity across the entire beadlock surface. Mac-Fab owner Tommy Kirk designed this specifically for high horsepower radial cars.
At last year’s Street Car Super Nationals, we qualified number eight in a 37-car field with a 4.50 at 165 mph run. Qualifying was challenging, as we were dealing with a cracked inlet pipe bleeding off boost. We made it four rounds and achieved a new personal best, however, with the aforementioned 4.38-second pass with a 1.12 60-foot to go to the semifinals in a very tough Xtreme Drag Radial field. We got the boost leak fixed and were making about 37-38 psi. Getting to the “final four” out of this very tough field was a great end-of-season accomplishment.
We ran as quick as a 1.11 60-foot grossly overweight, as we were about 350 pounds on the heavy side for the class. BlownZ needed to go on a diet. We were 3,150 pounds, but in most series and events, we were racing against big-blocks with massive power adders, so our supercharged small-block could weigh as little as 2,800-2,850 pounds. That meant we needed a weight loss plan.
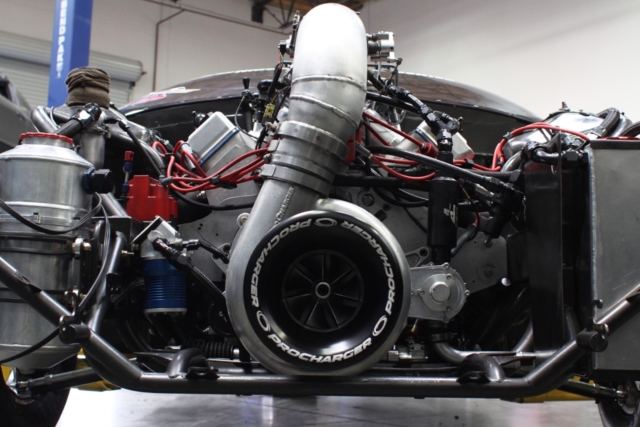
Boost comes from ProCharger’s F3-121 supercharger which stuffs more than 51 lbs of boost into the Late Model Engines small-block LSX. We also utilized ProCharger’s new boost ring for the 121.
A quick back-of-the-napkin calculation told us we needed to ditch 300 pounds or more, and that is no simple recipe. The only thing we could figure out was to go through the car with a fine-toothed comb to eliminate weight, as well as moving our 441-inch LSX to alcohol from gas and ditch a lot of the intercooler and water pump hardware.
The conversion to supercharged alcohol has been challenging, to say the least. We’ve had some pain, and we had some broken parts. But we got some amazing help from a lot of great companies and some kickass tuners, and we decided to write this article a little differently. Today, as we sit, we are the NMCA WEST Limited Street Champions, as this season has come to a close. We are writing this in October. So this is a look back at what we changed, and what you need to know when you’re converting to blown alcohol. We’ve segmented this into sections advising you on what you need to change if you want to keep your engine reliable and your tune up safe.
Alcohol Conversion Overview
There are some key areas that need attention when converting to alcohol with a supercharger. We’ll dive into each area. Any, and we mean, any lack of attention on any of these six areas can result in serious engine damage, either immediately or over a short number of runs. Blown alcohol is not for the lazy. We’re going to speak in as plain a language as we can as we guide you through this endeavor.
- Alcohol
- Oiling and Oil Handling
- Fuel Pumps and Fuel Lines
- Fuel Cell
- EFI Tune Up
- Ring Configuration
Alcohol
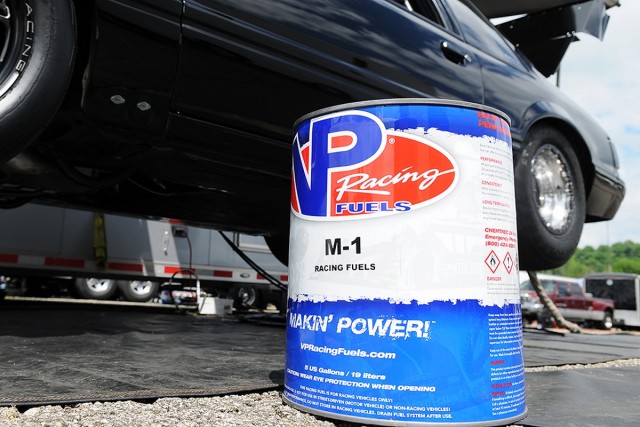
It may seem obvious, but we need to transition to alcohol as a “fuel”. We previously used VP Racing’s Q16, and we had such great success with VP that we wanted to retain them as our fuel supplier. VP makes three different types of alcohol, but for the most part, the practical choices for drag racing are the M1 and M5. M5 has some special additives — it makes more power but it isn’t legal in all series. We decided to use VP M1 in our application.
VP told us their M1 Racing Methanol has a 99 percent minimum purity — the highest purity available in the U.S. With M1, engines run cooler and are less subject to corrosion. Plus, VP uses only lined drums which prohibit rust, corrosion, and metal deposits that can contaminate fuel delivery systems. VP explained to us that much of the cheaper methanol on the market is reclaimed from industrial processes and far more likely to contain contaminants. VP doesn’t cut corners or ‘reclaim’ methanol.
Oiling
You can’t switch to alcohol without thinking about your oil. When a supercharged engine is converted to alcohol you have to realize that you have to increase the fuel volume two to even three times as much fuel as when you ran gasoline. A side component of all of this fuel volume is that you’ll end up with alcohol diluting your oil. Although certain engine combinations or tuneups might not have this issue, the reality is for most racers using alcohol, you’ve got more fuel than you can burn in parts of the tuneup, or even at idle. Thus, you will need to run a thicker oil, because you’re going to mix alcohol with the oil, which is going to thin it out. Alcohol racers call it “milking the oil”. And you too will most likely suffer from heavy fuel dilution.
We ran Driven XP9 in 2015 with our gas engine, and for 2016 we switched to Driven XP6, which is a 15W-50 oil with thicker oil film thickness. Now, we were very comfortable with a full synthetic oil like Driven, and in fact, makes burning off the alcohol a little easier, as it tends to separate more quickly when heated.
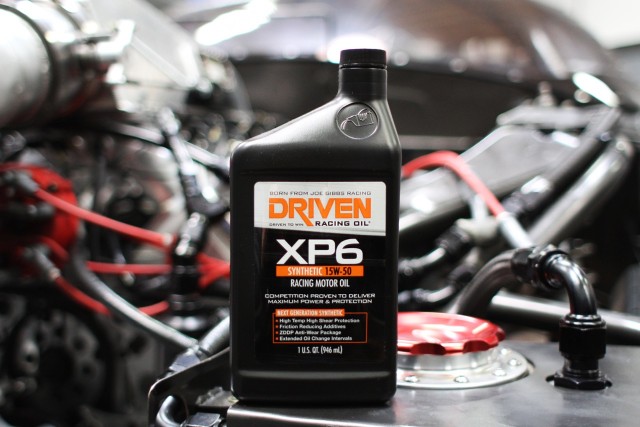
Driven XP6 is the correct choice for a blown alcohol application where you have to deal with oil and fuel dilution issues.
We spoke with Driven’s Lake Speed, Jr., who advised us on the recomendation with the XP6. We’ve been very happy with this oil and it is the thickest product that Driven offers. We’re changing the oil with our dry sump combination roughly every 15-20 runs, which takes about 10 quarts. We’d recommend you stay with a very high quality racing oil and not cheap out. Some argue that because alcohol milks the oil that you should run a cheap oil. We couldn’t disagree with that more. When you have a $50,000 engine and you have critical bearing surfaces, all that’s keeping your engine in one piece is your high-quality oil. It’s even more important when the oil is now being diluted with what is essentially a cleaning/cutting agent.
The second thing you need to think about with your oil is how you’re going to burn the alcohol off that will dilute the oil. After a run you’ll come back and the oil will look like a milkshake. Essentially, you’ll need to heat the oil to a minimum of 173 degrees, which is where the alcohol burns off, and you’ll need to have a way to rotate or ‘exchange’ the oil through the engine. We utilize a heating element in our Peterson Fluid Systems dry sump tank, and we utilize a Peterson Primer Pump to prime the engine. We will then turn the engine over with the engine off to fully exchange the oil in the engine for the oil in the dry sump tank. In about 30 minutes, we have all of the alcohol fully burned off and ready for another run. We run the heater even when warming up the car to keep the oil warm and the alcohol burned off.
Fuel Pumps and Fuel Lines
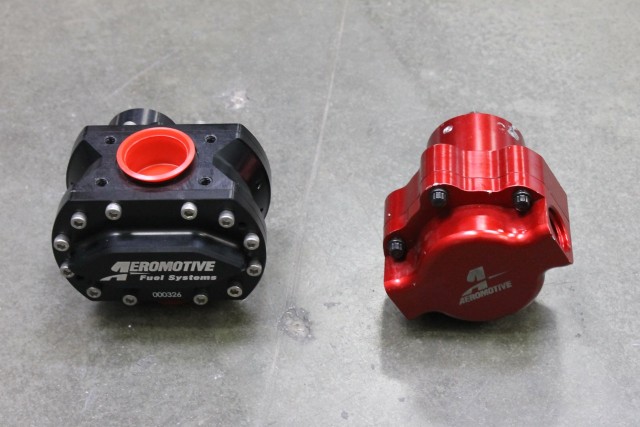
With blown alcohol, you need a lot more fuel than blown gas — at least twice the volume, if not three times for a safety window. That means you need to move to a belt-driven, hex-driven, or cable-driven fuel pump that has a much larger per-gallon output. We switched to the Aeromotive Terminator Spur Gear pump and wrote an entire article about it.
All you need to know is that you must find a reputable, top-flight fuel system company with experience in alcohol; Aeromotive is one good choice, but there are others, like Waterman Racing, and work with them to help you build a fuel system that has the necessary flow for your horsepower levels. You’ll have to ditch your electric fuel pump if you’ve got one and go mechanical. We worked with Bub Miller at Aeromotive, who helped us a great deal.
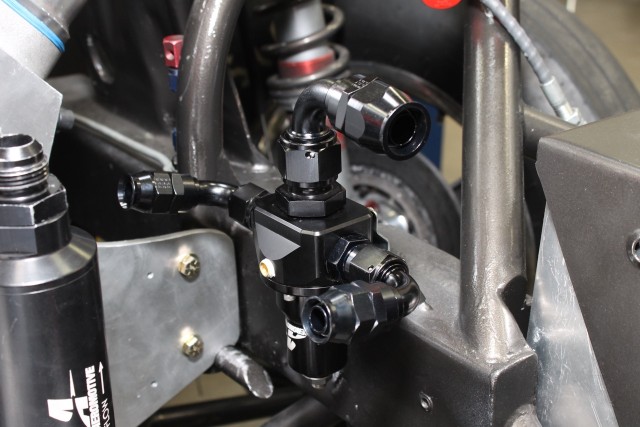
One of the things Bub advised us of is to increase the diameter of the fuel lines a significant amount. The inside diameter of the feed line from the fuel cell to the pump is 1-1/16-inches, with a AN -12 outlet from the pump to the filter, and then a Y-block, spitting to (two) -10s from the filter to the fuel rails, and a -10 outlet from each fuel rail back to the regulator. The pump will be driven off the hex drive attachment on the Chassisworks CDS gear drive.
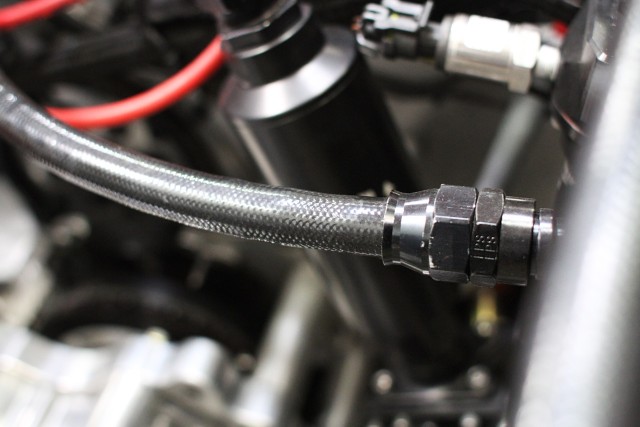
With alcohol, teflon lined fuel lines are recommended. We selected Fragola’s PFTE hose for long life and it’s exterior coating for additional durability.
We utilized Fragola PTFE hose, which is especially designed to handle alcohol, methanol, and other corrosive fuels. We utilized the black fuel line, which has a protective black cover, as well — it looks good and performed great. Stainless braided hose can be abrasive to anything it comes in contact with, and =for that reason, Fragola offers it with the plastic cover, as the hose will not scratch aluminum panels or remove paint. The clear maintains the stainless braided look, while the black matches Fragola’s most popular black anodized hose ends and adapters.
One important tip: don’t leave alcohol in your fuel cell or fuel system for more than a few days if you aren’t actively racing. Over time, alcohol will corrode and cause issue with your fittings, injectors, and anything rubber — even aluminum. We flush our fuel cell and put pump gas in the engine and run it for 30 seconds to flush out the alcohol if it’s going to sit for more than a few days at a time.
Fuel Cell
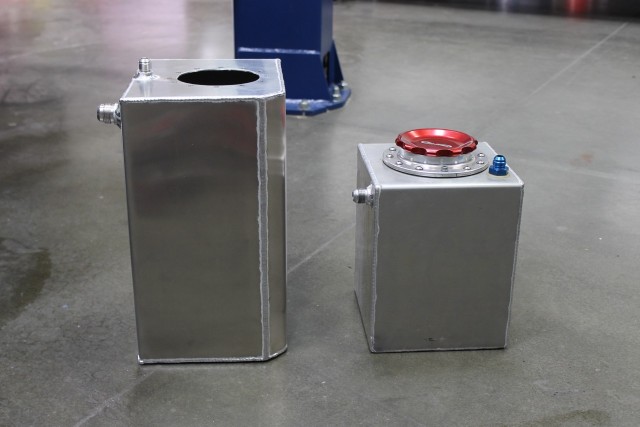
We got this one wrong and we hurt the cylinder head on two really nice engines as a result. Hopefully, you can learn from our mistakes. We ran a 2.5 gallon fuel cell in 2015 with gas, and we simply ordered a five gallon fuel cell for 2016 for the alcohol conversation. The result was a great deal of heartache our first two races, three burned up cylinder heads, and a lot of confusion that we couldn’t figure out. We didn’t even know that what was wrong was our fuel cell, until we started calling around.
One company came to our rescue – Tim McAmis Race Cars (TMRC). McAmis is a noted Pro Modified and high-end door car chassis builder, but his company sells a ton of parts, including many that we utilize on BlownZ. It turns out that we didn’t know very much about building an alcohol fuel cell, but TMRC does. TMRC builds a lot of alcohol Pro Mod cells, and took one look at ours and told us that we didn’t build it with 150 psi of alcohol in mind.
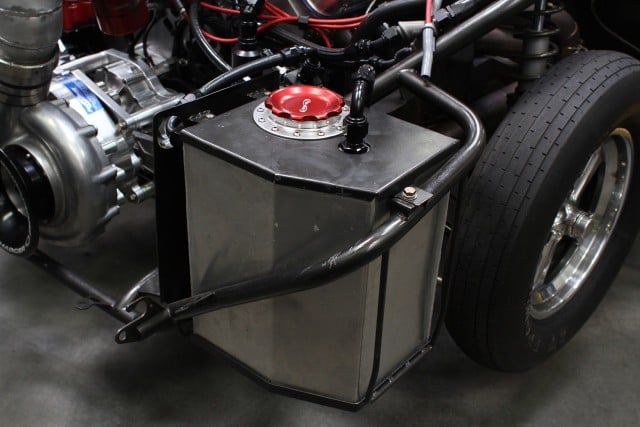
This is our fuel cell that we designed with the help of Tim McAmis, utilizing their high-capacity alcohol fuel cell fitting kit.
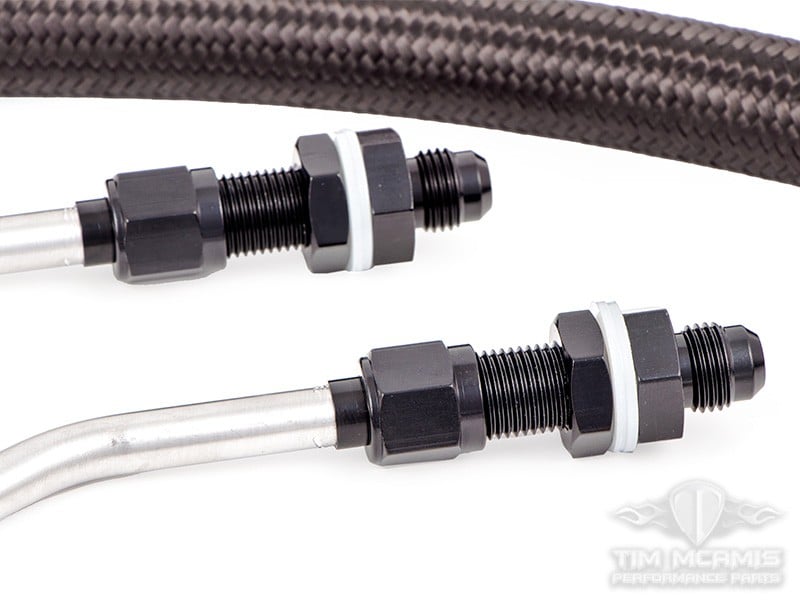
TMRC had a Fuel Cell “fitting kit” that solved all of our problems, and after working with Robert Rojas of Chiseled Performance, who built us a new, larger fuel cell, we had a solution that incorporated a few fixes.
- Our fuel cell was too small: five gallons wasn’t large enough, we needed a fuel cell that was more like 7-8 gallons. This would allow the fuel to cool and not get aerated, as it was too quickly getting returned to the cell and then sucked out again.
- Our vent was undersized. The TMRC kit includes a much larger vent #12
- Our fuel return was simply shooting the fuel at one of the walls of the cell. Instead, the TMRC kit includes a “low” style return where the fuel is returned to the bottom of the tank so that aeration doesn’t occur.
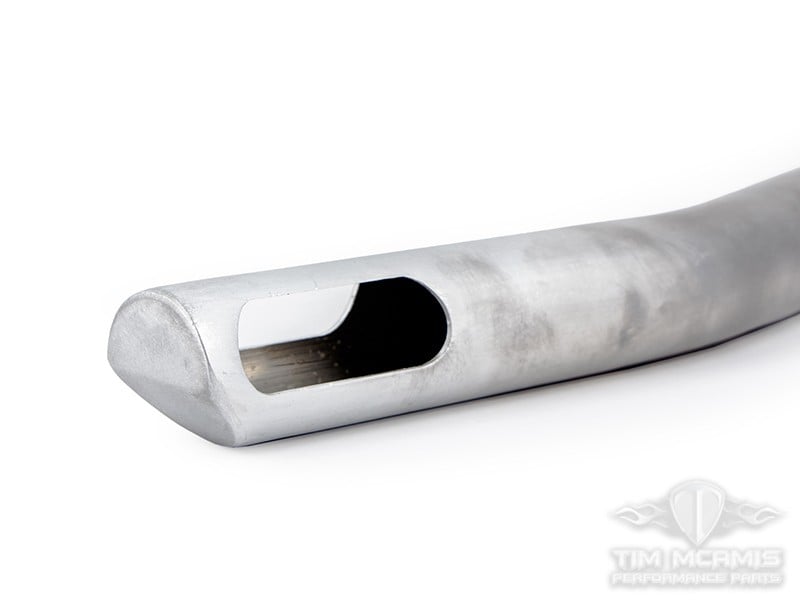
- The fuel “inlet” simply a hole punched in the side of the tank with a fitting. TMRC’s fitting kit includes a vented fuel tube that helps suck fuel in properly without sucking a hole in the fuel (think of a bath tub drain).
Once we installed the TMRC kit, we experienced literally zero problems with our fuel supply and the engine became healthy, happy, and well-fueled. A special thanks goes out to Chiseled, which built our new larger cell to which we adapted the TMRC fitting kit to.
EFI Tune Up
It’s obvious you need to modify your tune after converting to blown alcohol, but there are some basic principles that you can rely on.
- You need to find someone experienced in reading spark plugs on blown alcohol combinations. It’s a totally different “read” than gas engines, with the base ring providing most of your reading. It will take you half a season before you get good at it.
- Start conservative. You want to start fat and under-timed, and creep up on the combination by reading spark plugs, your O2 sensor readings, and your EGTs.
- Don’t make full runs early. Start with a 60-foot run, then a 100-foot run, 200-foot, and so on. It might take you a full day of testing to get all the way down the track. But being conservative is a lot better than having to re-weld your cylinder head or block back together.
- Be careful of your O2 sensor. There are specific alcohol sensors, but you don’t have to have an alcohol-specific sensor to utilize your EFI system with blown alcohol. However, you do want a high-quality sensor (use an NTK), and you want a fresh one.
- Be prepared for a significant increase in boost pressure. We were told by some experts that we would get another 5-6 pounds of boost from removing the intercooler. Well, it turned out that the boost pressure increase was about 12 psi … almost twice as much. The reason it turned out wasn’t just the boost loss from the intercooler and piping, but it was the fact that the increased amount of alcohol in the cylinder was now displacing the air in the cylinder. Since alcohol can’t be compressed, it increased the net pressure in the system since there was a lesser amount of air being compressed.
Rings
It’s rare we provide such a ringing endorsement in an article, but it’s hard to beat Total Seal when it comes to piston rings in racing applications. We’ve had Total Seal rings in our BlownZ race engines for the last four years, and Total Seal has always been there to help us and our engine builder, Late Model Engines, optimize our ring and piston packages.
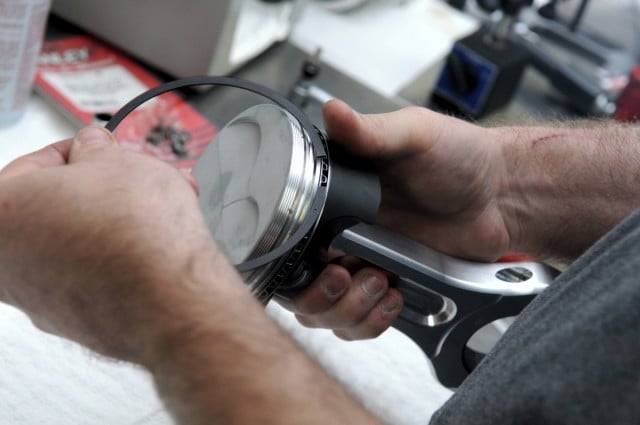
With alcohol, the fuel mixture actually burns at a cooler rate in the cylinder, and there is an increased amount of fuel in the system at the same time. Thus, a different strategy is needed with your ring package. Don’t simply convert your engine to alcohol and expect high performance from a ring set and setup that was designed for gasoline. Often, you will actually run a tighter ring gap and ring configuration. You will also, depending on your engine and sleeve type, prepare the cylinder walls with a different finish, depending on what ring you’re utilizing in the engine.
Your best bet here is to work with your engine builder and a company like Total Seal that can match your engine’s needs, horsepower requirements, and configuration with your new alcohol combination.
Overall Results
All in all, our alcohol combination resulted in a weight drop from 3,150 pounds to 2,850. Did it work? The car won the 2016 NMCA Limited Street Championship going undefeated with 14-straight round wins, and a “perfect season”.
We owe a great debt of gratitude to all the companies that helped us with our “alky” conversion and taught us a great deal in the process!
For those of you wondering about our engine combination, this is the basics below:
- Block: Dart Billet LS LS Next2, 9.750-inch deck height
- Crank: Bryant Racing Billet 4.125 stroke BBC snout, 2.750 main
- Rods: GRP Pro Series Billet, 6.300-inch long, .927-inch pin
- Pistons/Pins: Diamond Racing Hard Anodized, Trend TP-1 DLC-coated pins
- Rings: Total Seal M2
- Damper: ATI Racing Super Damper
- Camshaft: Custom solid roller
- Pushrods: Trend Performance
- Lifters: Jesel Keyed, .937-inch diameter
- Oiling System: Dailey Engineering Dry Sump
- Cylinder Heads: Edelbrock LS-R by Race Flow Development
- Rocker Arms: Jesel aluminum intake, steel exhaust, 1.8:1 ratio
- Camshaft Drive: Jesel belt-drive
- Valves: Ferrea Titanium
- Valvetrain: PAC 1.522-inch-diameter double springs, retainers, locks, locators
- Intake Manifold: Wilson Manifolds
- Supercharger: ProCharger F3-121
- Supercharger Drive System: Component Drive Systems’ gear drive
- Exhaust: Custom headers from REF Unlimited/Burns Stainless
- All Fasteners: ARP
- Driven Oil and VP Racing Fuels
- Wrap: 3M and SocalWraps.com
- Tires & Wheels: Mickey Thompson Pro 5 Drag Wheels, and ET Pro Drag Radial (29.5/10.5R15) and ET Front (26/4.0-15).
- Beadlocks MacFab Beadlocks

