Let’s face it, almost no one enjoys a cable clutch. They fall apart with time, require adjustment, and just doesn’t work on some hybrid engine swaps. In some cases, hydraulic systems are simpler, easier to install, and are self adjusting.
There are many options when it comes to hydraulic conversions, but we chose a Quartermaster hydraulic release bearing for our Project Rice Rat Rod 240SX that makes setting up a hydraulic conversion a breeze.

If you’d like to fast-forward to the entire photo gallery, it can be found here: RICE RAT ROD: QUARTERMASTER PHOTO GALLERY
The Quartermaster hydraulic release bearing was first used for super stock and late model class dirt racing, in which the idea was to keep the bearing inside the bell housing and free of dirt. For street cars, it gives clearance you may not have on the side of the bell housing and less pedal effort for engagement. This was the case for our Project: “Riced Rat Rod” with it’s Tremec TKO-600 transmission and Dart small block Chevy powerplant on an overly tight tunnel. The Riced Rat Rod is a ’91 240sx with the aforementioned small block Chevy for an obscure vehicle that is fully street-able and capable of 10 second quarter mile times.
A typical hydraulic setup includes a master that feeds a slave cylinder, which pushes on a fork that connects to the release bearing inside the transmission. The Quartermaster Hydraulic Release Bearing eliminates all those parts and hooks the master cylinder directly to the bearing. There has been a lot of questions about how the bearing is setup, and it is easier then you can imagine.

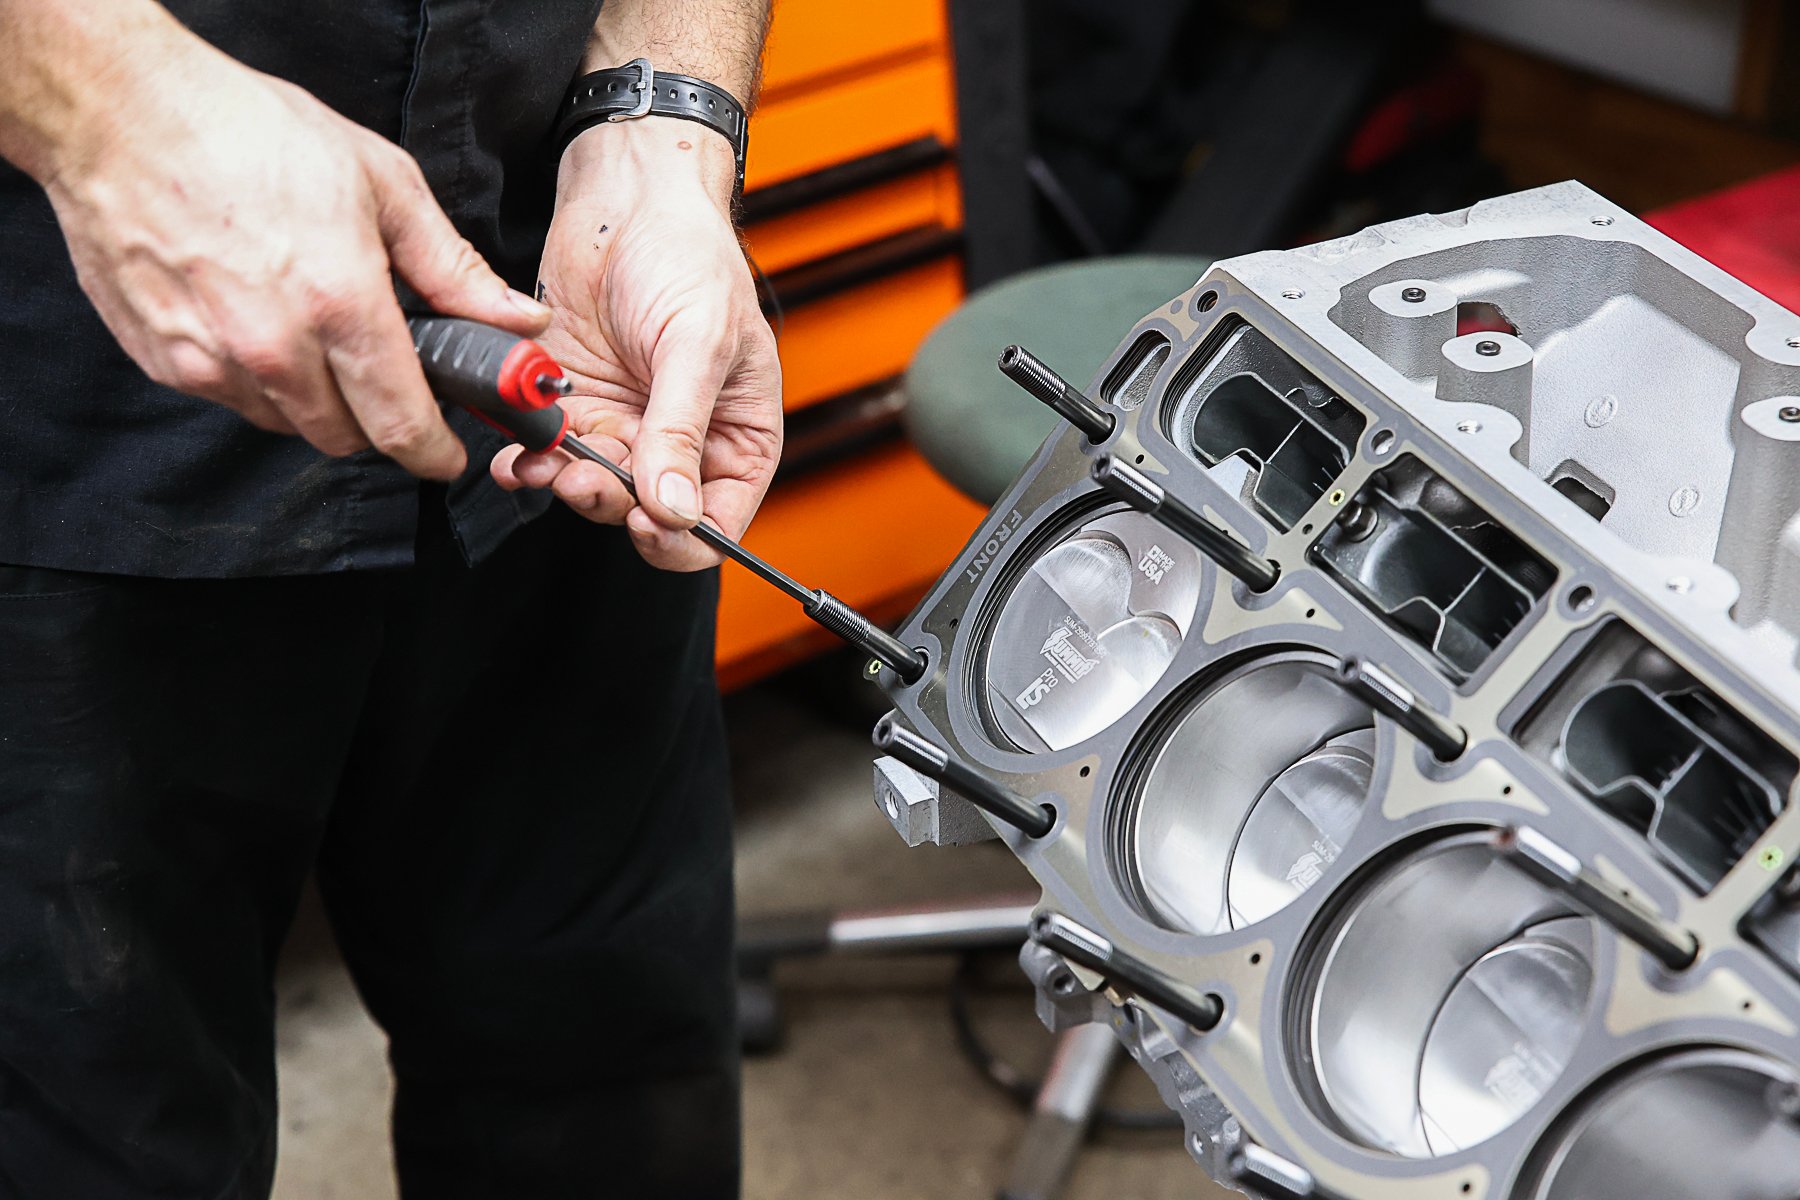
You will need to start with a transmission that works with Quartermaster bearing, and our Tremec TKO-600 was a perfect candidate. The flywheel and clutch must be completely installed on the engine and the bell housing mounted to the engine, leaving the transmission free of any extras. We chose a SPEC aluminum flywheel with a SPEC Stage 3 clutch that was designed to handle the 650 lb/ft that is going to be transferred to the rear wheels.
Installing the Quartermaster Hydraulic Release Bearing

Bearing retaining stud mounted
The kit comes with everything you need:
- Shims to control the height of the bearing on the transmission
- Two stops for different transmissions to keep the bearing in place
- Feed and a bleeder line.
First start by removing the input shaft mounting bolt at the 7 o’clock position (looking towards the input shaft) and replace it with one of the supplied retaining studs, making sure you lock-tite it before installation.

Measuring T.O.B Height
Then slide the bearing (without any shims) onto the input shaft down to the collar, which will fit snug. Make sure you slide the notch on the bearing onto the retaining stud to hold it in place. The bottom of the bearing is recessed to fit snug against the bearing retainer plate that is machined already on the transmission. Measure from the face of the transmission to the top flat part of the bearing surface. Make sure this measurement is exact as it is important, record this on the back of the supplied instructions as “T.O.B Height”.

Measuring Set-up height
Believe it or not, you’re half way done. The final measurement you will need is the distance from the outermost (where it sticks out the furthest) part of the pressure plate fingers to the transmission face of the bell housing for your “set-up height”. Subtracting the T.O.B height from the set-up height will give you the total air gap. In our instance, we did not have a block plate installed and were under the minimum .18” air gap. After installing the block plate to act as a spacer, we ended up with .20” and required no shims. Follow the guide on the instructions for adding shims to bring you within the .18”-.25” required air gap.
Our Set-up height was 2.80, minus T.O.B. height of 2.60, equals .20”.

If shims are needed, insert them behind the bearing
Master Cylinders and Bleeding
Originally, we tried to get by with the stock 5/8th-inch bore clutch master cylinder, but it did not push enough fluid to properly disengage the clutch. We opted for the recommended 3/4” bore that was more than adequate, which connects to the Quartermaster bearing via a -3 AN braided line. Bleeding is best done with the aid of a friend. Add fluid to the master cylinder with the cap off, pump the clutch pedal a few times and then hold it down. From underneath, have a friend open and close the bleed line at a medium pace, repeat until the line is free of air.

Once the correct shim amount is calculated, remove the bearing to install the bell housing to the transmission and re-install bearing with any required shims. Feed and bleeder lines will exit out the stock release fork hole
Positive Clutch Stop
You may need to install a positive stop on the clutch pedal to keep the bearing from over extending through the fingers. Use that friend that just helped you bleed the clutch while the car is off. Put the transmission into gear and try to rotate one of the drive wheels while slowly disengaging the clutch (pushing the pedal in). At the point you find your disengagement spot, add 1/4” to the pedal throw and then create a stop on the clutch pedal. This gives you a little leeway on disengagement but still within a safe margin.
With the engine installed it was time to try out the hydraulic release bearing. The engagement of the clutch is virtually effortless. By decreasing the amount contact points from a slave cylinder to the single point of the hydraulic release bearing, it makes clutch disengagement light as a feather. Now when you drive your hot rod, there will be no worry of having a larger left leg muscle from your cable driven clutch.

Completed installation with .20″ of air gap