![]()
For a car enthusiast, one of the best parts of building a new project is hearing the motor roar to life. The motor is the heart of a car and the sound of an exhaust note is music to the ears; the rumble of an engine can make your heart race and your palms sweaty with anticipation of what’s to come. Simply listening to the exhaust allows you to know if a car is packing serious power and helps to set the overall mood of the car.
When the time came to get an exhaust system on Project Blank Slate, we knew that we wanted it loud to scare off dogs, cats, small children and most importantly, the competition. With our LME 502 cubic inch naturally aspirated LS pushing over 700 horses, we have a lot to show off. An off the shelf kit simply wasn’t going to fit or fulfill our desires; our exhaust was going to be a custom set up.

The ultra slim Flowmaster mufflers.
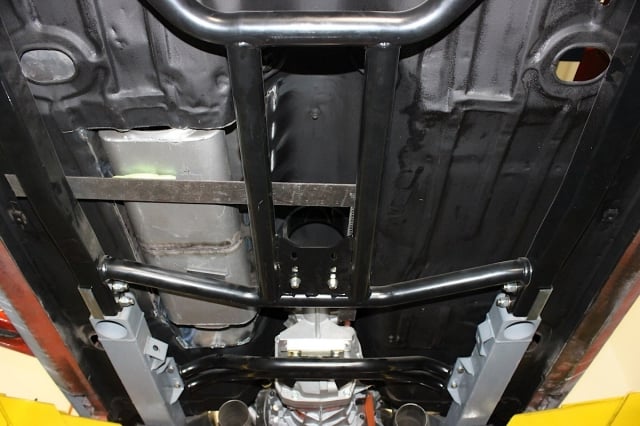
On Project Blank Slate, ground clearance is a major concern and our top priority. To add to the mix is our Chris Alston Chassisworks cross brace, which has extra connectors and supports over the factory set up. Since Blank Slate has been lowered a significant amount, a stock “off the shelf” exhaust system wouldn’t fit. Most exhaust on the market is the traditional round tubing with round entrances and exits to the muffler and that wouldn’t fit on our Camaro or provide the right note to scare our competition.
We hooked up with Flowmaster mufflers to get their oval mufflers made for low clearance applications. From there we talked with Vibrant Performance, who makes oval tubing designed for low ground clearance applications. With the two systems combined, we were able to save valuable ground clearance while still having a large easy breathing exhaust under the car.
Another factor we had to figure out was where the exhaust was going to exit. We thought if the exhaust exited through the rocker panel in front of the rear tire, this would not only offer a less restrictive exhaust but avoid snaking the exhaust around the rearend. Exiting through the rocker is also a nod of acknowledgement to the inspiration of our Camaro, the traditional SCCA cars where their exhaust ended in the same location.

TIG welding the mufflers with our Miller welder.
Research:
We started by looking at the room we had to work with and how we were going to accomplish having the exhaust exit by the rocker panel. With ground clearance our main issue, we also had to worry about all the suspension components under the car. A custom made exhaust was in order for this fire breathing LS.
After scratching and hitting our heads while under the car, we came up with a game plan: a completely custom exhaust with low profile tubing and mufflers. We did some research to see what kind of low profile exhaust options are available on the market, and we found out that Vibrant makes oval tubing for low profile applications. Flowmaster makes a low profile muffler that was designed for use on that NASCAR Nationwide Series race cars and if the mufflers are good enough for the NASCAR series, they should be up to snuff on our ’69 road race Camaro.
Talking with Flowmaster:
I would use our low profile, narrow race muffler. These are only three inches thick, and much narrower than our traditional street mufflers. Nick Tauber – Flowmaster


Two mufflers welded together vs. non welded mufflers.
Tauber told us that this muffler wasn’t intended for street use as race mufflers focus purely on functionality and performance; street mufflers start as race mufflers then focus on sound and performance.
But Tauber had a solution in mind for using race mufflers on a street car. “This muffler is a racing muffler that will be extremely loud for street use. I would suggest welding two of them together,” said Tauber. “I had to do this exact thing on a car I built. The car had an aftermarket chassis and there was hardly any room for mufflers. I was able to squeeze this long, narrow and thin muffler between the chassis frame and pinch weld on the outside of the car” continued Tauber. With mufflers in the mail, we called up Vibrant Performance.
Talking with Vibrant Performance:
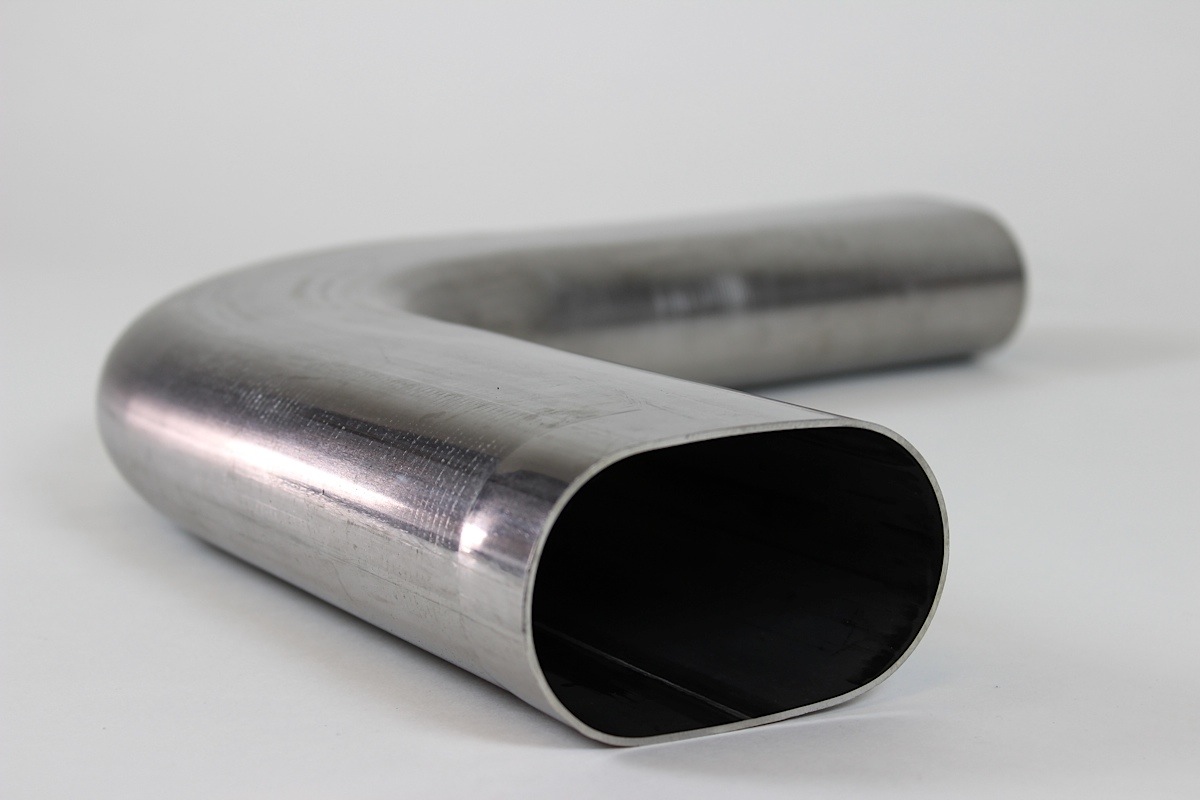 At Vibrant Performance we caught up with Aaron Weir who told us some great info about the exhaust tubing. “All oval tubing is made from 16 gauge, 304 stainless steel,” said Weir. “These are four inches wide by two and seven eights inches tall, which optimizes ground clearance.”
The downside with the oval design is that flow will be reduced as compared to a traditional round tubing. “This oval tubing will flow slightly better than a two and a half inch round tubing,” said Weir.
The oval design of the exhaust is purely for clearance. – Aaron Weir, Vibrant Performance
Vibrant also makes a round tubing to oval tubing connector, allowing us to connect the exhaust to the headers. In addition to the connectors, Vibrant manufactures flanges that fit the oval exhaust. “The flanges are three eights of an inch thick and have a recess in them for the tubing to fit nice and snug and all you do is weld around them.” We will be welding all of our exhaust together, but the flanges would be a nice touch as well. With all the correct parts now in hand we were able to start fabrication and the fitment of all the exhaust parts.
Fabrication And Installation:
To start, we tackled welding two of the mufflers together. Our fabricator Dean started this process by cutting the back half off one muffler, and the front half off a second muffler. From there he TIG welded the two halves together to make one muffler. While this combination provided an ultra slim muffler, the downside was a longer than normal muffler. We started holding the muffler up to the car to decide where the optimal mounting location was. We found the perfect spot was right where the bucket seats would normally mount. This is behind the front mount of our Chris Alston subframe connectors and on top of them.

The underside of the car with the floor cut and the patch panels started.
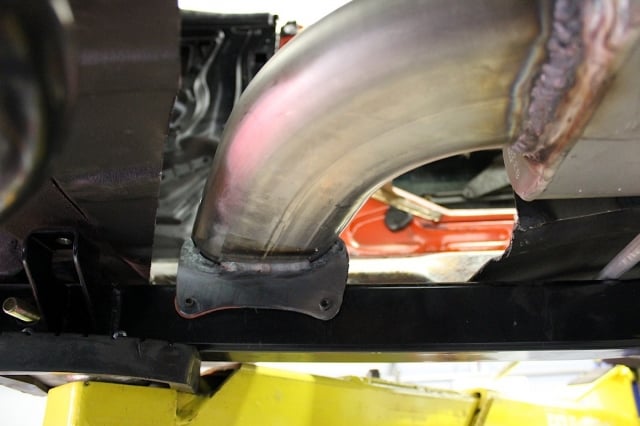
With our location spotted, Dean started cutting out the floorboard to provide enough room for the mufflers. After the sparks flew and the sheet metal was removed, we looked at getting the Vibrant tubing out through the rocker panel. Our original plan was to have the exhaust exit completely through the rocker panel. In order to help keep the rocker panel integrity, we ended up notching the rocker panel to make room for the exhaust to come through, then reinforcing it. A piece of rolled sheet metal was installed to finish off the opening and provide strength. Now that we had cut away all the sheet metal needed to make the exhaust fit, we started fabricating the exhaust tubing.


The required floor modifications to fit the exhaust.
Starting from the headers, we used traditional round tubing, utilizing Vibrant’s V-bands in order to get the bends needed to clear the cross member. This involved cutting and welding in order to get the perfect curve with clearance around the floor and cross member. After getting past the transmission cross member, we used a round to oval tubing adapter to get the tubing mounted to the muffler.
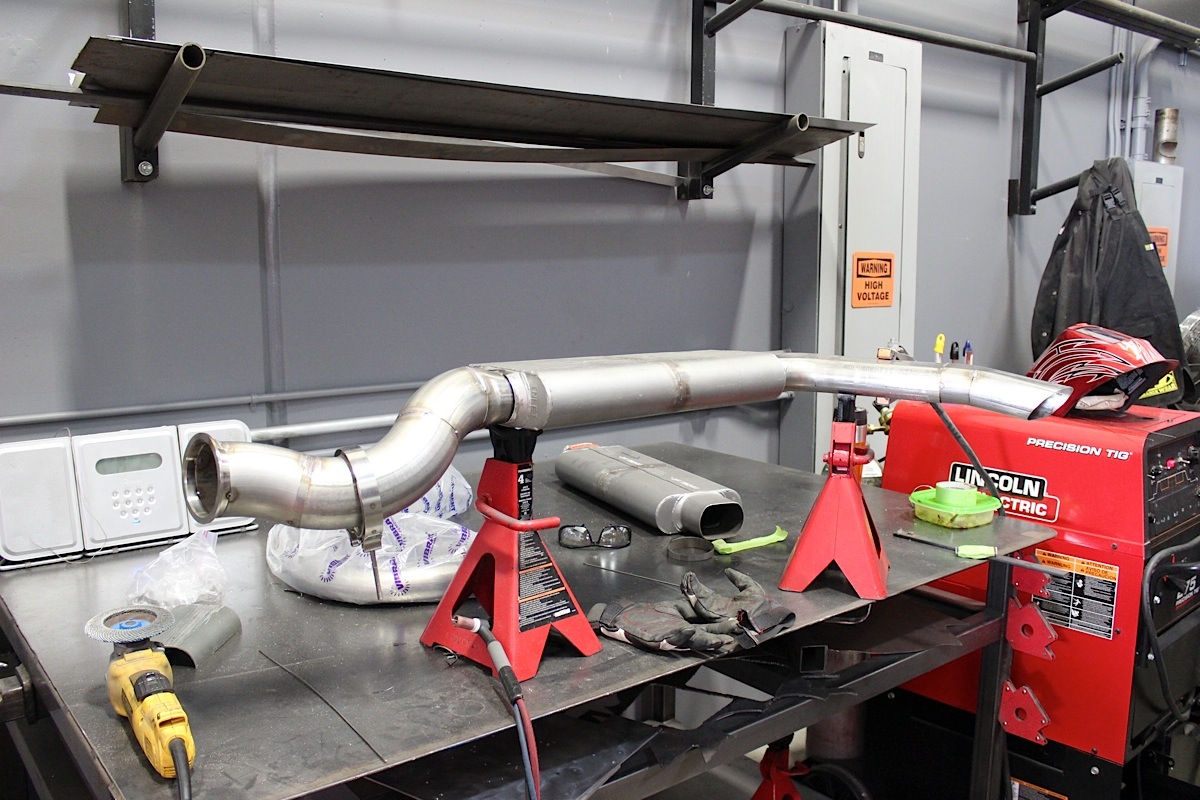
One side completed and getting fully welded.
On the exit side of the mufflers, we started by using the Vibrant oval tubing. We cut a 90 degree section of Vibrant tubing a little short to end up with almost a 45 degree turn. After the bend the exhaust shoots straight out under the rocker in the notch we cut earlier. A small relief was cut to angle the tips down and provide proper clearance as well.
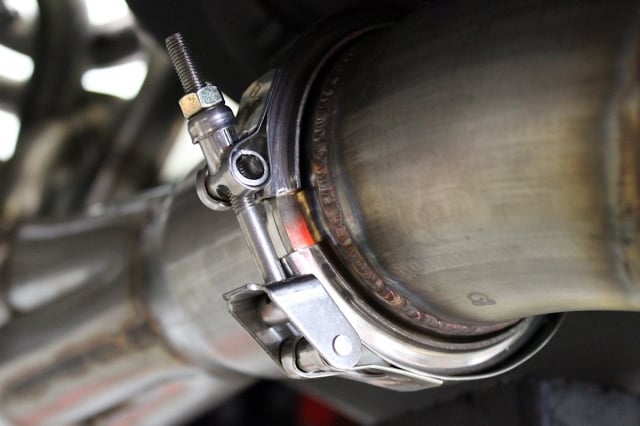
The V-band clamp at the collector and support bracket.
After the entire exhaust was cut and tack welded in place, we removed each side to fully weld every seam. With the exhaust installed using Vibrant Performance’s V-bands, there wasn’t much movement in it. Just to make sure that the exhaust stays in place and doesn’t bang around under the car, we fabricated up a mount directly behind the mufflers. This one bracket makes the exhaust solid, with no chance of movement.
One last thing to consider when fabricating exhaust is the serviceability. This exhaust does bend around and tuck up and can’t drop down by simply unbolting the V-bands and support bracket. But all we have to do is undue a few bolts and the entire cross brace section drops out, allowing access for the exhaust to drop down.
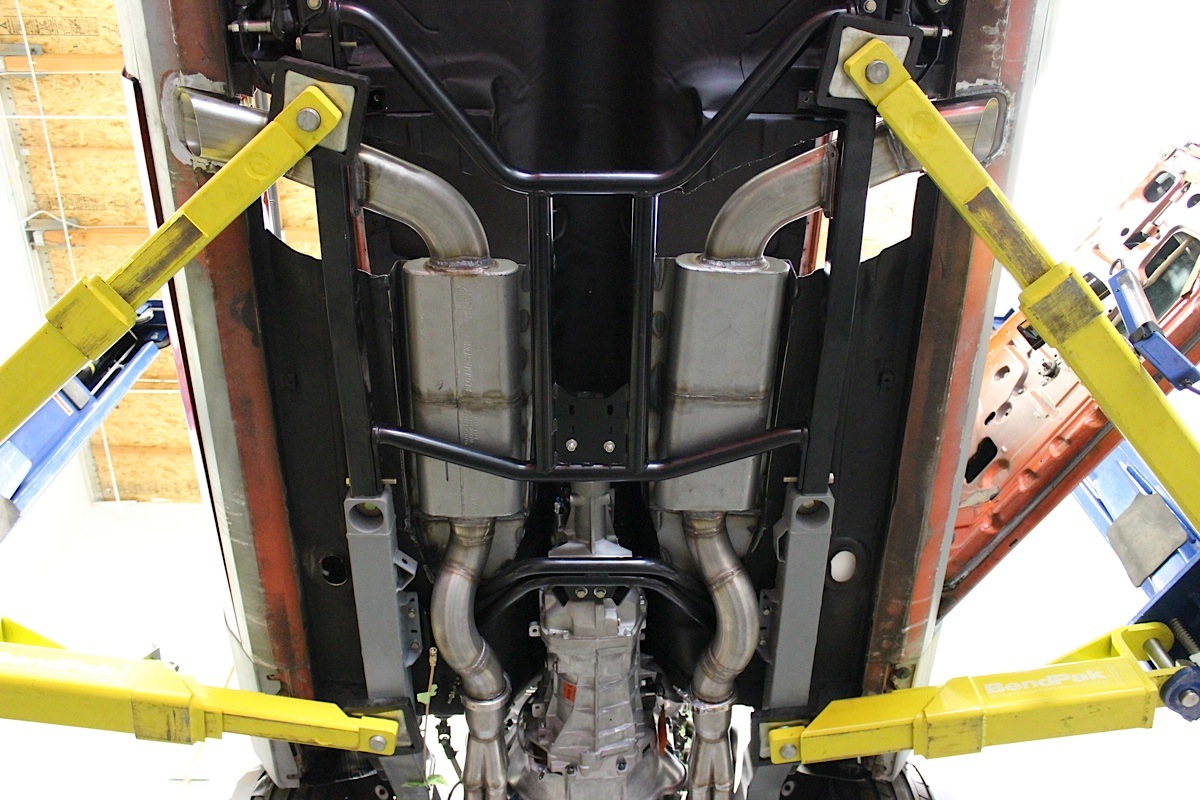
The finished exhaust!
The only thing left exhaust wise is to finish installing the floor, which we will be done at a later date. With exhaust system complete on Blank Slate, we are one step closer to firing up the motor in the car and hearing all 700 ponies roar. Be sure to check back for more updates!