
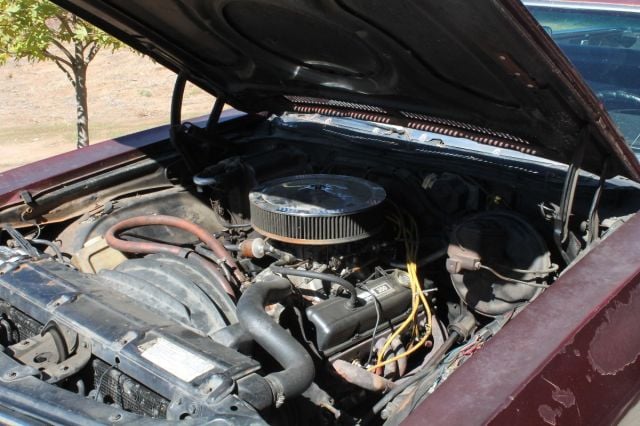
When it comes to crate engines, enthusiasts are given numerous choices to replace their tired motor with something new. Our own shop dawg, Dean Jigamian, breathed new life into his 1972 GMC Sprint by way of a 195+ horsepower Chevrolet Performance 350 crate engine ordered straight from Summit Racing. The engine itself had the potential for 260 horsepower, but there were other plans for this engine and the heads that came with it were only there to break it in.

We started with a $1,600 SBC crate engine from Chevrolet Performance, but that was only the starting point.
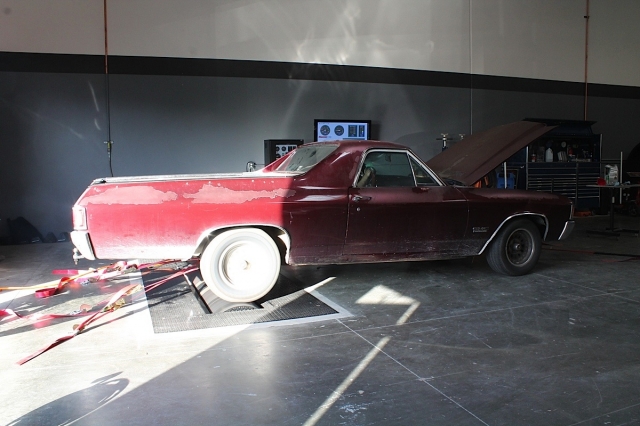
After about a thousand miles and being duly broken in, it was time to give this engine a facelift, as well as a complete top-end makeover. The Sprint is a daily driver that gets used for anything and everything, so it needs to be reliable and streetable.
As much as we’d like to, we can’t just throw a bunch of money at it seeking the kind of power some of our other projects around the shop have. We need to make sure that this daily driver can still get “driven daily” without excessive trips to the gas pump.
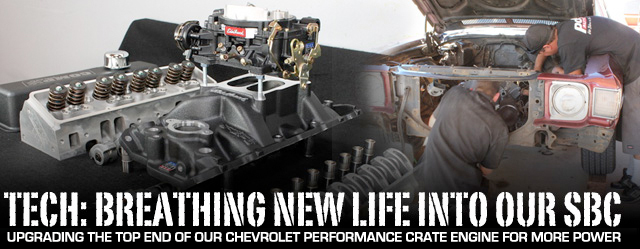
We ordered some goodies from Comp Cams to throw under the hood of the Sprint, like a camshaft, lifters, pushrods, roller rockers and valve covers. We also ordered a new set of Racing Head Service cylinder heads.
To finish off our install, Edelbrock will top it off with an intake manifold, carb and air cleaner. To get the ignition dialed in, Performance Distributors had what we needed for a new distributor and wire set.
Parts Upgrade
- Comp Cams Xtreme Energy Cam, Part #12-246-20
- Racing Head Service Pro Action SBC Cylinder Heads, Part #12052-01
- Comp Cams High Energy Hydraulic Lifters, Part #812-16
- Comp Cams Magnum Pushrods, Part #7695-16
- Comp Cams High Energy™ Die Cast Aluminum Roller Rocker Arms, Part #17002-16
- Comp Cams Pushrod Guide Plates, Part #4808-8
- Edelbrock Performer EPS Intake Manifold, Part #27013
- Edelbrock Performer Series Carburetor, Part #14063
- Edelbrock Pro-FloAir Cleaner, Part #1223
- Performance Distributors DUI Street/Strip Distributor, Part #12720BK
- Performance Distributors LiveWires Spark Plug Wire Set, Part #C9054

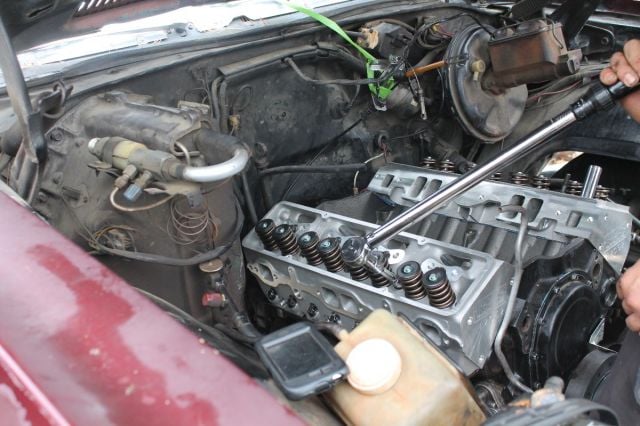
The Sprint made some runs, then the time came to tear it all down for the top end rebuild.
Out With the Old, in With the New
These upgrades provide a complete underhood – and seat of the pants – transformation of the original crate engine. Keeping with the theme of being streetable, we wanted a bigger cam and better flowing heads, but we weren’t looking for 600+ horsepower figures because after awhile that kind of power eats at the wallet a gallon of gas at a time.
If you’re only replacing the camshaft on a SBC, it still requires a lot of real estate under the hood to remove the cam, and it also means that more parts have to be removed than you’d think. This will often include the radiator and the condenser, if so equipped, and likely the front grille.
Plan on spending some time just prepping for a cam replacement by removing parts in front of the engine. When you have to install the new cam, you don’t want to damage any of the lobes, journals or bearings, so plan on removing anything that could be in the way.
Prior to removing parts, we set the engine at TDC so that when we reinstall the camshaft and the timing set we’ll already have the crankshaft in the proper position. Since we’re giving our SBC a complete top end rebuild, we also removed the cylinder heads and all accessory drives, as there will be new parts installed there, too.

When you wrench on musclecars for a living, it means that 'stock' isn't a part of your vocabulary.
With our crate engine’s low mileage, gaskets had been given enough time to seat properly, but they weren’t completely cemented into place like you’d expect from an engine with six digits on the rollers. The intake came off fairly easily, and since we’re topping off this crate engine with a new intake and carburetor from Edelbrock, the entire setup was set aside.

From the camshaft to the valve cover breather, all components in between also come from the COMP Cams family.
Removing the valve covers and the rocker arms are also necessary to remove the pushrods and lifters. The Chevrolet Performance 350 valve covers will be tossed aside to make room for a set of powdercoated wrinkle-finish cast aluminum valve covers from COMP Cams.
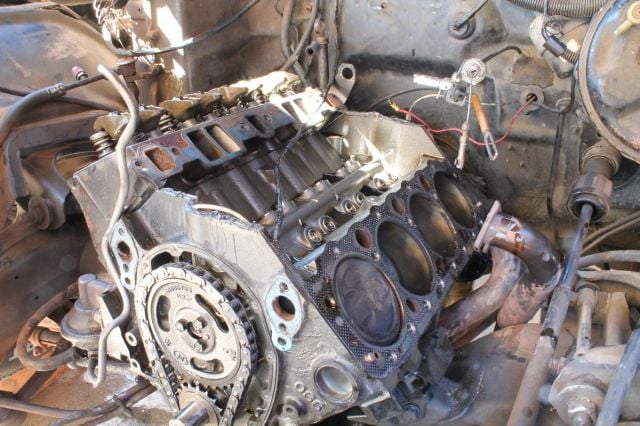
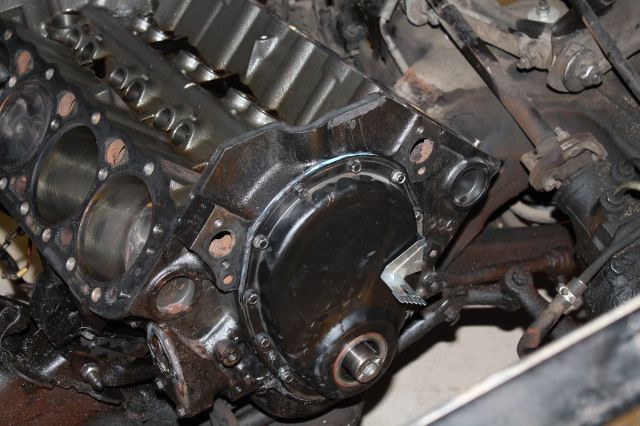
Since we’re replacing the entire top end of our Chevrolet Performance crate engine, we basically tore it down to a short block. Any further and it would have been easier to just remove the engine from the vehicle entirely.
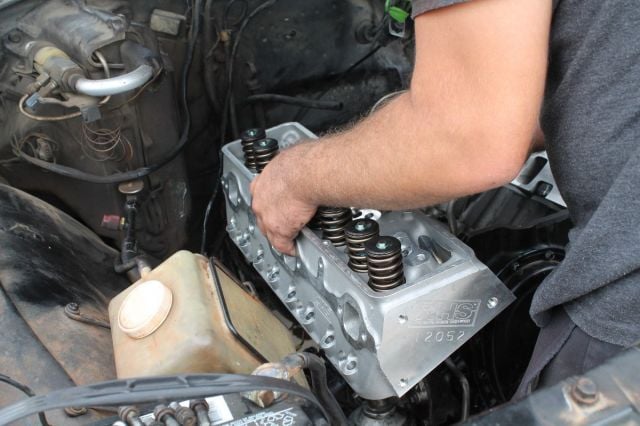
Dean enlisted the help of his friend Nate to help remove parts, and to help install the new parts. An extra set of hands is always welcome, not just for placing heavy cylinder heads, but also to help keep things organized and to make sure the reassembly gets done properly – two heads are better than one with a job like this.
Cam Removal and Replacement
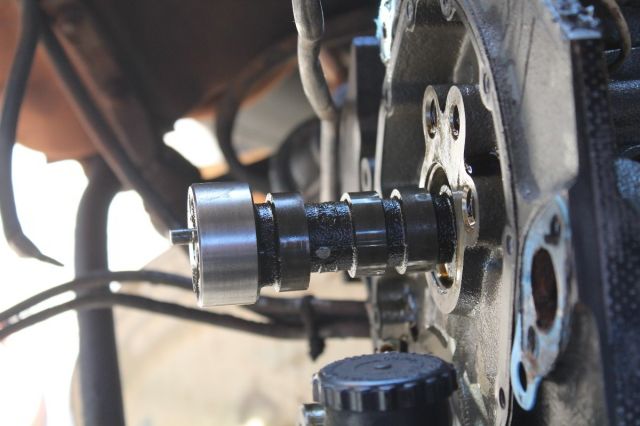
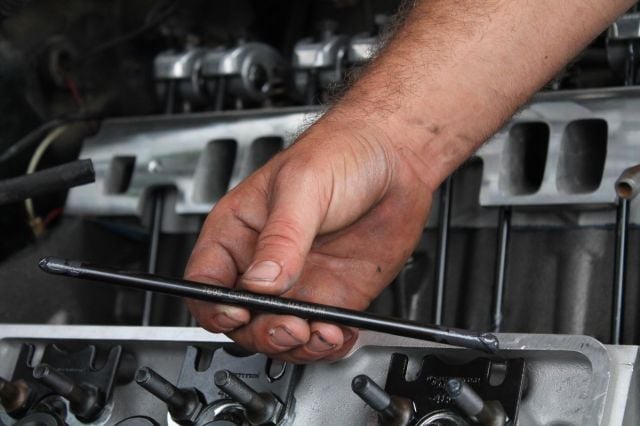
It’s best to use a cam puller tool to remove the cam, but a long bolt can be used in the face of the cam to facilitate removal. Although the stock cam will get tossed aside, it still needs to be removed carefully.
The camshaft needs to come out as straight as possible, and any time you come across a stubborn spot you need to realign the cam again and not try to force it out. With multiple bearing journals, you’ll likely notice the cam catching a couple times as you try to remove it. Gently adjust the cam angle until the bearings are aligned with the journals, and slowly work the cam out.

The new camshaft we installed is a COMP Cams Xtreme Energy Cam, part number 12-246-20, which should give us very strong mid-range torque and a good throttle response. This particular cam has been nitrided, which is a process that helps to harden and smooth out the contact surfaces on the cam. The nitrogen is forced into the steel to fill the microscopic voids and this helps to give the cam and lifters much better wear protection.
Why is the nitriding process necessary? Thank the ever-tightening EPA regulations for that, because with key chemicals, like phosphorous and zinc, being removed from conventional motor oils, engine builders began noticing excessive wear on lifters and camshaft lobes.
Many engine builders now recommend a zinc additive with every oil change for this reason. Nitriding valvetrain components became the solution that COMP Cams pioneered to help eliminate the dishing that was found on flat tappet lifters.
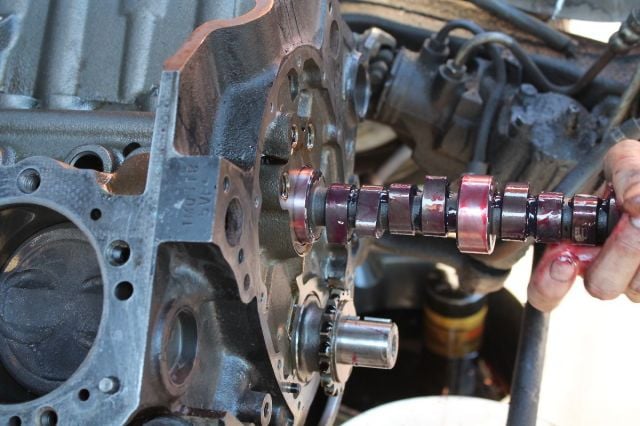
To install the new cam, it’s time to get messy. Included with the cam is a packet of COMP Cams cam and lifter lube that needs to be spread generously on the camshaft itself, on all journals and lobes. Installation is just as specific as the removal, and a cam installation tool helps.
We slowly inserted the cam into position, keeping the lube generously applied and being sure not to wipe any of it off. This lube helps to break in the cam, but also aids in the installation as tolerances are very tight. Whenever the cam stops, readjust the angle and slowly work it into place, rotating it if necessary, until it seats into the block.
With the stock camshaft removed, we lubed up the new cam and slowly worked it into place.


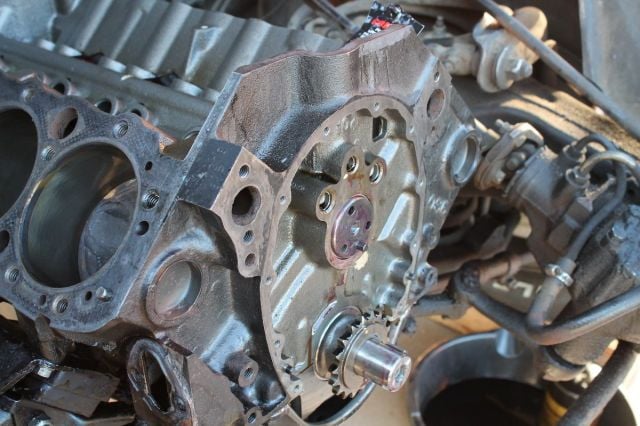
With the cam in place, it was time to reinstall the timing set. The cam sprocket will install only one way onto the cam, and the timing mark on the cam sprocket must be lined up with the mark on the crank sprocket. With the chain on the cam timing gear, it can be put into place over the crank sprocket and, with the marks lined up, rotate the cam so the dowel is aligned to the sprocket.
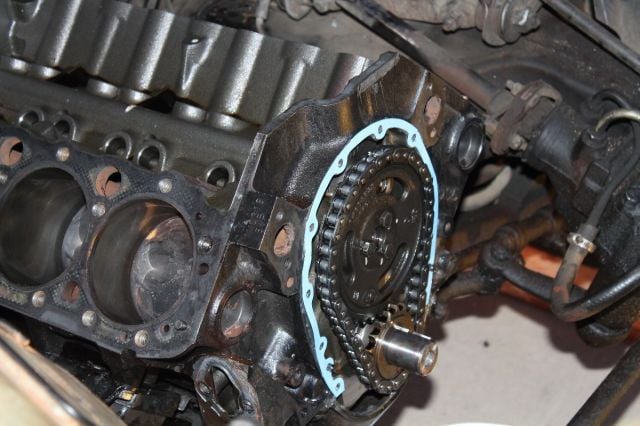
Using a threadlocker is good insurance on the three cam sprocket bolts. The timing cover gasket is put into place, and the timing cover is installed. We used a light coat of gasket sealer to help hold the gasket in place while the timing cover was installed, and the bolts were tightened.


Cylinder Head Installation
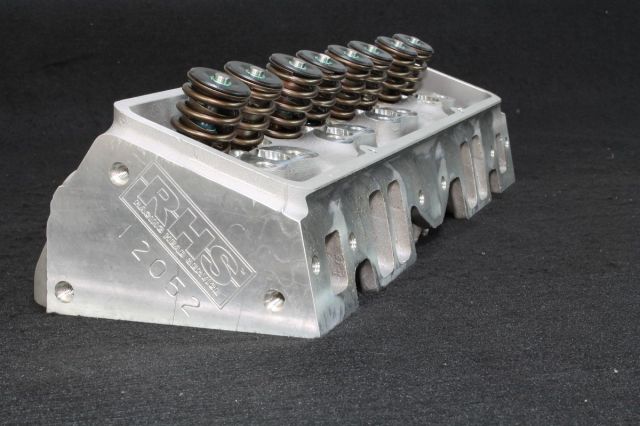
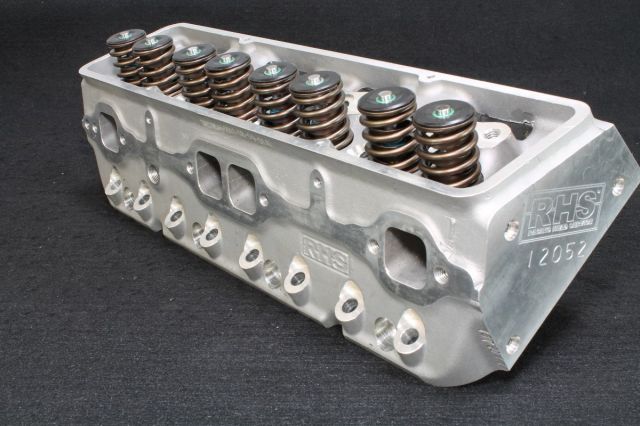
The new assembled cylinder heads are Racing Head Service’s Pro Action SBC aluminum heads (part #12052-01). These heads have 180cc intake runners and 64cc chambers, and are assembled with 2.020 inch intake and 1.600 inch exhaust valve sizes. The RHS heads will give us considerable power and torque over stock heads, and have improved port and runner designs, as well as modified water jackets for better performance and cooling efficiency.
The advantage with our assembled heads is that we use our own components from COMP Cams, and not off the shelf parts from various vendors. -Kevin Feeney

We made a call to Kevin Feeney at Racing Head Service and asked him about the design of these cylinder heads, and the benefits of their assembled heads versus a bare head for upgrades like this. He said, “The advantage with our assembled heads is that we use our own components from COMP Cams, and not off the shelf parts from various vendors.”
“Many times when you buy a cam kit you have to replace springs and retainers because the assembled head isn’t compatible with the cam. We avoid that problem because we assemble them with our own parts,” Feeney continued.
With many manufacturers, and with some enthusiasts, the flow numbers and port sizes are the predominant feature for the cylinder head. But Feeney told us, “We design our ports not just to flow the most air but to get the most velocity. We also pay particular attention to the water jacket design to get better coolant flow, too. We worked hard looking at the thermal dynamics of these cylinder heads for street use and endurance.”
RHS uses a permanent mold for their cylinder heads, rather than an extrusion process. This method gives more consistency with the casting and allows for stronger metallurgic properties when machining the head surfaces.
The RHS heads look great, and perform even better. These heads are not just designed to flow more air, but designed to optimize that airflow, providing more velocity and torque.


We needed to measure the pushrods for proper length, so the cylinder heads need to be installed completely. With 17 cylinder head bolts per cylinder head, torquing them down is a time consuming process and this is where the help of a friend comes in handy.
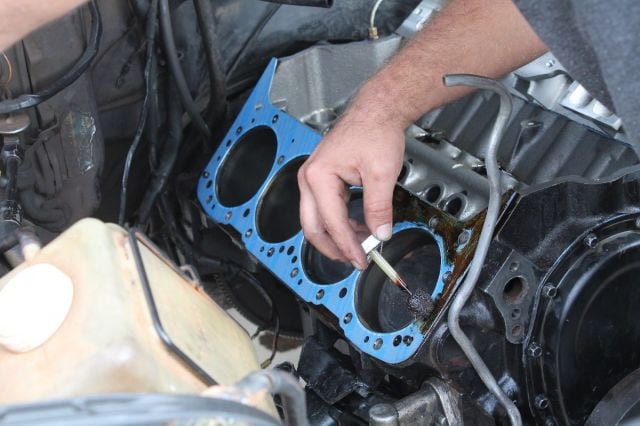
We first cleaned the engine block surfaces of all old gasket material. Anytime that you’re preparing a surface you need to make sure that you are not using any sort of abrasive to remove the remnants of the old gasket. A sharp razor and gasket remover can work well, it simply takes time and patience. With the low mileage on our Sprint, gasket removal was fairly quick and easy.

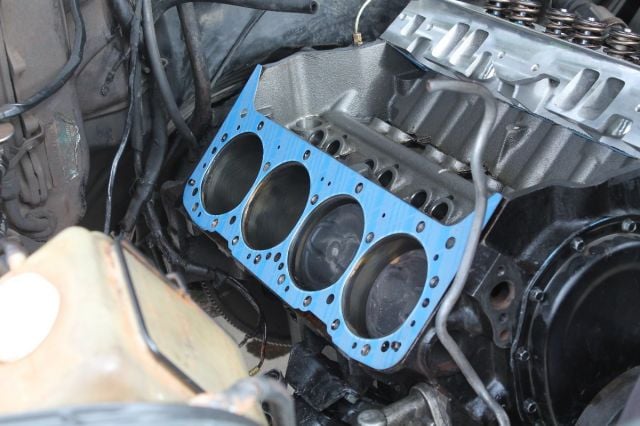
Indian Head Shellac from Permatex was used to give a good coating to the mating surfaces on both sides of the head gaskets.
A good shellac coating will help to seal the head gaskets in place. We used Permatex’s Indian Head Gasket Shellac to coat the block surface first, and then after placing the head gasket on the block we coated the gasket prior to setting the head down on the block. The shellac will help hold the gasket in place while you set the head down, but will also help to form a bond between the gasket and mating surfaces.
 Next, we torqued down the three-different-length head bolts. It’s a good idea to put a coating of thread sealer on all of the head bolts, as some of them may go into a water jacket and you don’t want to find out too late that thread sealer was needed.
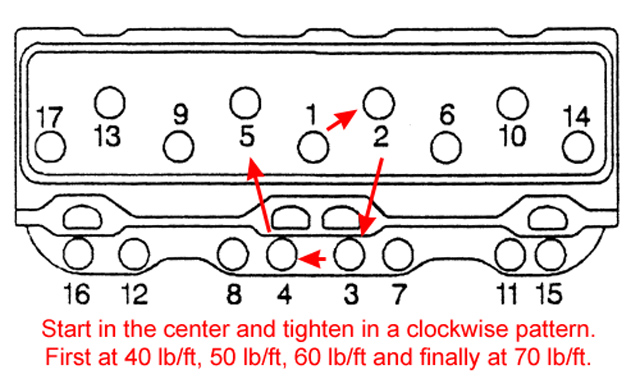
The recommended sequence for tightening the head bolts is to start in the center and tighten all bolts to 40 lb/ft in a clockwise-pattern until the 17th bolt is tightened. The sequence is then repeated for 50, 60, and finally 70 lb/ft of torque on all bolts.
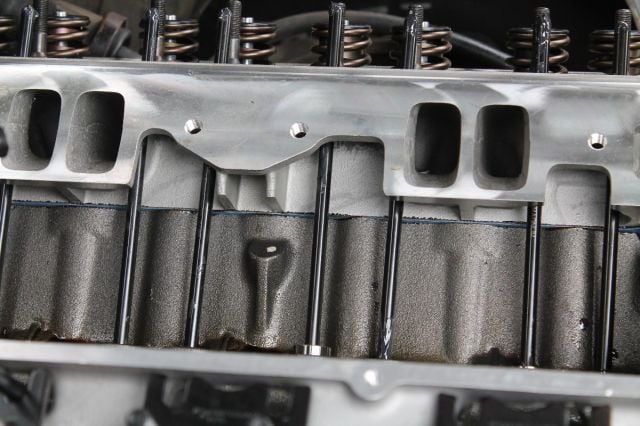
At top, thread sealer is recommended for head bolts, then tighten in sequence. At bottom, a comparison of the old and new cylinder heads.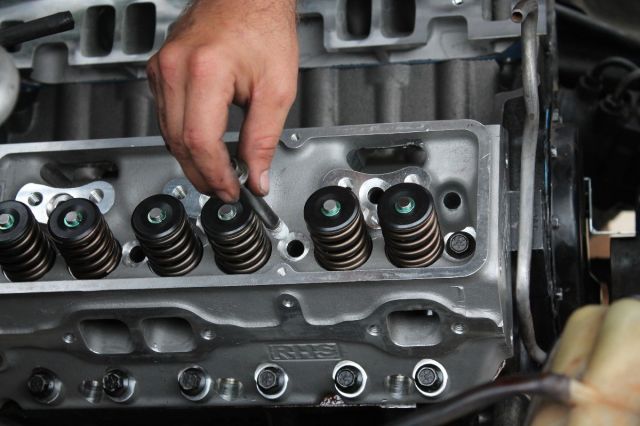

Many head bolts are torque-to-yield (TTY), meaning that once they’ve been torqued they have stretched and will no longer hold the same clamping force if reused. Although some techs might tell you it’s safe to reuse head bolts, it’s not our recommendation, nor that of RHS. When replacing as many components as we’re replacing, buying a good set of ARP head bolts is worth the extra money.
Pushrod Length and Valve Adjustments
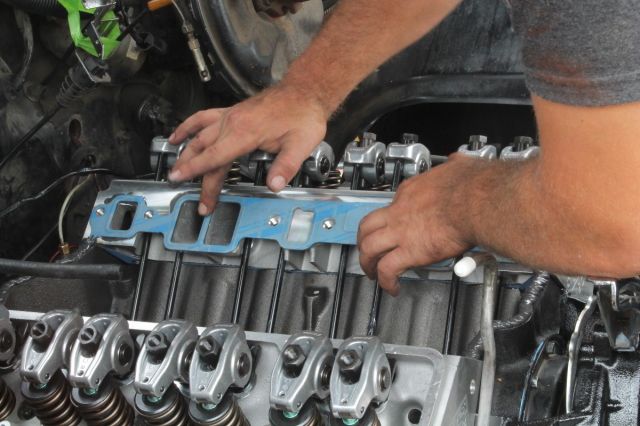
With the cylinder heads torqued to spec, it’s time to measure pushrod length. We soaked the COMP Cams High Energy hydraulic lifters in COMP Cams break-in oil overnight to assure us that the oil will be completely soaked into the lifter and it will be lubed properly. The goal here is to have all parts tightened and to have the roller rocker hitting the top of the valve stem directly in the center.
 If the pushrods are too short, you don’t get proper valve lift; too long and the valves may not close fully, so this is an important step whenever you swap cylinder heads. A typical pushrod tool is just an adjustable pushrod that you twist to expand or contract to determine proper pushrod length.
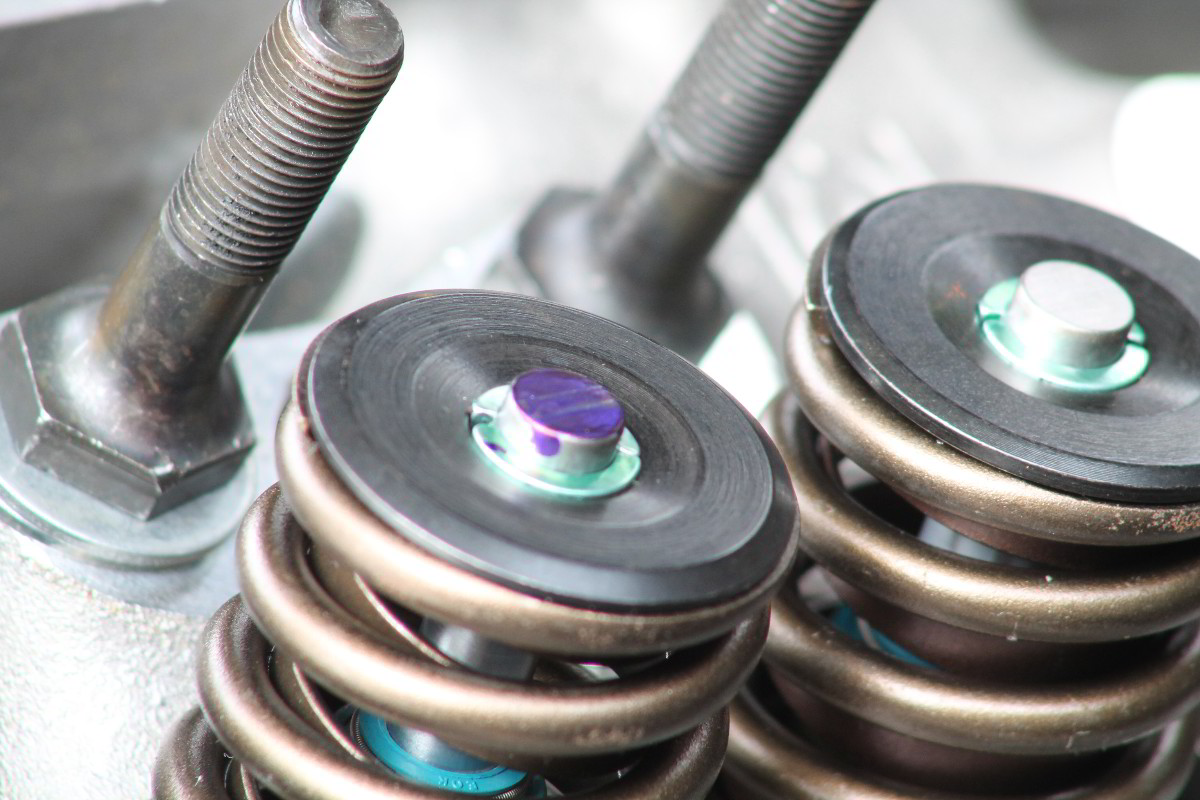
With the pushrod length measured at 8.000 inches, we installed a set of COMP Cams Magnum pushrods and High Energy Aluminum roller rocker arms and guide plates. The hardened guide plates are used in any high lift cam configuration to keep pushrods aligned properly.
The roller rockers have a needle bearing fulcrum and roller tip, with a larger body than stamped steel rockers. The cost effective aluminum construction of these rockers provide an excellent strength to weight ratio. They’re designed to be stiffer and more durable, and are capable of providing the added valve lift needed in a street or mild performance engine.
They have a 3/8-inch stud diameter and a 1.6 ratio, this gives better lift over factory, and combined with the roller tip it creates less friction than the sliding factory rockers, which helps to lower temperatures and improve both response and horsepower. They can be used with up to 550 lbs of open spring pressure.
When making adjustments, keep in mind that hydraulic lifters don’t require a feeler gauge for setting valve lash like you would with a solid lifter. The adjustment process is similar, but you use the lifter as a guide for proper rocker adjustment. Once the valvetrain was assembled, we began to adjust each cylinder one at a time in the proper firing order.
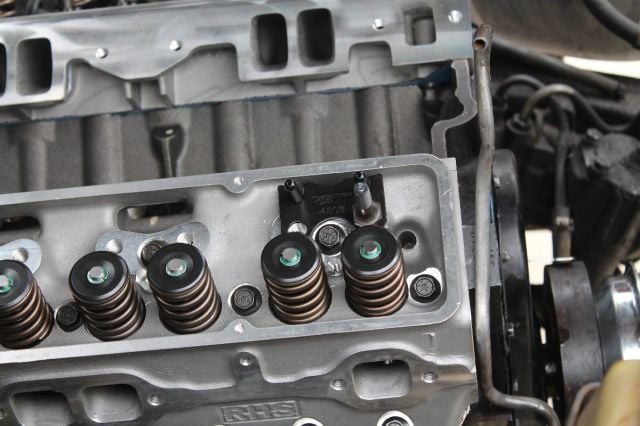
After soaking in oil overnight, the lifters are dropped into place, the pushrods inserted, and the roller rockers get installed.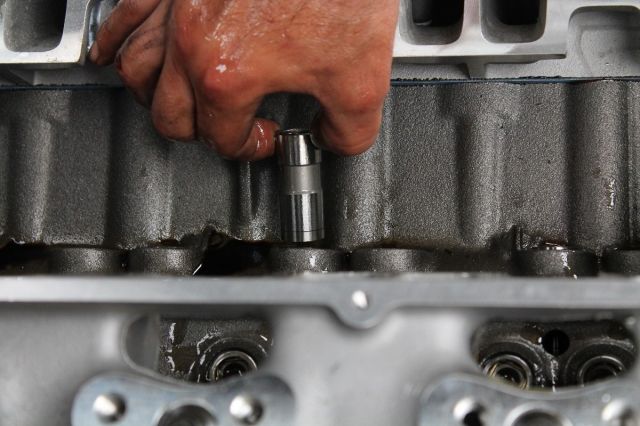


The valves are set at what is called zero-lash; it’s a point where you’ve taken all of the slack out of the pushrod. From there, turn the adjuster nut a half-turn to give proper pre-load on the lifter, pushrod and rocker arm, and tighten the adjuster nut using the proper Allen wrench to hold the set screw in place. Most professionals will tell you to make your adjustments cold, and to do so in the proper firing order so that valve overlap won’t be an issue.
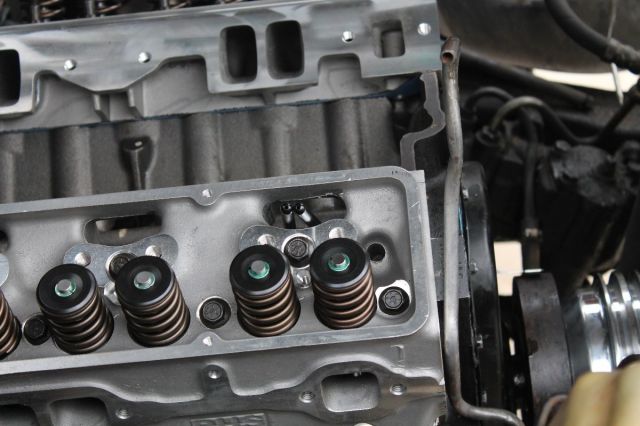
Topping off the cylinder heads is a set of cast aluminum valve covers from COMP Cams. The wrinkle finish is powdercoated, so it not only looks great but will last for a long time. Anyone who has ever rattle-canned wrinkle finish knows that it doesn’t always look the same a year later. When the finish is powdercoated, it doesn’t wear off, and it won’t get dull and hold grease or oil in it the way painted valve covers seem to do. Included with the valve covers was a nice set of chrome breathers, and the chrome “COMP Cams” logo is a nice touch.
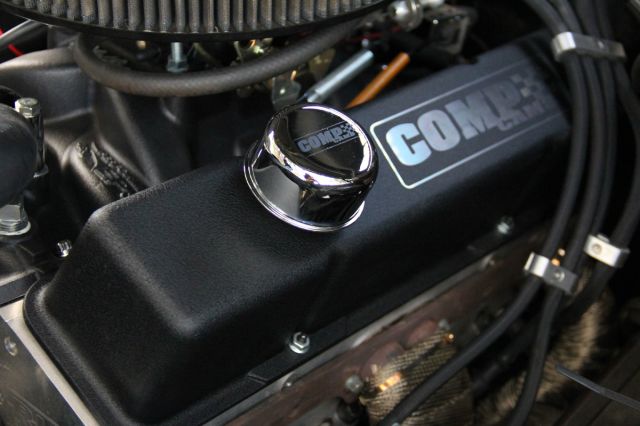

The cast aluminum valve covers with black powdercoat finish complement the theme and fit in perfectly.
But Wait, There’s More!
What good would it be to install all of these components on this recently purchased SBC, and then bolt the old carburetor and intake back on? We knew that the old parts weren’t going to be compatible with the new, so we picked up an Edelbrock Performer EPS intake manifold and 600 cfm Performer Series carburetor, both in black powdercoat finish.

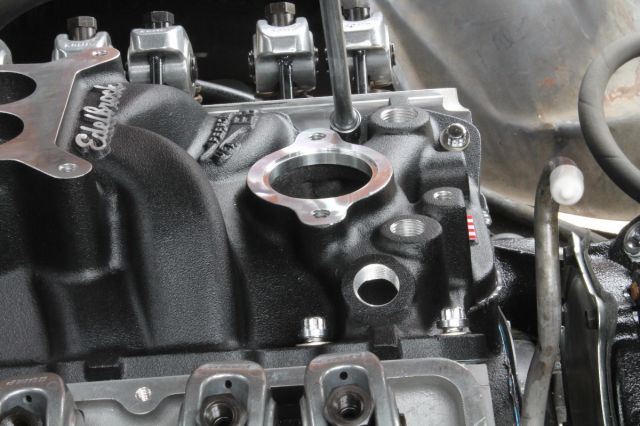
The Performer EPS was designed to work well with the Performer Series carburetors, with tuned runners for increased power and torque over the Performer intake.
The Performer EPS intake manifold was designed for 1986 and earlier SBCs, and is a dual-plane design that is optimized for performance. The runner design is tuned for peak torque at about 3,500 rpm, and helps to make power from off-idle through 5,500 rpm. Edelbrock has tested this intake and found an additional 5 horsepower and 9 lb/ft of torque over the the Performer intake manifold, with average increases of 5 lb/ft of torque from 3,000 to 4,500 rpm – where you need it the most. The black powdercoat finish will assure that you’ll have a look that lasts, and cleans up easily.
Picking a carburetor for our SBC shouldn’t be based on the “size matters” philosophy. We chose the 600 cfm carburetor for a reason: it fits with the size of the engine, and the components we installed on this engine. Since our Sprint is a street driver, and not a track hero, we wanted to have a carburetor that will give us the performance we wanted, when we needed it, and still allow us some extra time between fill ups. For those reasons, the Edelbrock Performer Series carburetor was selected.
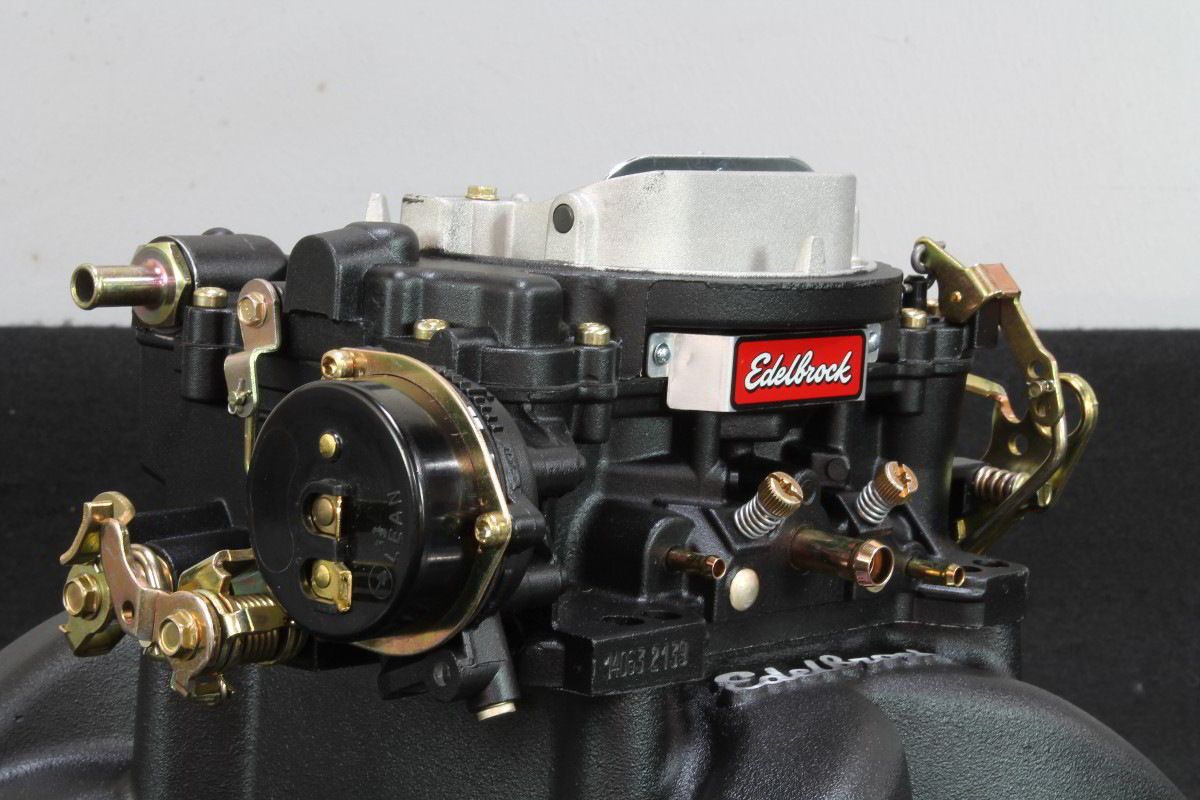
The Performer Series 600 CFM carburetor was calibrated for economy, and we chose it because the Sprint is a daily driver.
The 600 cfm is optimum for small-block and small displacement big-block engines, for stock or mild performance applications. Because this carburetor is calibrated for fuel economy, Edelbrock recommends that this carburetor is not used with intakes such as the Torker II, or the RPM. This carburetor will run about 2% leaner than the performance carburetors, and includes the needed timed and full vacuum ports for ignition advances. It’s also a non-EGR, electric choke application with a vacuum operated secondary.
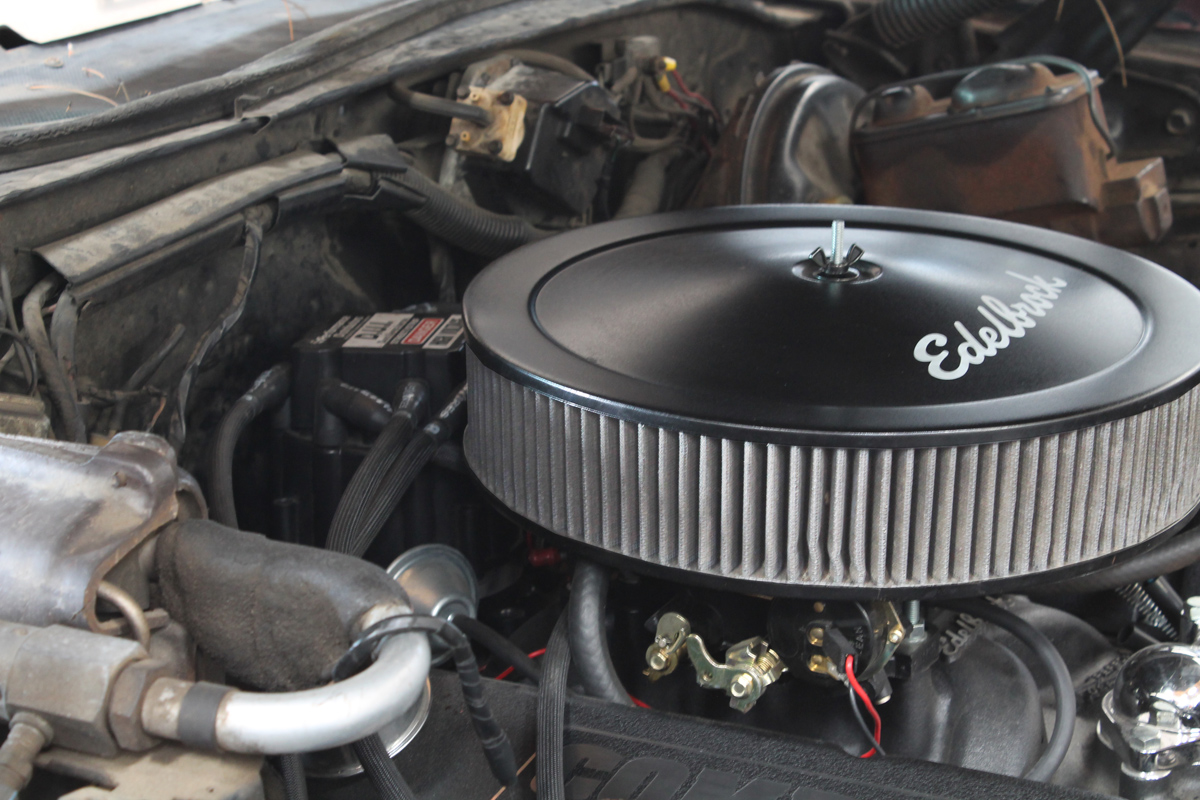
Keeping with the good guys wear black theme, we liked the finish on the intake and carburetor for two reasons: we didn’t want a lot of chrome and flash, and the powdercoat is both durable and won’t lose it’s sheen. Of course, we had to match it up with an Edelbrock Pro-Flo air cleaner in, you guessed it, black powdercoat. It’s 14-inch diameter assures plenty of surface area for breathing, and the 3-inch tall element fits nicely under the hood.


Handling the spark, we installed a new D.U.I. distributor and LiveWires spark plug wires from Performance Distributors. The Davis Unified Ignition utilizes GMs H.E.I. (High Energy Ignition) style distributor cap and ignition. Unlike a conventional distributor, the ignition unit and coil are incorporated into the distributor cap, but the D.U.I. gets its spark from their 50,000 volt coil, which produces a longer spark than a standard ignition.
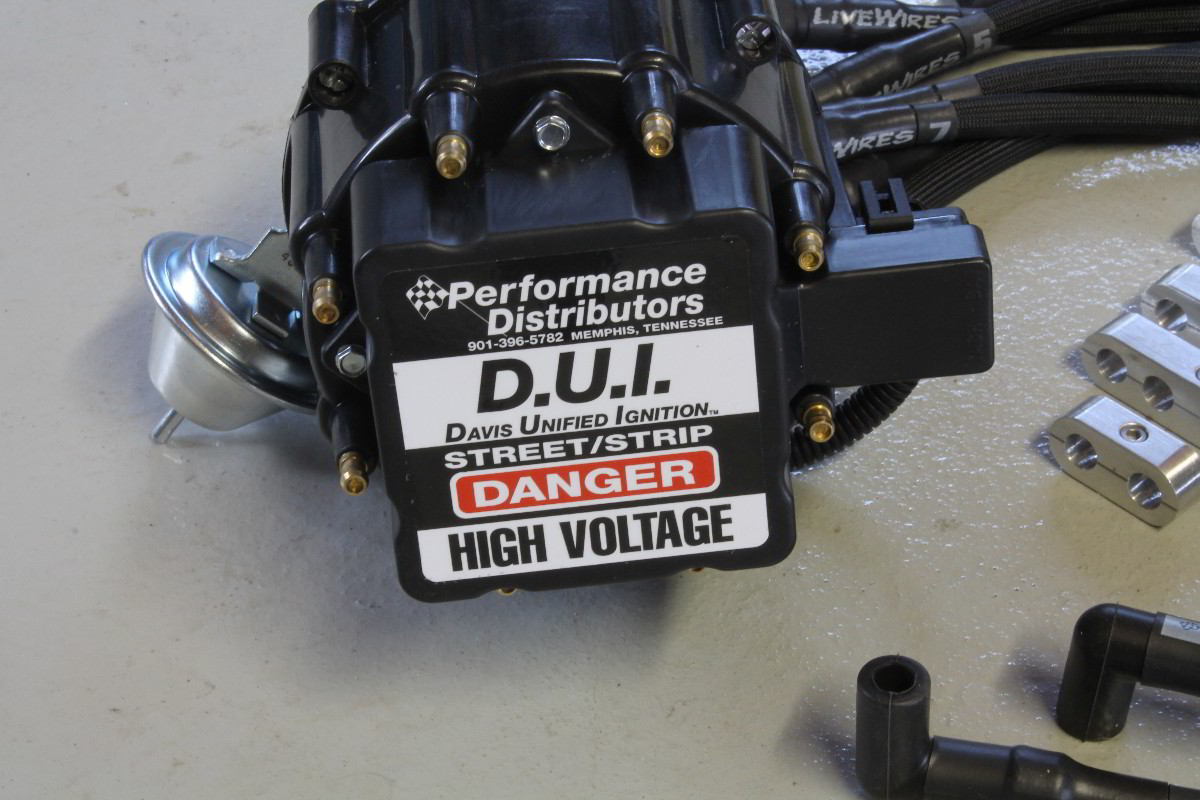 Connecting the distributor is a simple one wire connection to a 12 volt hot source, with no other external boxes or wires to mess with. The Dyna-Module producing the spark allows a .055-inch spark plug gap; the bigger the gap, the bigger the spark – and that translates into a more complete burn in the combustion chamber. This complete burn equates to an increase in power and torque.
Other benefits of the D.U.I. Street/Strip distributor include better starting, a smoother idle, and increased economy. But getting that spark to the plugs from the distributor requires a good set of spark plug wires, and for that we called on Performance Distributors again for a set of their LiveWires. They feature a heat-resistant sleeving that extends from boot to boot, with heat-shrink tubing at either end to keep the sleeves in place. The sleeves protect the wires from underhood heat and are resistant to moisture, chemicals, fluids and flame.

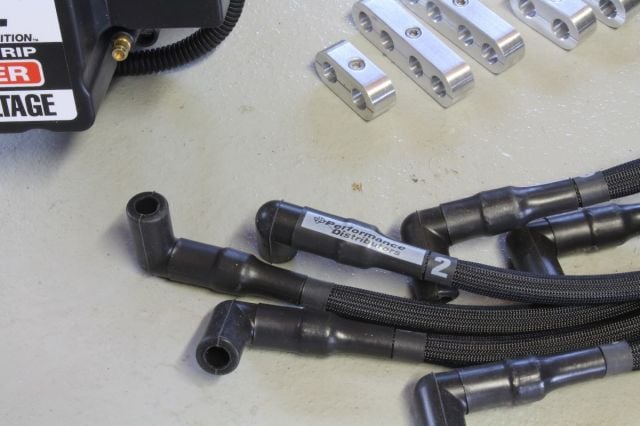

One other thing we liked about our LiveWires was that they include the cylinder numbering on the wires themselves – at both ends. These custom-fit wires were made for the SBC, as well as other popular engines, and we liked that they were just the right length, meaning that we didn’t have to cut and crimp the wires. Of course, we chose the black wires, but other colors are available, too: red, blue, yellow, purple and now silver.
The sleeves will protect your wires up to 1,400 degrees, and have a spiral core wire, which means they have a stainless steel wire wrapped around a magnetic core. These wires will not interfere with radios or computers, so there is no electrical interference from these low resistance spark plug wires. They’re also available with different boot configurations, and if you have a custom application, contact Performance Distributors and they can make a custom set for you.
Overall Impressions
We poured all of the fluids and the final checklist was run through and we were all set to go. It was time to fire it up, check for leaks, and to set the timing. The stock engine was rated at about 190 horsepower with the potential of 260, but we were aiming higher with our upgrades.
It fired right up, and with that turn of the key the Sprint entered musclecar status. But what kind of numbers will we see? It was a bit of work, with a new engine and a complete top end upgrade, we had some expectations, and we knew that our refreshed SBC crate engine would benefit from the RHS cylinder heads, Edelbrock intake and carb, the Comp Cams cam, lifters and rockers, and the D.U.I distributor and LiveWires.
After all of our new parts were installed on the SBC, we ran the Sprint for a couple of months to break it in before we got some numbers from the dyno. Then we ran into some problems with the bottom end, and it started making some noise that left us rather uncomfortable. We’re not sure where the problem occurred – it’s possible that we didn’t tune it properly – and unfortunately we seemed to have damaged a piston. We weren’t able to get the Sprint on the dyno, and figured we better fix it before we push it too hard.
To spare us from any possible damage to the rest of the engine, and the new components we installed, we are tearing it all back apart and we’ve decided to stroke the small block to 383 cubic inches. So stay tuned for part two of our stroked out Sprint, when we come back with a complete, fresh build to get the Sprint back into the game.


