 [1]
[1]
In the ten years since the F-body left production, the aftermarket has refused to let go of these cars. Enthusiasts continue to keep buying them up, installing the latest performance parts, and generally doing their best to keep today’s competition in their rear view mirror.
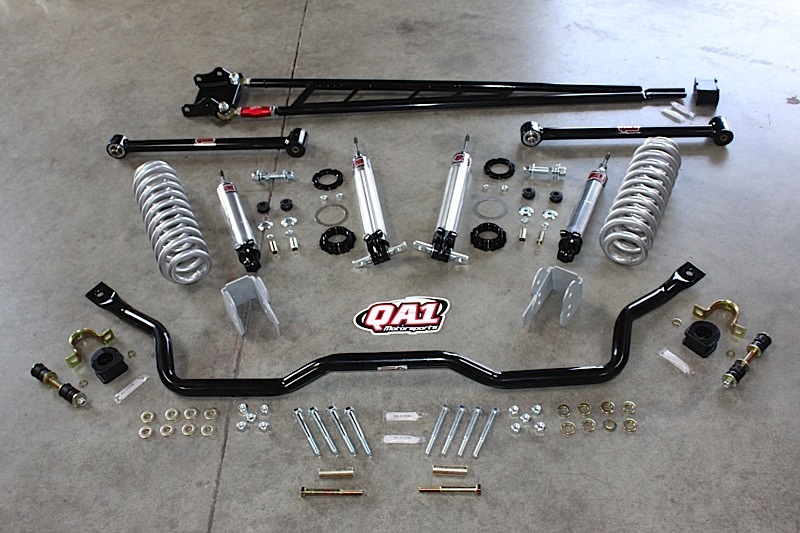
 [2]QA1 Pro-Touring Package Contents:
- 1 3/8-inch hollow front sway bar
- 1-inch solid rear sway bar
- adjustable torque arm
- front coil springs
- adjustable front struts
- adjustable rear shocks
- adjustable panhard bar
- rear lower control arms
- LCA relocation brackets
- end links
- hardware
- instructions
Why? Well, price is probably a big factor. When these cars went out of production, they stickered in at as much as $34k – then a decent chunk of change. The final examples largely held their value up until the 5th-generation Camaro was released.
Now they’re reaching levels that pretty much anyone can afford and their awesome LS-series platform lends to immense performance potential that just about any gearhead can envy. To all of the fourth-gen fans out there, you’ll be happy to know that we’ve got more than one in our stable.
Our Test Mule
Our example is a 2002 Trans Am WS6 that’s seen it’s share of miles (83k), and a healthy dose of modifications. It has ported heads, a lumpy aftermarket camshaft, a built transmission, and just about every bolt-on available. Unlike most of these cars, it’s still owned by it’s original owner (your author), and yes, it has a slushbox.
With all of the modifications we’ve made to it in the past, its primary function was to be an occasional daily driver that would see 1/4-mile track duty. But with your author’s taste changing from straight line acceleration to autocross, we’re looking at switching out its current suspension set-up. Besides, we miss driving a car with t-tops – call it nostalgia.
That meant getting in touch with our good friends over at QA1 Suspension [3], and ordering up their awesome new pro-touring suspension package that’s designed for the 1993-2002 Chevy Camaro and Pontiac Firebird. It’s a bolt-in kit that comes with everything you need to change the way your car rides, handles, and launches.
 [4]
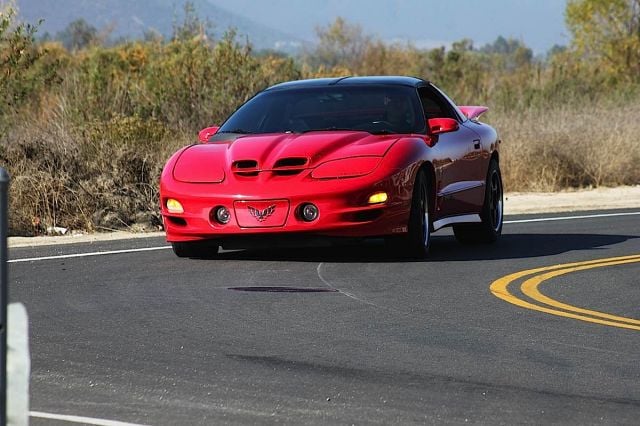
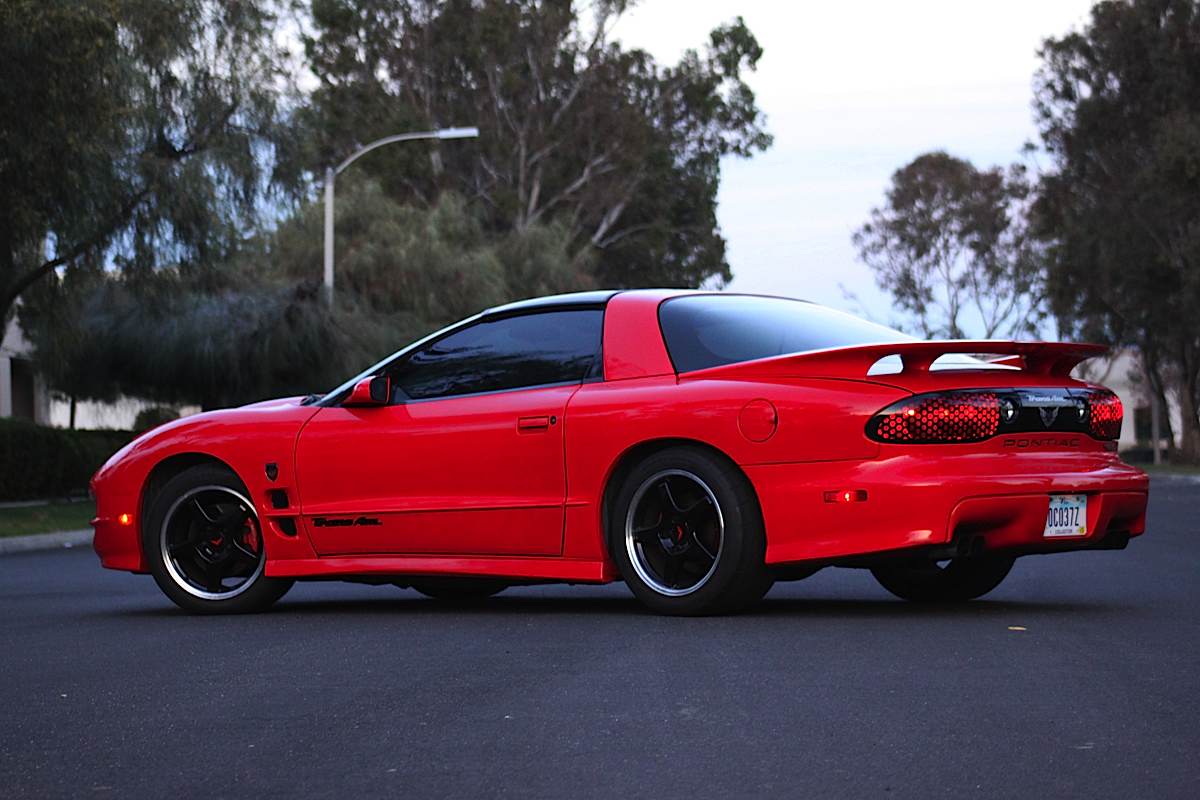
[4]Our subject for the QA1 suspension package was this '02 Trans Am WS6.
Baseline Testing
 [5]
[5]We took this corner at 30 MPH, and you can see in the photo that even though the wide tires are doing their best to keep the car planted in the turns, there is evident body roll.
The T/A’s suspension had some work done to it in the past, including a set of lowering springs, stock replacement shocks, an off-brand rear sway bar, and a strut tower brace. But all of these components were installed over eight years and thousands of miles ago, and the years seemed to have not been very kind to our aging suspension pieces.
Handling was never really an issue with this car – not even when it was stock. GM did a decent job with the WS6 Performance & Handling package back in the day. However, it did sit high like a truck when it rolled off of the Canadian assembly line, and with the continuous efforts of the aftermarket, there’s always room for improvement.
We took the WS6 down the street behind our office to get a baseline, and to have one last final blast with our current setup. Although we are happy with the vehicle’s current ride height, the ride is brutal. If you were to run over a donut, you would feel the jolt in the middle of your spine. Plus when we took the corner at 30 MPH, there was a lot more body lean than we would have liked.
The pro-touring scene has been a great market for QA1 because many people are looking to give their musclecar a better stance and improved handling characteristics. – David Krass

It might partially have something to do with the shocks – they’re ancient, rusting, and not remotely adjustable. Plus, the car has mostly sat for the past three years in lieu of other projects that demanded time and effort. Simply put, this suspension won’t be missed and it made us look forward to the new components even more.
QA1’s Suspension Package
QA1 is known largely in the world of drag racing, thanks to their lightweight and strong suspension pieces, but thanks to the continually growing pro-touring scene it’s a trend that no aftermarket supplier can afford to ignore these days.
David Kass is QA1’s Technical Consultant/Customer Service Lead and he was very helpful in the way he described what each component was for, how it was developed, and how it will be used in our application. He’ll be providing his insight along the way.
David told us, “The pro-touring scene has been a great market for QA1 because many people are looking to give their musclecar a better stance and improved handling characteristics.”
 [6]
[6]
The QA1 suspension kit came to us in several large boxes – enough to take up quite a lot of storage space in our shop. Once we opened the boxes and examined all of our new goodies, we got in touch with David Kass from QA1 to tell us more about the parts we received.
Apart from the from the sway bars and front coil springs (QA1 doesn’t make rear springs for this application), every major component is fully adjustable. There are a total of 18 combinations to tailor your suspension to suit your needs in terms of finding the perfect balance of ride comfort and handling quality for you. The front and rear shocks, the Panhard bar, and the torque arm can all be tuned – and thanks to the lower control arm relocation brackets, the LCA’s are adjustable too.
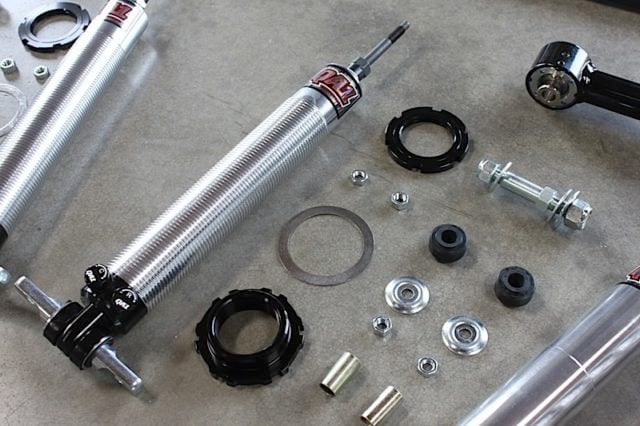 [7]
[7]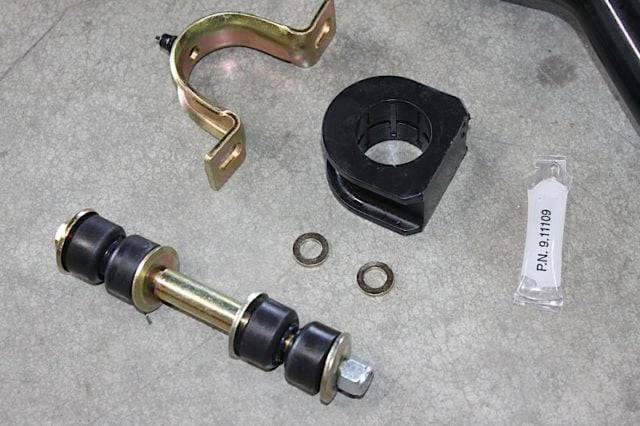 [8]
[8]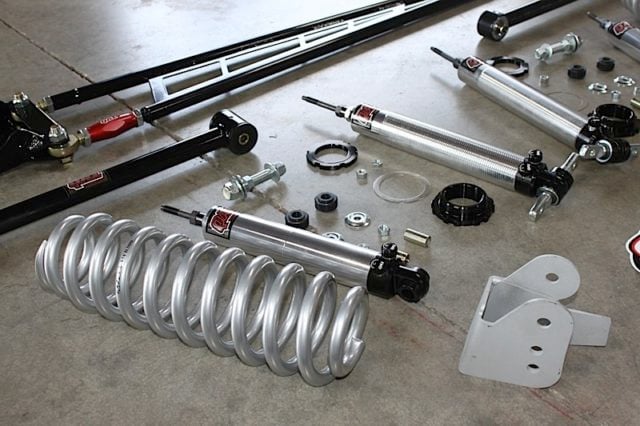 [9]
[9]
We took a few close up shots so you can get a better idea of the quality that QA1 incorporates into the design of their products. From their lock washers to the more substantial pieces like the torque arm, sway bars, and the shocks, everything QA1 makes is top-notch.
Installation of the Coil-Overs and Front Sway Bar
Baseline testing finished, we threw the ‘Bird up on the lift and set about our QA1 installation. That meant complete disassembly of basically everything suspension-related. We referred to the QA1 instruction sheets throughout the process in order to guarantee that we followed the procedures accurately, and enlisted the help of our resident shop dawg, Sean G., to help with the installation.
 [10]
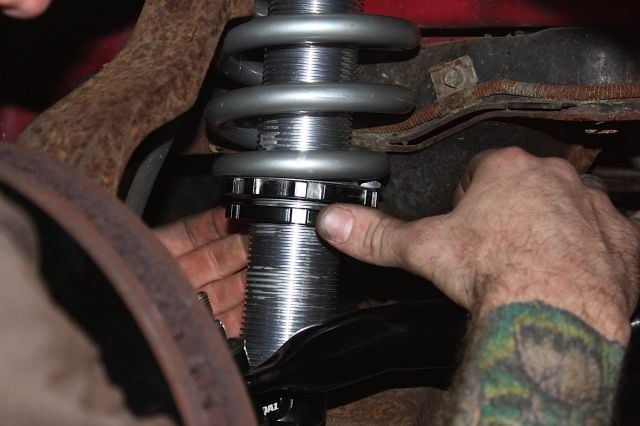
[10]Sean installs the new front driver's side coil-over into the Trans Am.
Our front struts and springs come out with removing the two bolts on the bottom of the shock attached to the A-arm, and the top four strut bolts found under the hood. To help remove the two bolts hiding underneath the master cylinder, you also have to remove the two bolts holding the master cylinder in place.
After that, the factory front coil-over shocks come out in one swoop that includes the upper a-arms and strut mount. Removal is pretty straightforward, but if your car has seen much precipitation you might have to replace one, or both, of the strut mounts since they have a way of rusting themselves to the strut. Ours were still in good shape, so we reused them. The struts go back together the same way they come apart, and reinstall just as easily in reverse order.
We also recommend reinstalling all of the bolts with an anti-seize agent like QA1 included in the kit to prevent the threads from rusting and to make life easier when and if you ever have to remove these bolts in the future.
The old front sway bar was removed by unbolting the end links and the two mounting brackets. All of this hardware will be discarded since it’s deteriorated, and the QA1 kit comes with everything needed to complete the job. We lubed up the new bushings using the grease that was included with the kit, and installed the hollow 1 3/8-inch front sway bar using the factory mounting locations. There were no holes to drill as QA1 has designed this kit for a bolt-in installation.
 [11]
[11]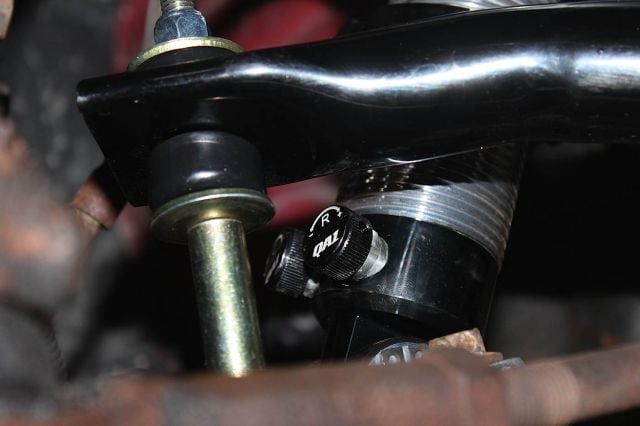 [12]
[12]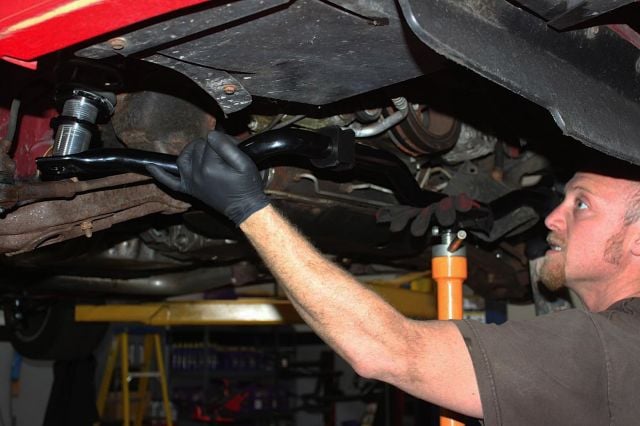 [13]
[13]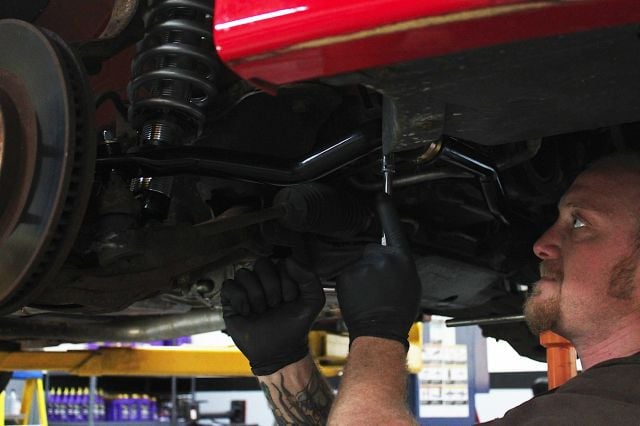 [14]
[14]
We put the QA1 front sway bar in and set the coil-overs for a nice ride that will give us the improved handling that we're looking for.
Installation of the Rear Suspension Components
Replacing the rear suspension is a slightly more involved process, however. It includes removing a portion of the rear section of the interior. In order to make things easier, we removed the t-tops, lowered the windows, and popped the rear hatch. The back seat needed folded down, the folding rear compartment cover came out, and the four rear sail panels (two in the trunk, two in the rear passenger compartment) had to be removed.
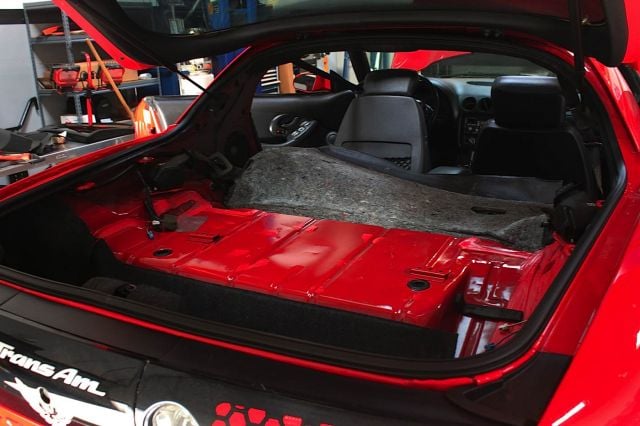 [15]
[15]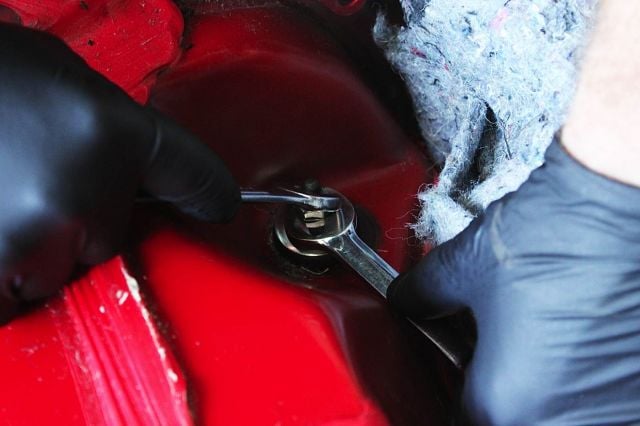 [16]
[16]
Removing the rear shocks meant removing much of the rear section of the car's interior. This granted us access to the rear top shock bolts.
We also had to take out the two car seat tabs located in the trunk in order to pull back the carpet and access the top mounting bolts for the rear shocks (one on each side). In all actuality, this was probably the most difficult and time consuming part of the whole process. Once we had this out of the way, it was all downhill from there.
Sean brought the T/A up on the lift, pulled off the rear wheels, and removed the the bottom bolts that were holding the shocks into place. Removing the shocks allows the rear axle to drop down, which helps us remove the rear springs for more room to work with, or if we were replacing the springs. Since we’ll be reusing our current springs, we set them on the work bench for reinstallation later.
Being as how the car and your author are from the Rust Belt, there was quite a bit of it under our otherwise clean F-body. The rain and occasional few winters we drove this car through weren’t easy on our undercarriage, and the rear axle and suspension components were no exception. Luckily Sean, being familiar with the rusty Midwest, knew exactly how to handle this – break out the grinder!
We ground all of the rust, road tar, and vintage tire rubber that the car had accumulated over the last ten years off of the mounting locations to ensure a clean installation and proper alignment of the new suspension components.
With the springs and old shocks out of the way, Sean removed the lower control arms, torque arm, sway bar and Panhard bar. Using our old lower control arms as a guide for fitment, he then welded the lower control arm brackets into place using our handy and versatile Lincoln Electric [17] PowerMig. The LCA brackets come in grey primer to prevent rust, but we cleaned off the area where we’ll be welding them to the rear axle to ensure a proper weld.
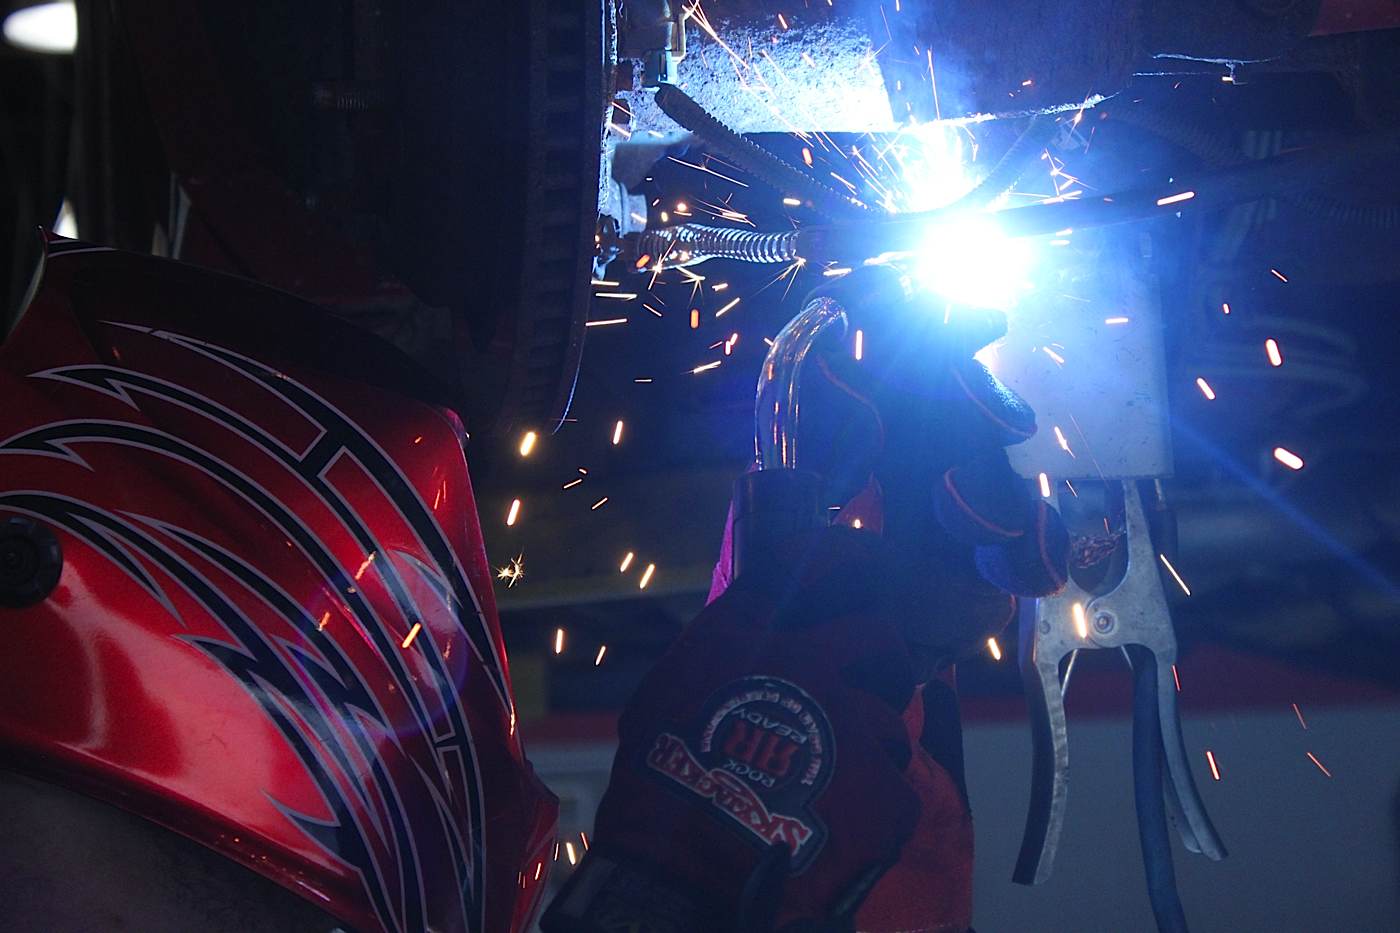 [18]
[18]Sean used his welding abilities to tack up the lower control arm brackets for us.
You can leave them in primer if you like, but we chose to paint them in black to prevent them from rusting and for a much better overall look. We bolted the new lower control arms right in place. We bolted the lower control arms in the lowest setting to give us the most traction possible – in the bends, and on launch.
The adjustable LSA relocation brackets slightly help alter the Trans Am’s suspension geometry, especially if your car is lowered like our Trans Am is. This is a good thing, and for two reasons. First, it helps fix the awkward position that the lower control arms would otherwise be in if they were in their stock location. The second being that they brackets will add positive “anti-squat” to the car that will help with wheel hop and straight-line traction.
Moving on to the next step meant swapping in the new adjustable torque arm. It bolts to the rear differential and the front bushing bracket attached to the transmission. It should be said that it’s important that you make sure your transmission and motor mounts are in good shape before you install this part. Faulty mounts working with a heavy-duty torque arm like this can only spell disaster. It would have a negative effect on every component from the engine to the rear axle.
We checked the condition of these components and they were in good shape, so we proceeded. Installing this bar means that you’ll be reusing your OEM bolts, but it requires drilling out the two rivets into the transmission mounting bracket. QA1 supplies a new polyurethane bushing and bolts for the transmission mount.
 [19]
[19]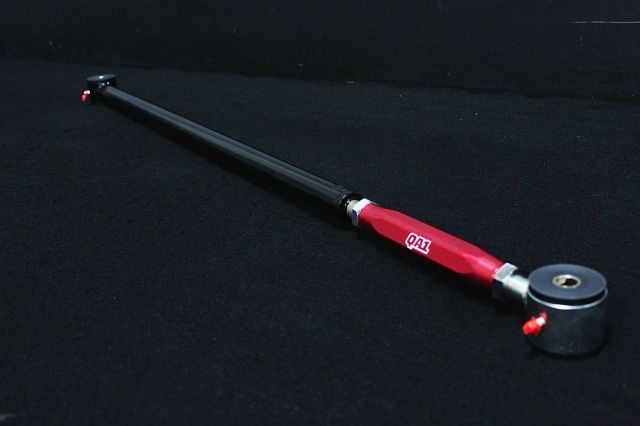 [20]
[20]
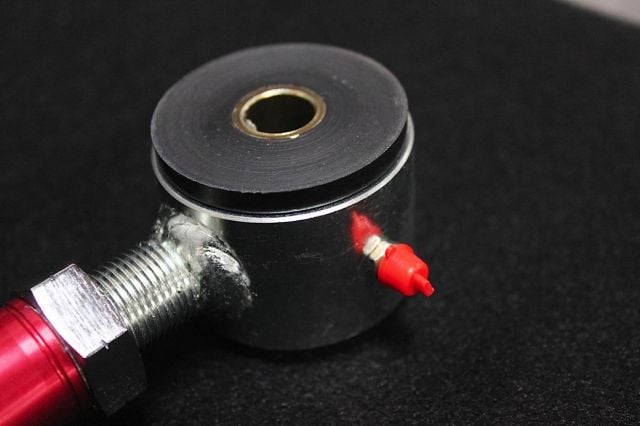
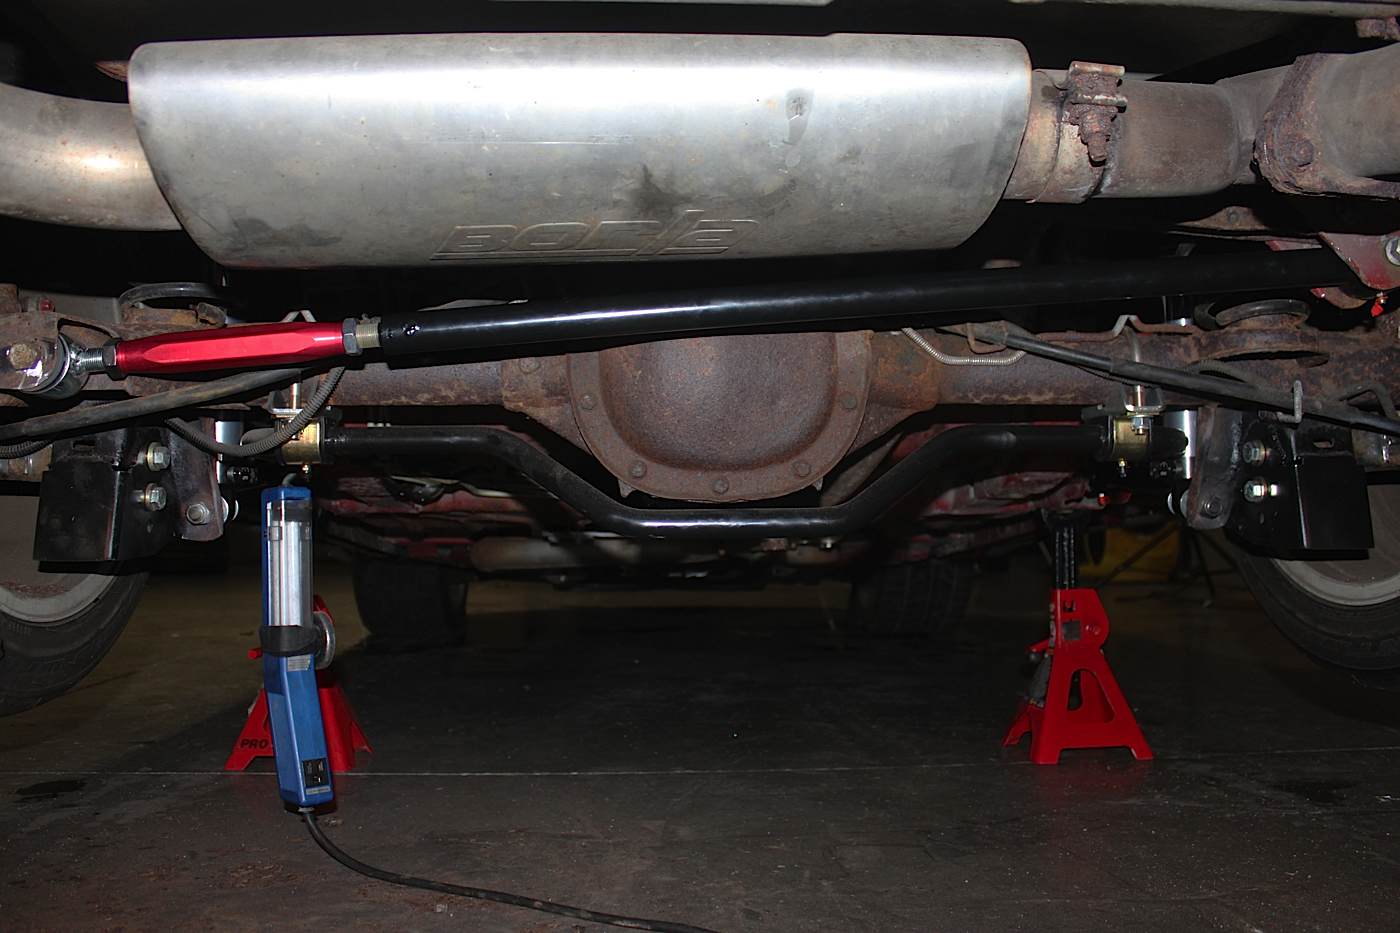
The solid Panhard bar replaces the stamped piece that originally came on the car, and provides a stiffer and stronger construction. The adjustability of this piece takes it a step further by allowing us to get the position of the rear axle centered perfectly. QA1 incorporated spherical ball assemblies to allow the car's owner to grease the suspension fittings accordingly.
Installing the new Panhard bar was really straightforward. It installs into the factory mounting holes just like the OEM bar does, and prior to installation, we adjusted the QA1 piece to the OEM unit to make sure it was the appropriate length. Just make sure that when you’re installing the bar, the bushing lubricating points are pointed down.
The finishing touch was the solid 1-inch diameter rear sway bar, and it, like the rest of the kit, bolted into the factory location and came complete with new Energy Suspension end link bushings.
 [21]
[21]The finished product in the rear, included the rear sway bar, adjustable Panhard bar, lower control arms, adjustable shocks, and lower control arm relocation brackets.
Final Results
After having removed the entire suspension from the WS6 and replacing it with QA1’s finest components, we were ready to see how well we would be rewarded for the fruits of our labor. Right from the get-go we noticed that the ride quality had improved.
We should point out that the Trans Am’s adjustable suspension was set to provide a firm (but not jolting) comfortable ride that increases handling capabilities. After all, this is a road car that we could drive everyday if we wanted or needed to.
 [22]
[22] [23]
[23]
We took the Pontiac out a couple of days after our initial test. Looking at the before and after shots, you can see the difference in the way the Trans Am handled. We took the same corner and at the same speed as before. Body roll was minimized and the car definitely felt more planted to the pavement than before.
The Pontiac was smooth as can be, and it felt like a new car. We wouldn’t go as far as calling Rolls-Royce smooth. But no longer do we have to worry about swerving around ants on the tarmac – we can now relax while we pilot the F-body down the street.
One of the nicest things about the QA1 pro-touring kit is that they require very little maintenance – they should be greased, along with a general visual inspection during routine maintenance. -David Kass
Speaking of handling, it has improved – greatly! The body roll we previously experienced was all but completely eliminated, and the car stayed planted in the corner we took it around earlier.
The T/A felt sure-footed when we took the same corner as before. We even did a couple of follow up runs, each time taking it faster than we had the first time and there was nothing in the way of body lean or even a tire chirp. Not to sound cliché, but it handled like it was glued to the road.
We asked David if there was anything that we should know in terms of maintenance with our new suspension, something the average enthusiast may overlook. David assured us that there isn’t a lot of extra upkeep involved with this suspension system.
He added, “One of the nicest things about the QA1 pro-touring kit is that they require very little maintenance that needs to be performed. We offer grease fittings on many of these components, and they should be greased, along with a general visual inspection during routine maintenance.”
Conclusion
We would put the Trans Am up against any of today’s pony cars with full confidence. With multiple combinations in which we could adjust our suspension, we can set this package up just about any way we want. In the future, maybe we will replace the OEM K-member and upper & lower front A-arms with something more impressive. Until then, we’ll continue to enjoy the new QA1 kit.
 [24]
[24]