 [1]
[1]
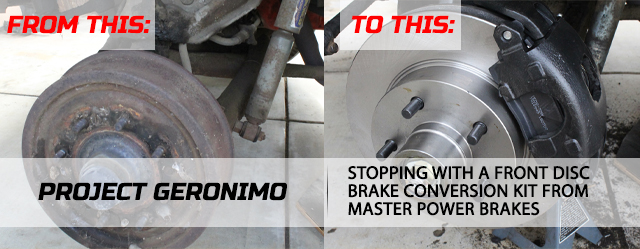
For safety and performance, the reason for upgrading to disc brakes is a no-brainer. Unless you have a rare, factory-original classic that spends most of its time on display or in the garage, there is no good reason why you shouldn’t upgrade to modern technology. Especially if you drive your classic.
The rationale for upgrading to disc brakes seems pretty obvious. – Mark Chichester Master Power Brakes

It was obvious to us that we needed to do this conversion as efficiently as possible. While there are times when you want to assemble your own kit, figuring out which parts look and fit the best – physically and financially, as well as what parts you can do without is part of what custom builders do everyday. Personally, we don’t mind sourcing our own parts for engine combinations, body repairs, and things like that. However, assembling a disc brake conversion kit is best left to the professionals.
 [3]
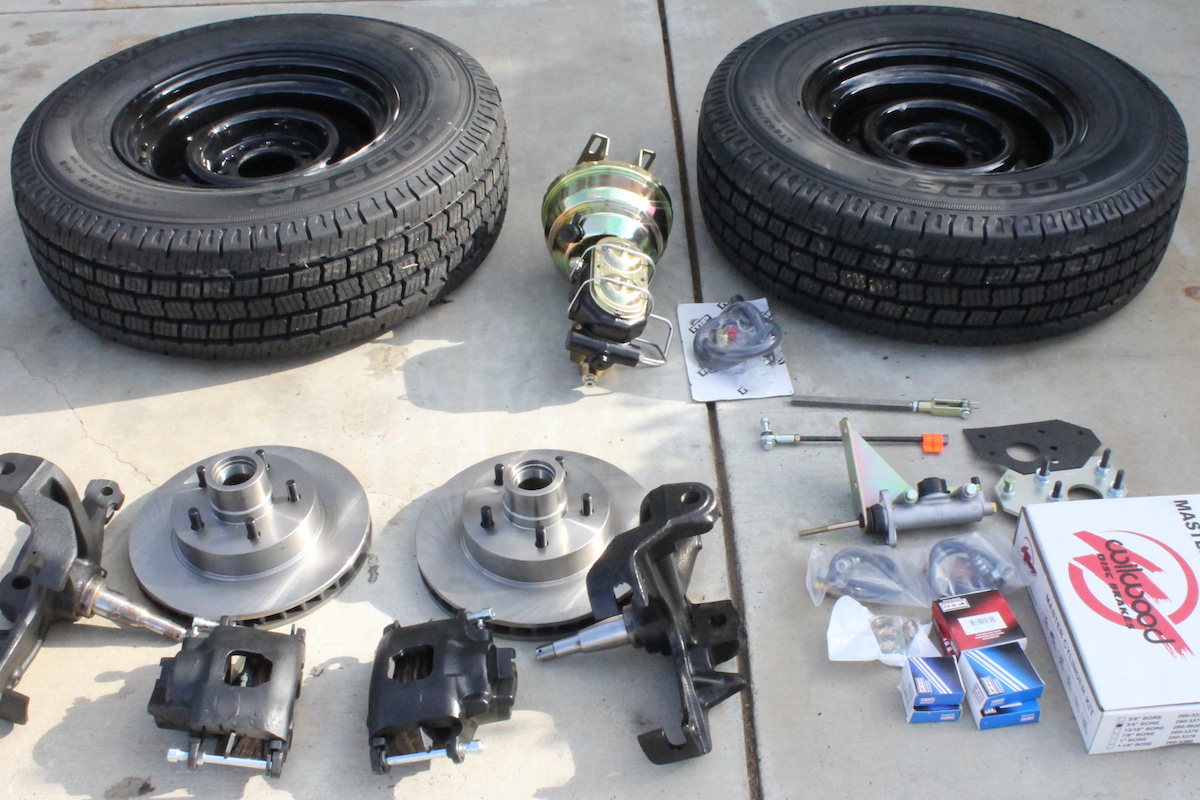
[3]For a driveway upgrade to be a real driveway upgrade, it needs to be a professional kit installed on an actual driveway. That’s what we did, and we used a realistic vehicle to do the upgrade. The tires and wheels are included in this upgrade, because we switched from an 8-lug hub to a more common and modern 5 X 5 lug pattern.
We wanted to upgrade our beastly project truck from using an archaic and very scary, four-wheel drum-brake setup, to feature a modern disc brake system on the front. Not finding much help for our particular needs, we reached out to Master Power Brakes.
We talked to Chichester, he repeated our request back to us: “So, you want a premium front disc brake conversion kit at a budget friendly price, that you can assemble in your driveway … and you want it to be safe enough for your family to use.” After a short pause he continued, “Yeah. We have something for you.” That was music to our ears.
 [4]
[4] [5]
[5]
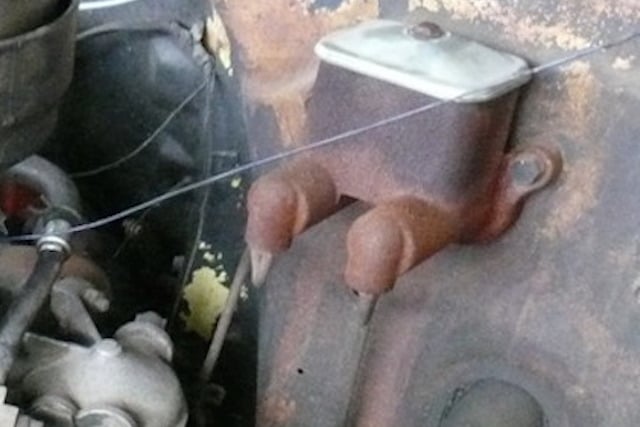
The stock hydraulic brake and clutch system was pretty simple, with a single-chambered master cylinder that had seen a lot of use. Brake fluid is corrosive, and the cast iron master cylinder had its fair share of corrosion on the outside where spills and leaks had taken a toll.
The Project And The Problem
If you’ve been following our Project Truck, Geronimo [6], a 1960 Chevrolet C20 with the stock 261 cubic-inch straight six and fleetside long bed body, then you know the goal of this project. We started out to show how a junkyard-found old truck could become a safe and dependable daily driver on practically anyone’s budget. That’s a great goal, but reaching that has proven to be more difficult than we expected.
 [7]
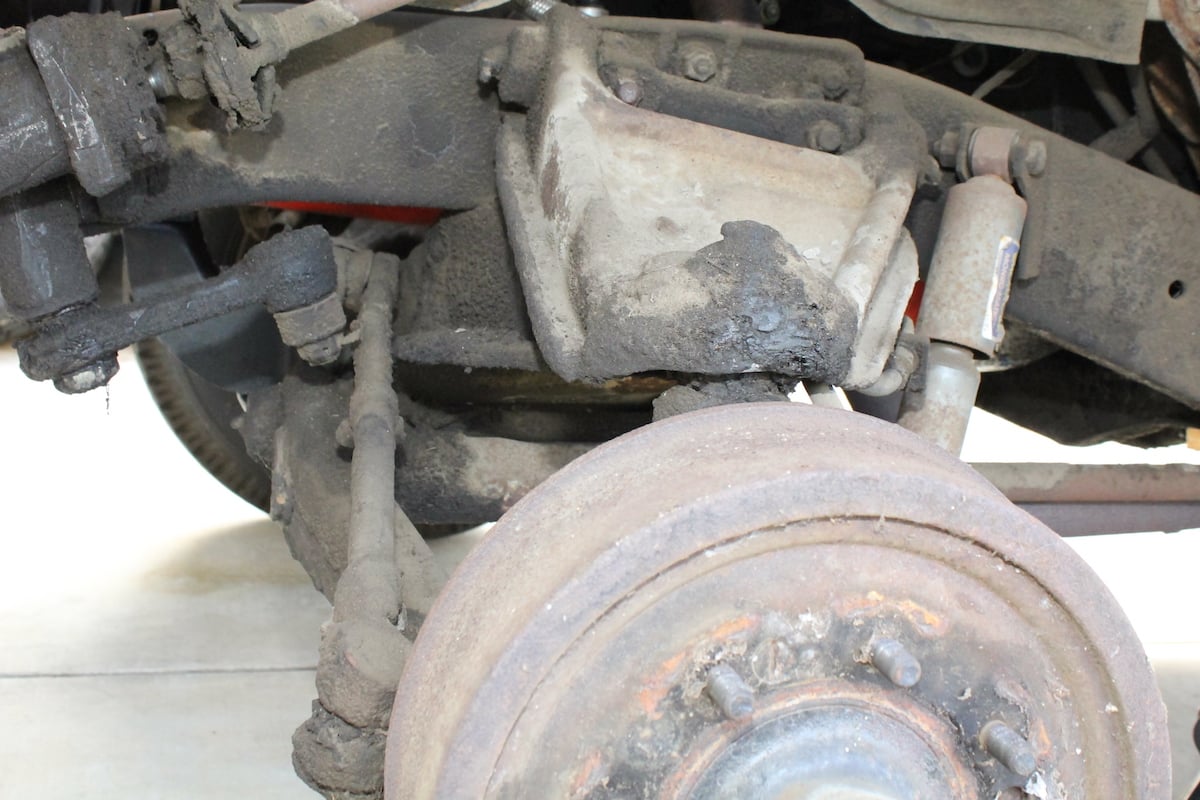
[7]The stock four wheel drum brakes were probably decent back in 1960, but in today’s traffic, where almost every vehicle has disc brakes on the front – and many with disc brakes on all four corners – drum brakes are simply unsafe at highway speeds in heavy traffic conditions.
For example, the stock brake system is horrific on today’s roads. The heavy, three-quarter ton truck needed two hours notice if you planned on stopping. It was a seriously scary proposition when traveling the surface roads with cars that could stop twice as quick. Trying to provide a cushion space for the car in front was nothing more than an invitation for other cars to jump in front of you, which cut down your cushion space. Driving a vintage truck with four-wheel drum brakes is simply unsafe these days.
 [8]
[8] [9]
[9]
More than 56 years of grease and road grime had built up on the brake and suspension components that would make the job a little tougher. Replacing the brake lines with handmade lines would be the only way to ensure a contaminant-free system. We took some time to clean off much of the grime where we would be working. Our goal was to complete the conversion in a day, but a serious upgrade requires time to clean all the parts thoroughly while many of the components are disassembled.
Research shows that as much as 70- to 90-percent of a vehicle’s braking, takes place in the front brakes. Sure, it would be nice to have disc brakes all the way around, but for a budget build, do you really need four-wheel disc brakes to provide a safe ride? The answer is no.
 [10]
[10]We were careful to wear a particulate mask when removing the drum. The OE brake shoes were made with asbestos, and there is no telling if asbestos fibers were still inside the drum. The safest move is to wear a mask with a particulate filter and gently remove the brakes and backing plate, placing it in a plastic garbage bag for disposal. This is probably overkill, but why risk breathing in any airborne fibers that you don’t have to?
What Brake System Will Fit Our Needs?
The problem then becomes: What is the best bang for my buck? According to Chichester, once you have decided to improve your braking system, determine what is available for your vehicle. In our case, no one makes a disc brake conversion kit for the three-quarter ton 1960 C20. But that didn’t mean we couldn’t take advantage of better braking.
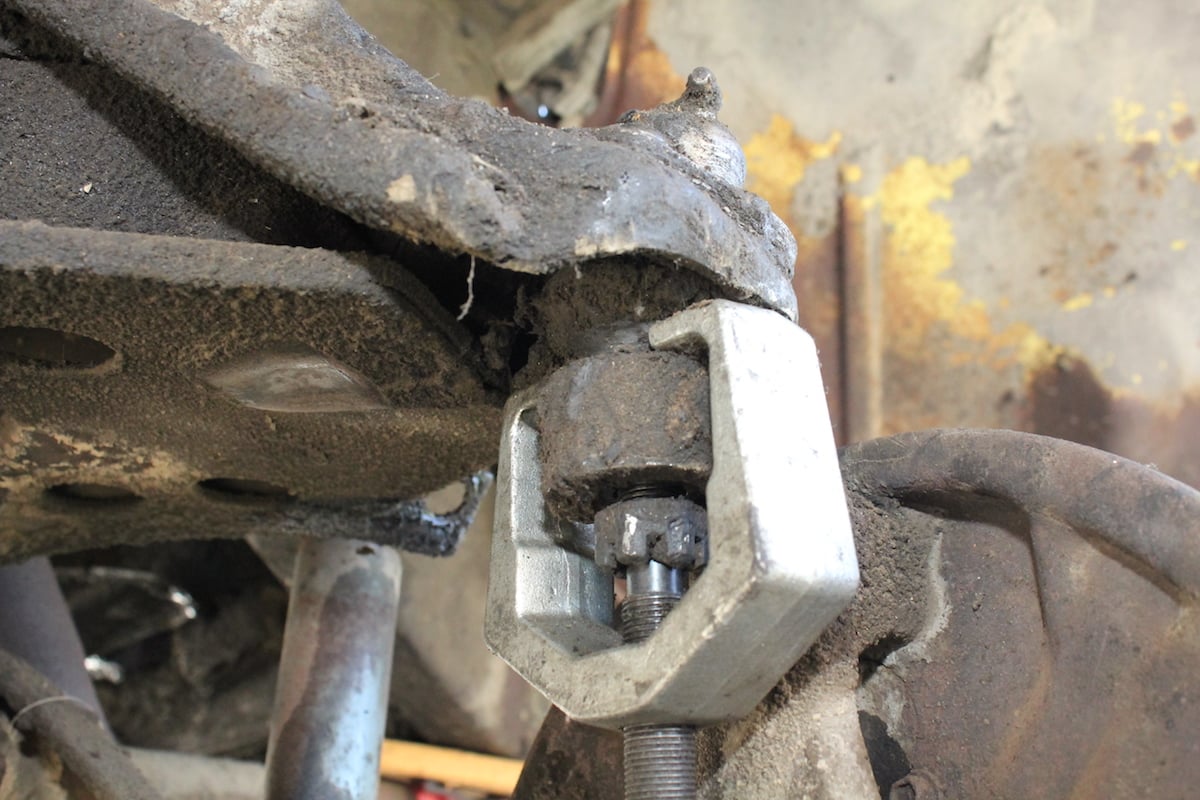
 [11]
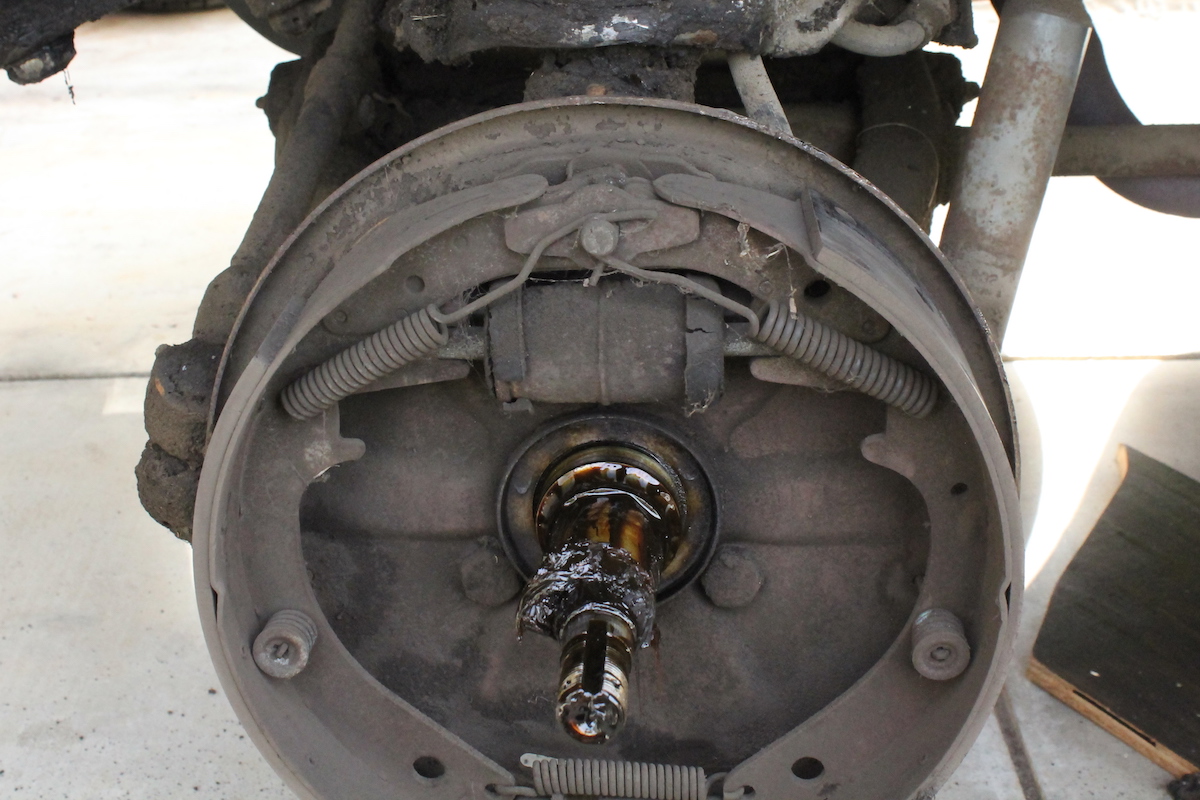
[11]There is a noticeable size and weight difference between the two different styles of braking systems. The heavy old drum system trapped in all of the brake shoe dust, as seen in the top of the drum in the photo. We were careful not to disturb the dust and bag the components as quickly as possible.
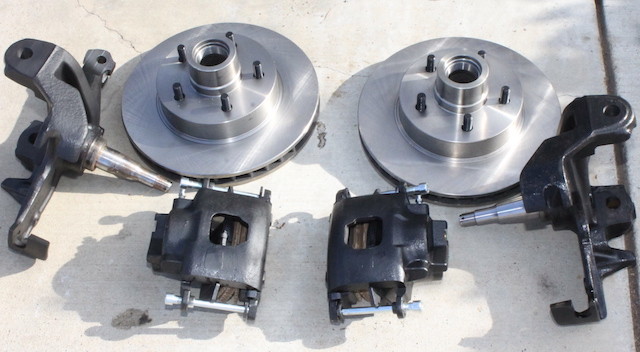
Chichester explained that the Master Power Brake’s 1960 C10 front disc brake conversion kit would work as long as we didn’t plan on using the truck in its three-quarter ton capacity ever again. “There is a difference in wheel bearing surface area between that year’s half-ton and three-quarter-ton trucks,” he explained. “The bearing set for the C10 will not support the carrying weight of the C20 without bearing failure.”
 [12]
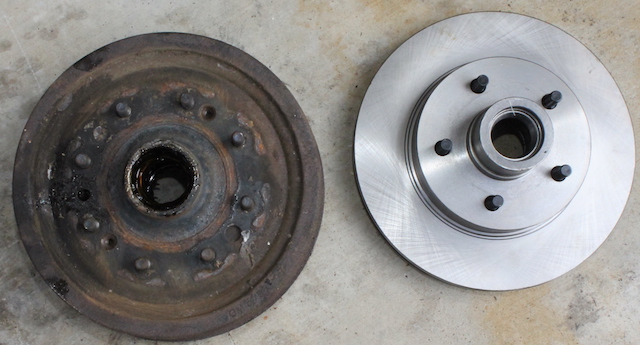
[12]Notice the 8-lug stock drum and the new 5 X 5 GM lug pattern on the disc hub. This enables us to buy and use more common, and less expensive, 5-lug wheels.
Our intention was never to use the old truck as a heavy hauler. Honestly, thinking that the worn out straight-six engine could even attempt to haul any serious weight is outright laughable. Which meant that the C10 front disc brake conversion was an option. Chichester pointed out that other options were available if there isn’t a conversion kit available. “Switching from manual to power assist through a conversion kit could help with pedal feel. Brake shoes with improved friction material could help, or a larger-bore wheel cylinder might work better than the stock one,” he added.
 [13]
[13]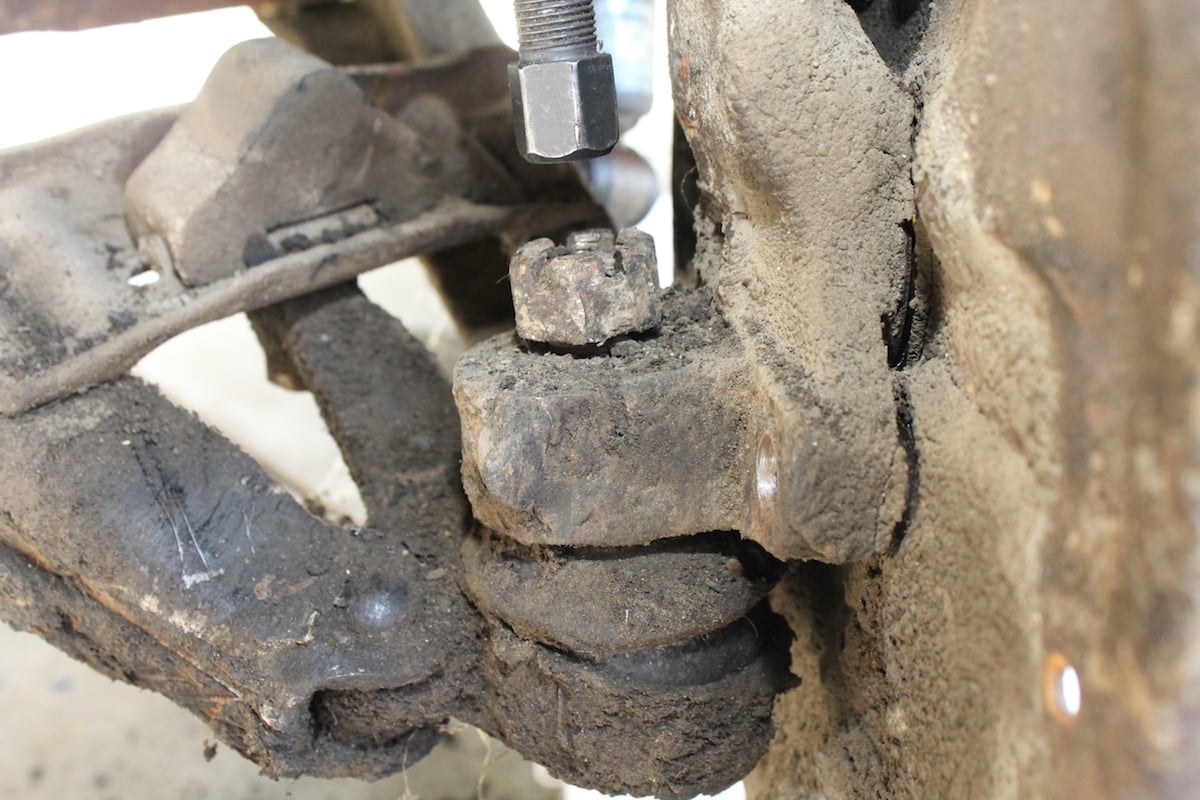 [14]
[14]
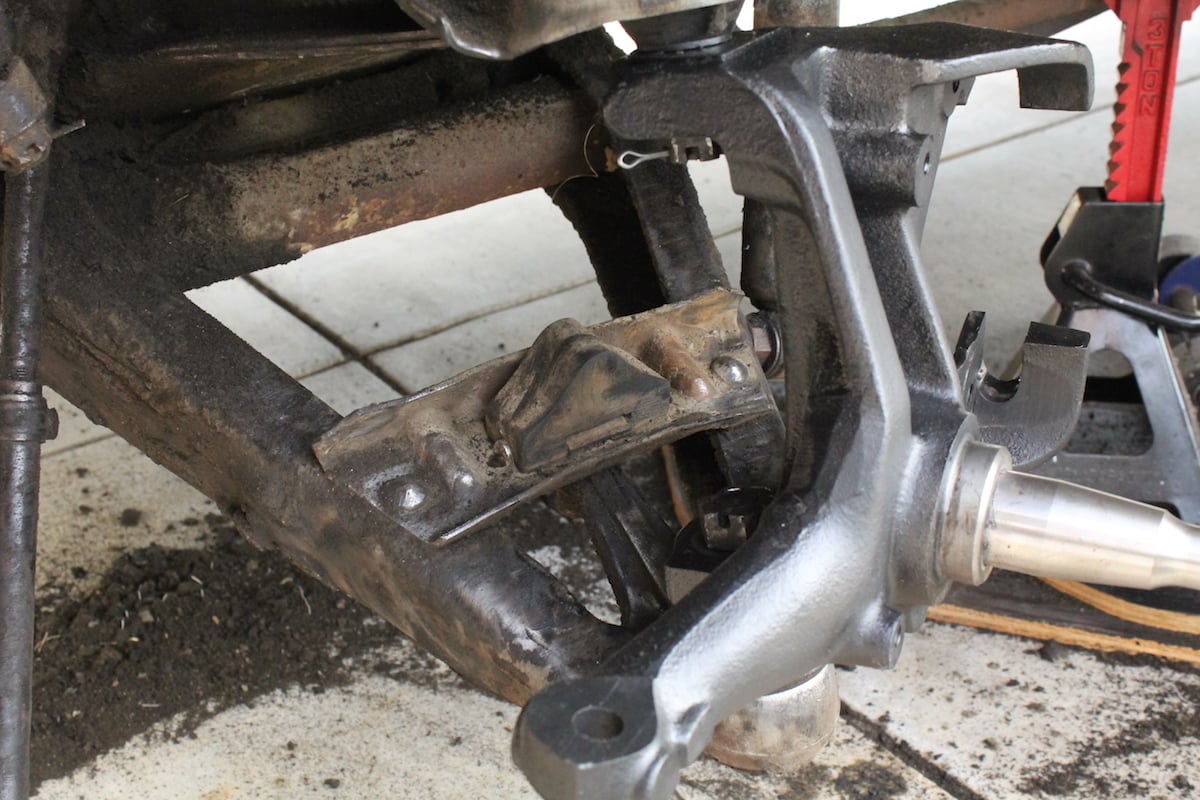
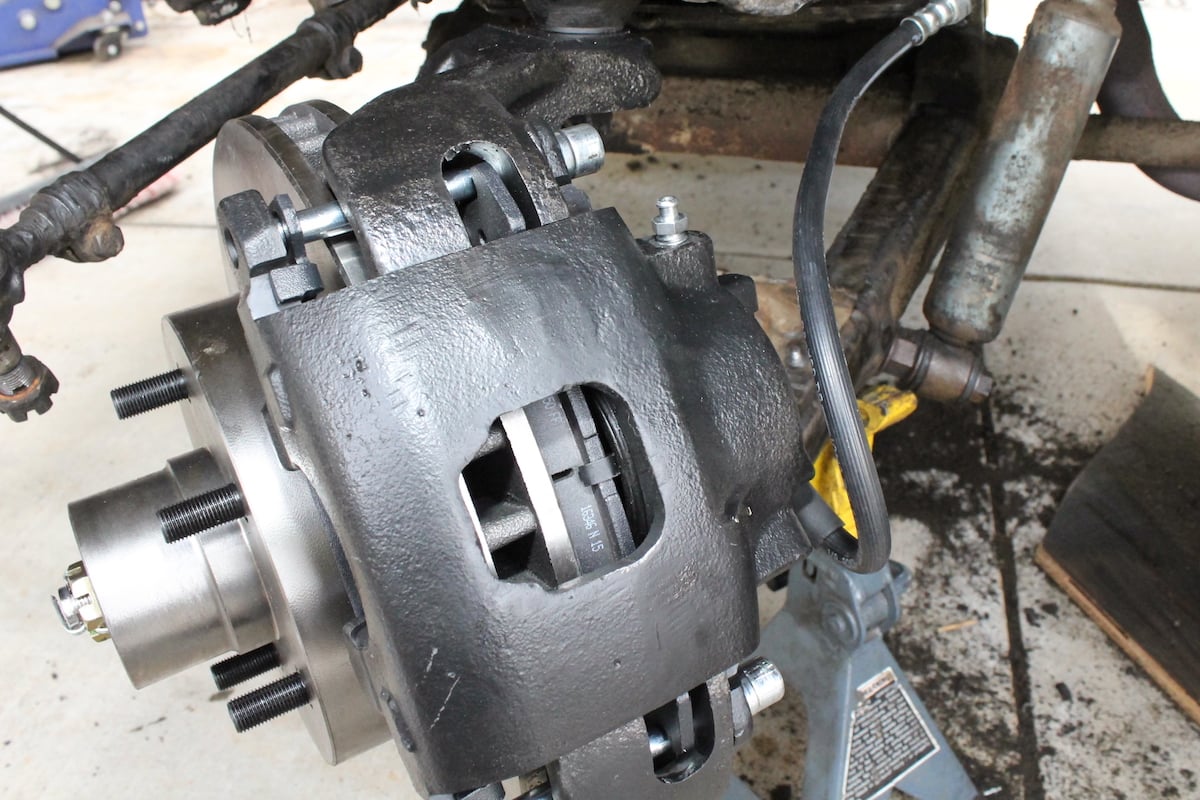
Once the brake drums were removed, we removed the old spindles by breaking the connection at the upper and lower ball joint with a separator tool. The Master Power Brakes' conversion kit comes with a set of new spindles.
We liked the opportunity to improve the overall safety of the vehicle by switching to front disc brakes, so it was a no brainer for our choice. Once we had determined what type of brake system we wanted, we still had other aspects to figure out. Appearance, manual or power, bolt pattern, pedal ratios, and even which series conversion kit would fit our needs.
 [15]
[15]Once the spindles were out of the way, we could really dive in and get rid of the caked-on grime.
Weighing the Pros And Cons Of Each Kit
Master Power Brakes makes different brake conversion kits depending on the driving style and purpose of the vehicle. We’ve already determined that our truck was not going to be a heavy-hauling work horse, but maybe we wanted to have superior braking on our way to and from the office. We want to be able to go on a cruise and not have to worry about slamming into the truck in front of us. Others may want a system that could compete in autocross events or rallies, but not for this project.
 [16]
[16]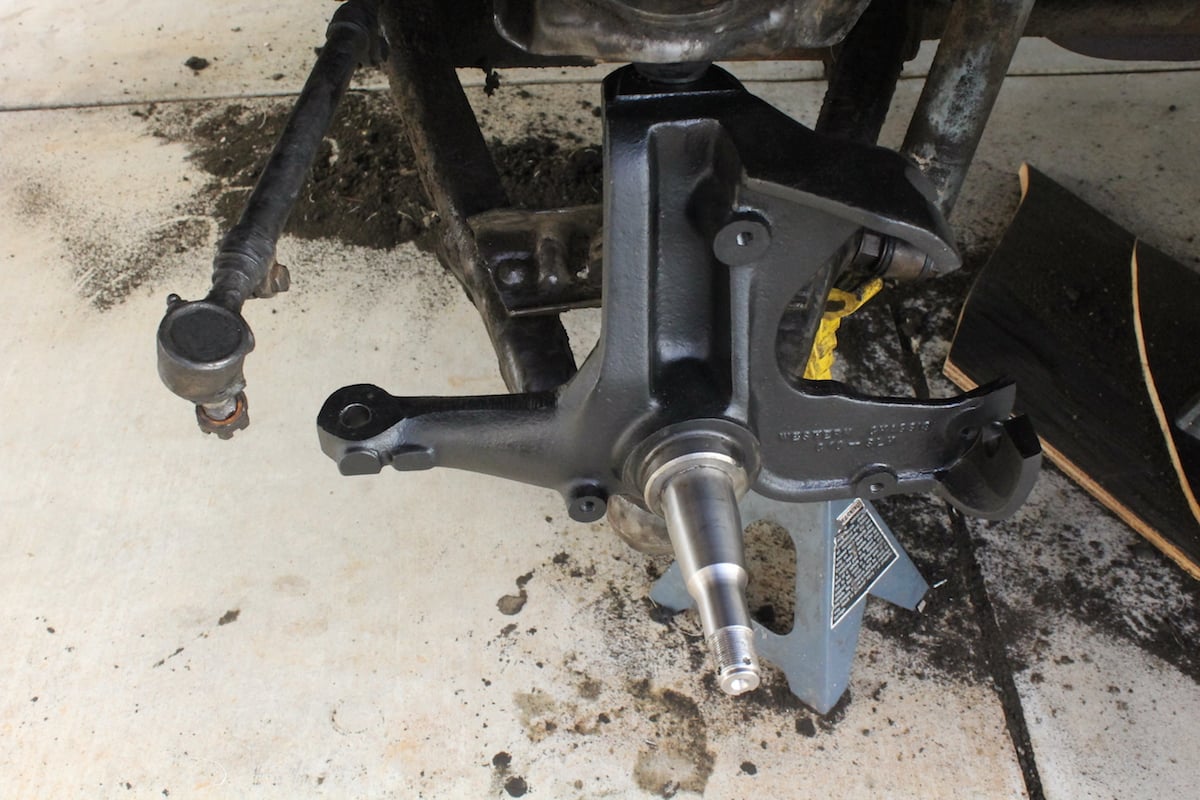 [17]
[17]
After we had removed a substantial amount of road grime from the connecting components, we purged the old grease out of the ball joints, checking for play and serviceability. Then the new spindles were attached.
Master Power’s choices range from calipers with a single, stock-type pistons to four piston calipers. Others will want to consider a system that allows for a bolt pattern change, or wheel size change. From the simple to higher performing systems, Master Power Brake’s Legend series, Rallye series, or Pro Driver series will have the kit that fits your driving style.
 [18]
[18]
Five-Lug Front Disc Brake Conversion Kit (Part #DB1754B)
- Two 12-inch, five-lug, vented rotors
- Two cast-iron calipers with 2-15/16-inch piston
- GM D52 style brake pads
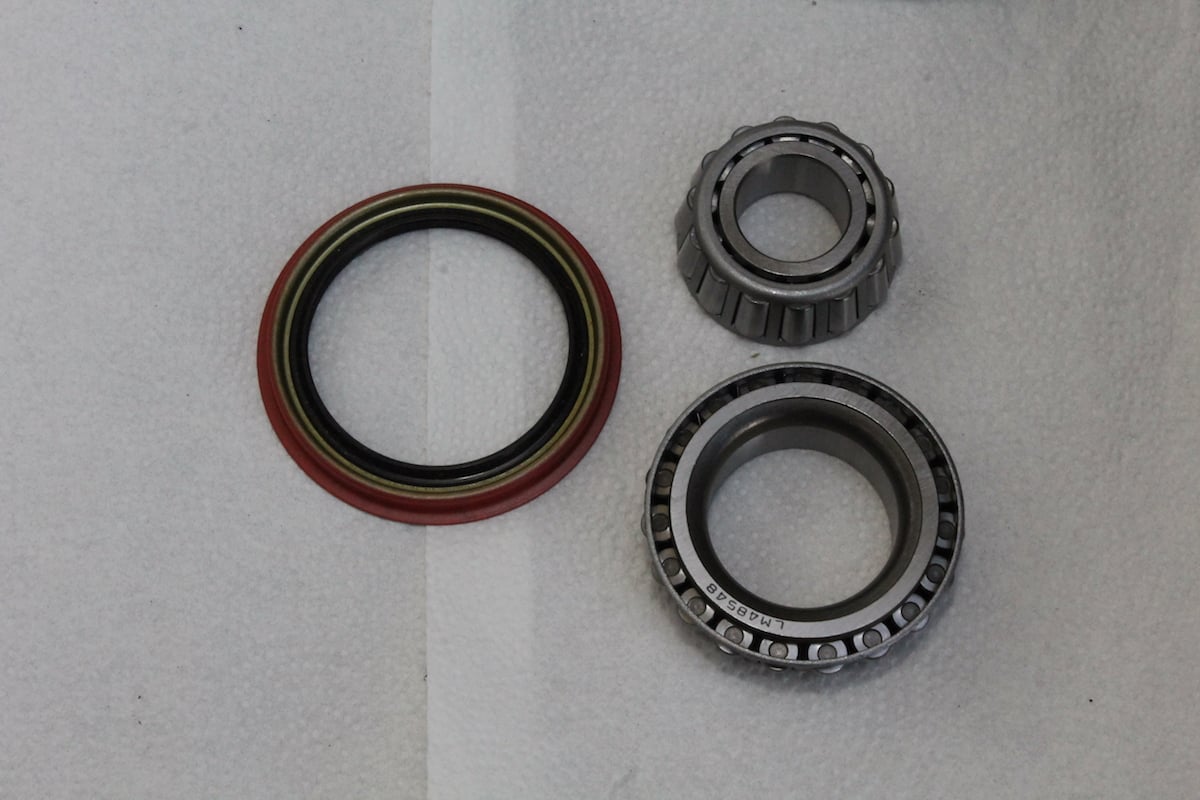
- Two outer bearings
- Two inner bearings
- Two grease seals
- Dust caps
- Two stock-height spindles
- Spindles nuts and washers
- Brake hoses w/ Banjo bolts & crush washers
- Eight-inch dual diaphragm power brake booster
- Dual reservoir master cylinder
- Combination valve
- Master cylinder to combination valve hard lines
We planned on changing our tire and wheel combination from the 16.5-inch stock, eight-lug wheels to a modern 15-inch five lug wheel, and the Legend series fits that option. This presented a long term economical value, as the modern wheels and tires are much more affordable and easier to find. Trying to find an eight-lug 16.5-inch wheel during a vacation trip would be no easy, or affordable, task – trust us on this one.
Power Assisted Brakes
To be perfectly honest, we weren’t too concerned about the power assist part of the kit, but Chichester assured us that it was worth the extra cost and effort. It turns out that he has seen enough of these conversions completed to know what people wanted to feel in a new brake system, and he was right. We ended up loving the power assist.
Before, we were resigned to the fact that our old truck was a water buffalo, and getting it to stop was going to require stepping on the brake pedal as hard as you could. Most of the time, this resulted in pushing your back against the seat hard enough to actually start rising off of the bench seat. We falsely believed that was just an inherent problem in the heavy beast that we were going to have to live with.
Master Power Brakes achieves smooth braking action by virtue of a single or dual diaphragm brake booster. Our kit included an eight-inch dual diaphragm brake booster, which is great for what we are doing. When switching to disc brakes, there is no such thing as too much assist. The system can handle whatever booster you mount to it. Space is generally the limiting factor. If an 11-inch single diaphragm booster won’t fit, something smaller, like the 8-inch dual diaphragm probably will.
 [19]
[19]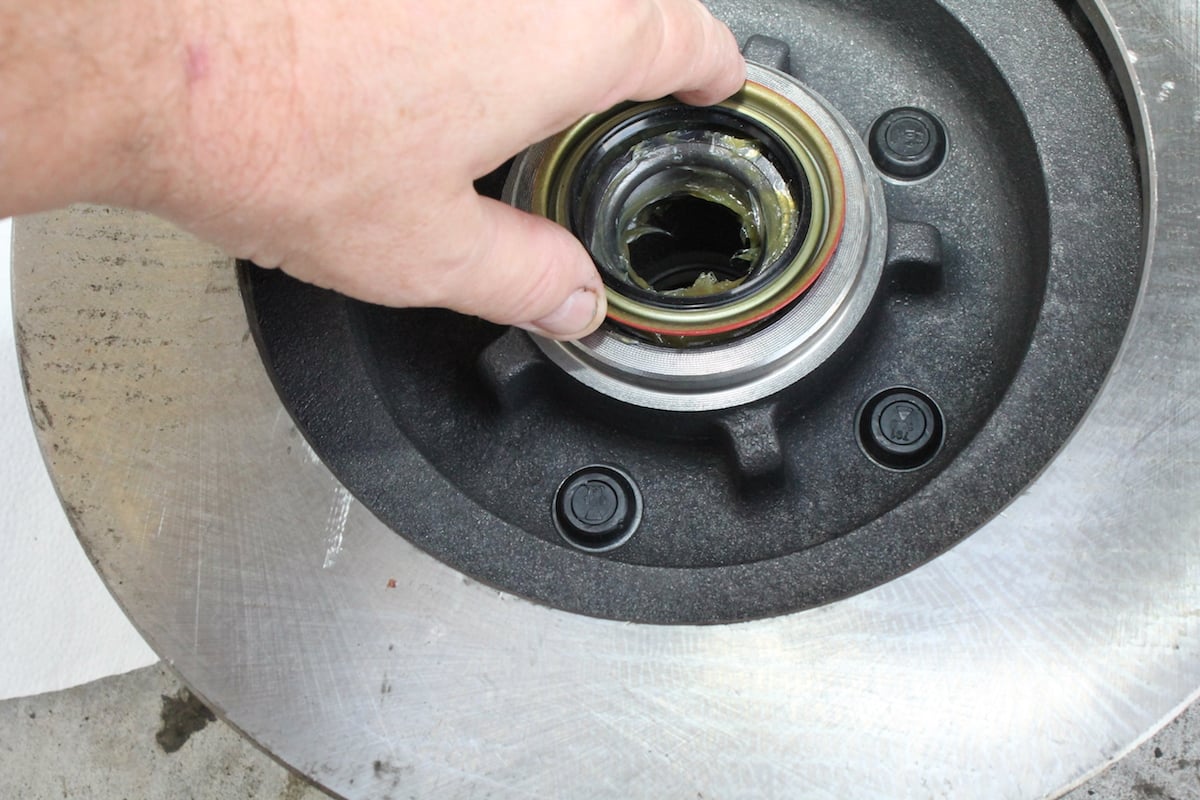 [20]
[20]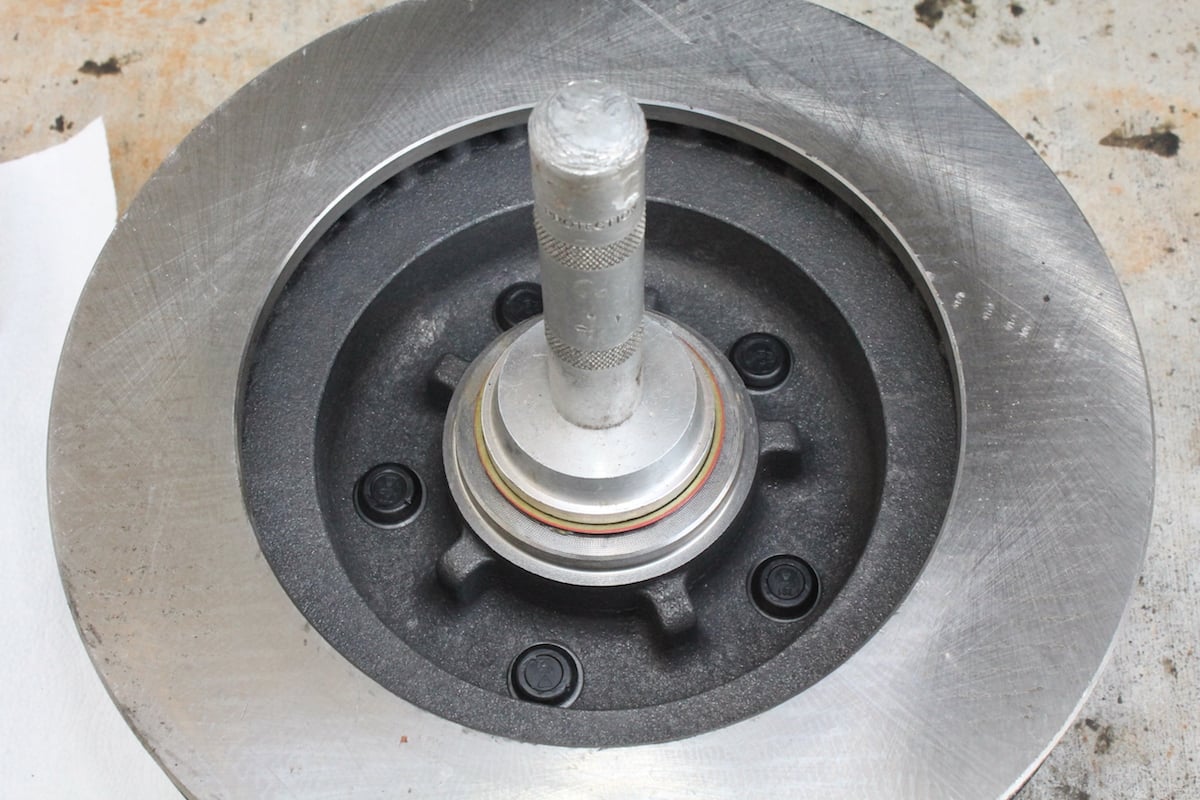 [21]
[21]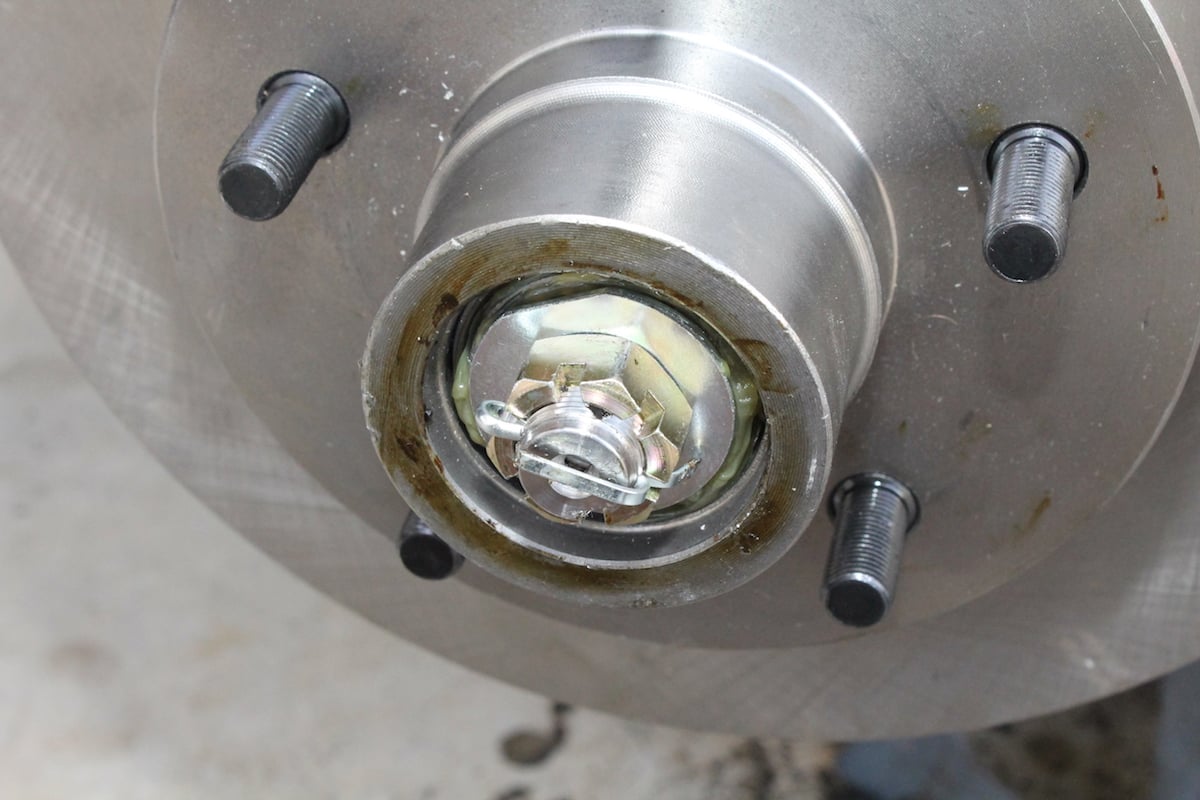 [22]
[22]
With the new spindles in place and torqued, it was a simple matter of packing and installing the bearings and seals.
Boosters provide brake assist by using vacuum from the engine working with the internal diaphragm(s) and atmospheric conditions. What happens is, the engine creates vacuum on both sides of the diaphragm(s) until the brake pedal is pressed. When pressed, the pedal actuates a rod that passes through the booster that opens a valve and allows air to enter the booster on one side of the diaphragm(s) while sealing the vacuum from the engine on the other side. This unequal pressure helps push the rod, which in turn pushes the piston in the master cylinder.
 [23]
[23]
How much assist that is achieved is determined by multiplying the atmospheric conditions by the diameter of the booster, and then multiplying that by the number of diaphragms in the booster. In the simplest of terms, an 11-inch, single diaphragm booster will not provide as much assist as an 8-inch, dual diaphragm booster. Likewise, an 8-inch, dual diaphragm booster doesn’t provide as much assist as a 9-inch, dual diaphragm booster. However, the thinner 11-inch, single diaphragm booster may fit in a tighter space than the thicker 9-inch, dual diaphragm booster. Space constraints usually determine which booster is used in the kit.
 [24]
[24] [25]
[25]
We installed the caliper and new flexible brake line. The hard line was replaced after this photo was shot. We replaced all the lines at the same time.
Chichester explained that each kit is tested for fitment to ensure that the system will work properly, and mount without clearance issues. “We start by checking the system in a CAD program to make sure it fits virtually. When we are satisfied with that, we take it to real world applications for verification.”
Other Considerations In Assembling A Kit
There are a lot of working parts in any hydraulic system, and for something as important as a brake system, there are many other considerations Master Power Brakes uses when developing a kit. Master cylinders for example, have different bore sizes for the pistons that provide the pressure for the system to operate. In case you have ever wondered why manufacturers advertise master cylinder bore diameters when talking about the brake system, the bore size is directly proportionate to the entire system.
The brake pedal ratio is a simple equation, but one often overlooked. – Mark Chichester
The brake pedal ratio plays an important role in the brake system. Auto manufacturers spend a great deal of effort and time engineering the pedals for the best “feel” when the brakes are actuated. Many times, customizers struggle with finding the right pedal ratio that produces the right feel. “The brake pedal ratio is a simple equation, but one often overlooked,” Chichester said. “In a power brake system, the recommended pedal ratio is 4:1. A typical manual brakes system is 6:1,” he added. “Adjusting this is necessary due to efforts required to press the pedal.”
 [26]
[26] [27]
[27]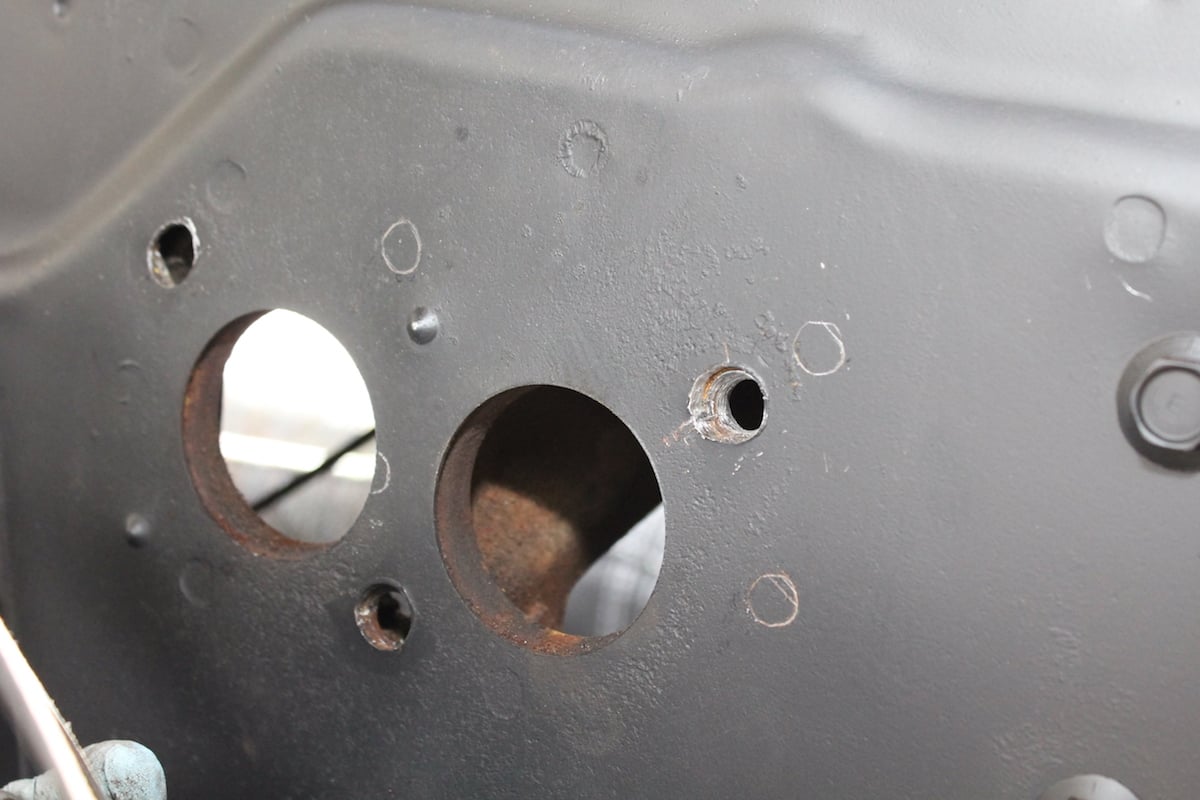 [28]
[28]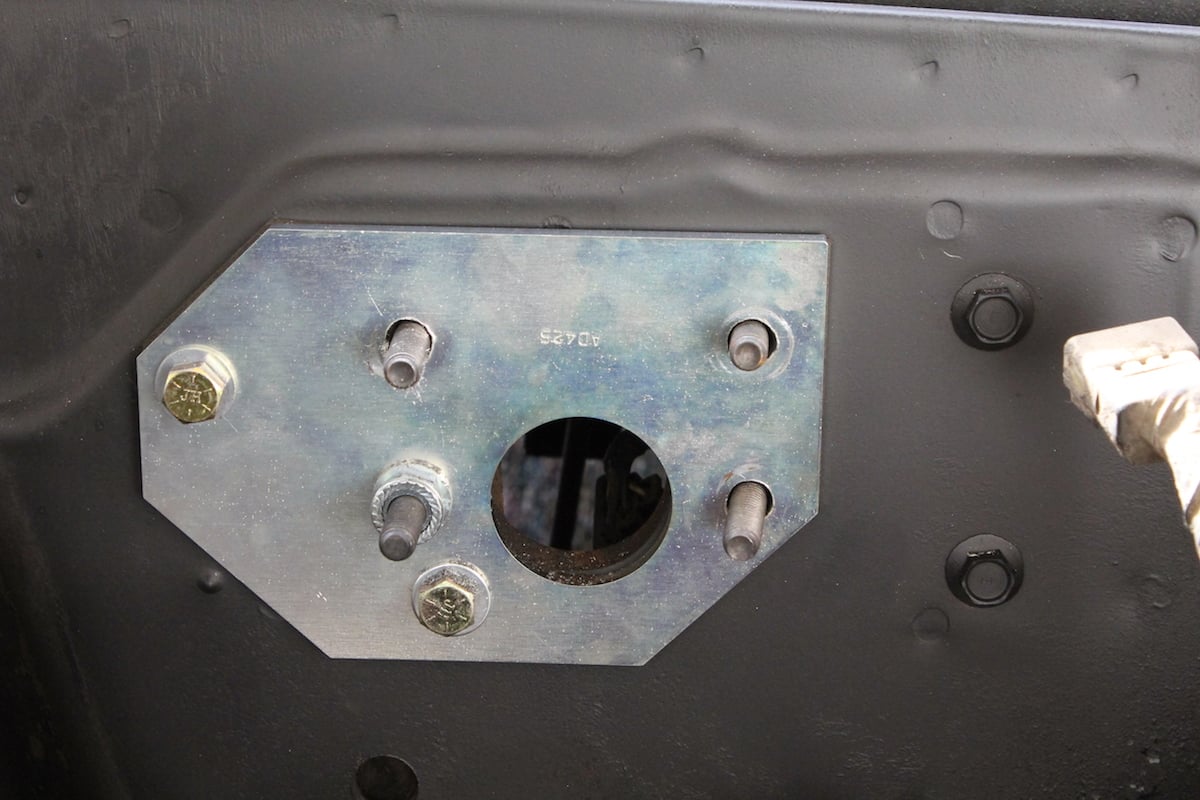 [29]
[29]
Using the existing bolt holes and the new gasket, we located where the new mounting holes needed to be drilled, then added the mounting plate.
“If the pedal ratio is incorrect, things could happen much too quick due to the mechanical leverage being applied,” he explained. “This would make for a situation of a touchy brake pedal that would almost be like an on-off switch with no modulation.”
 [30]
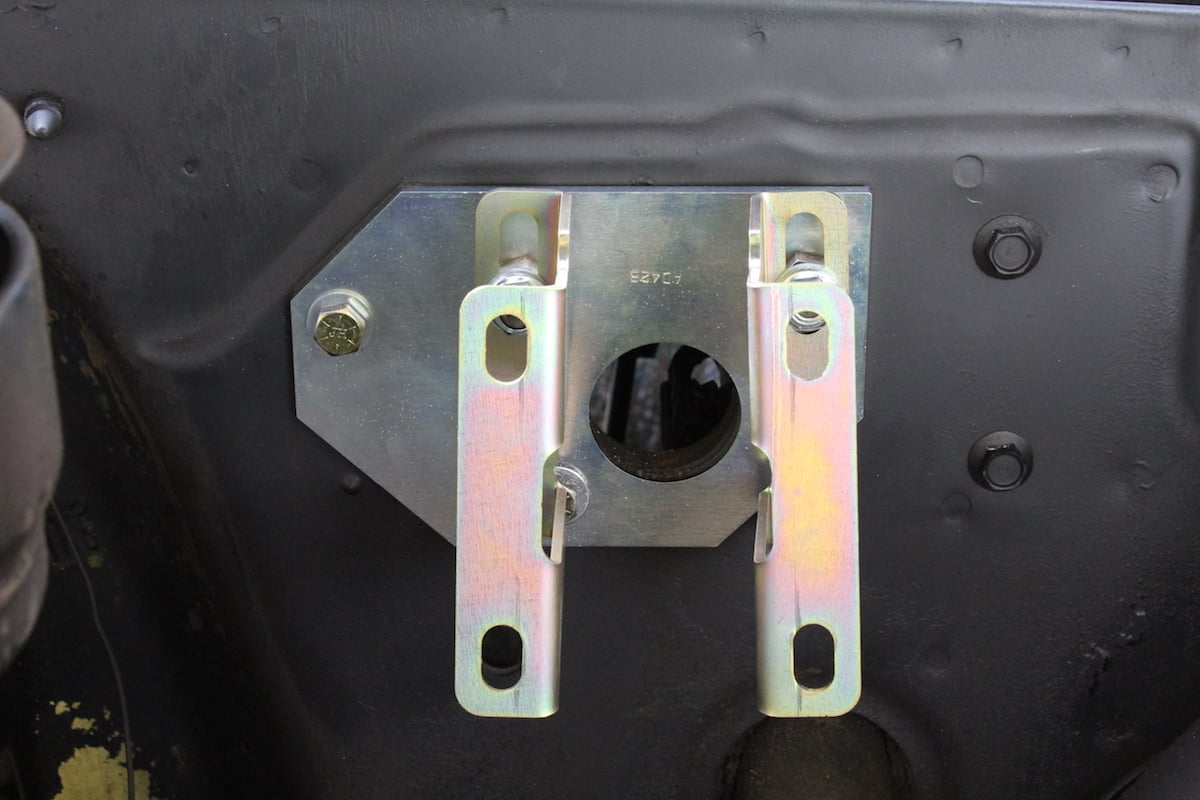
[30]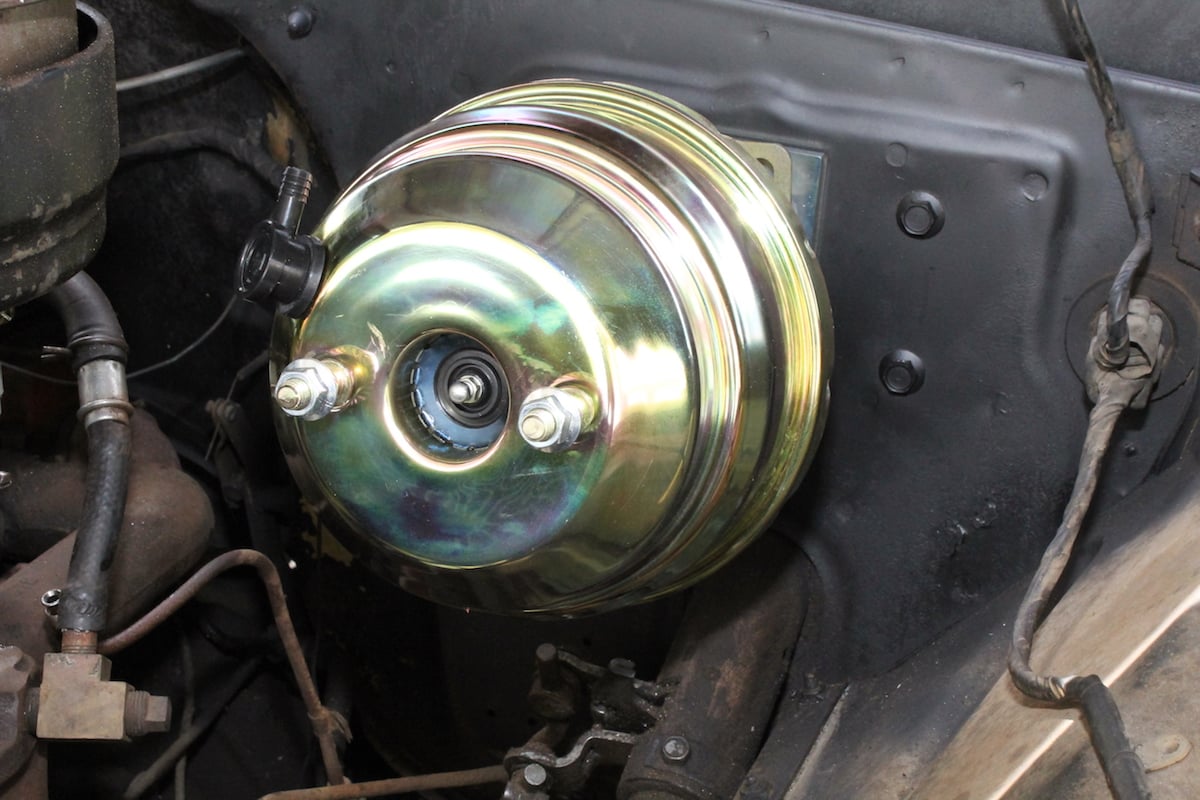 [31]
[31]
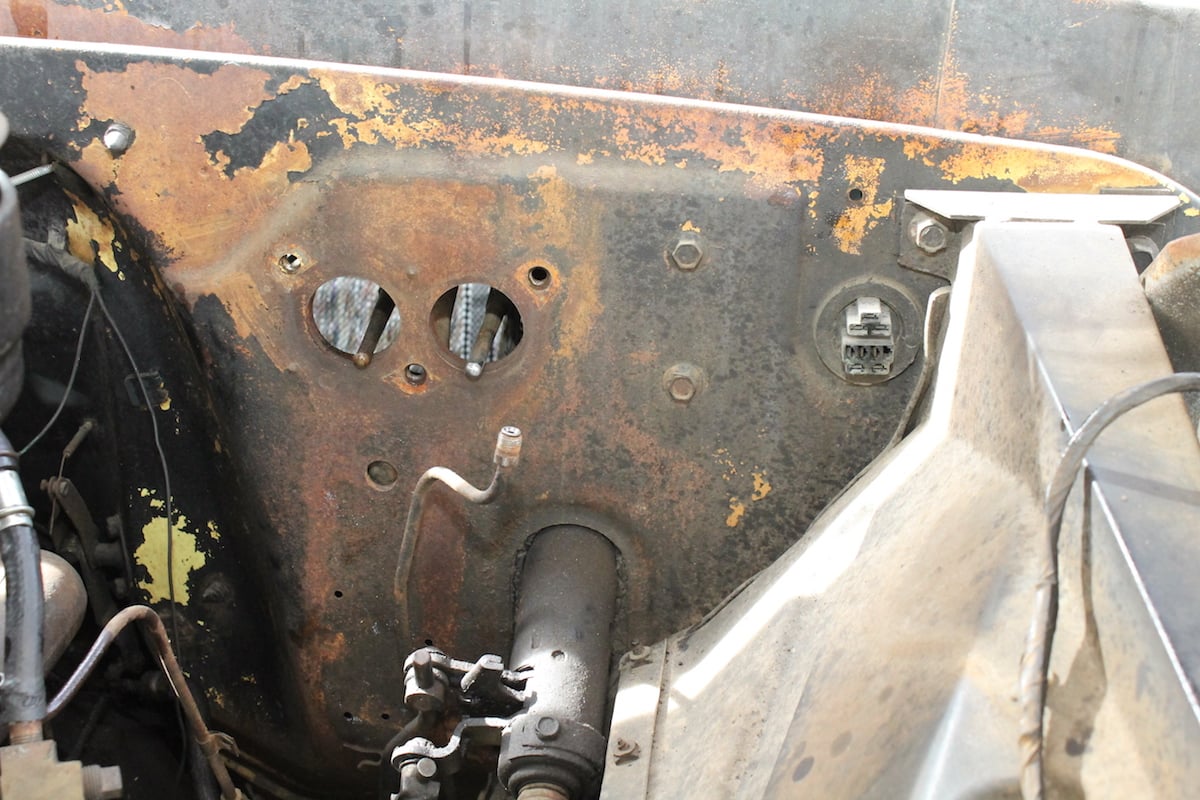
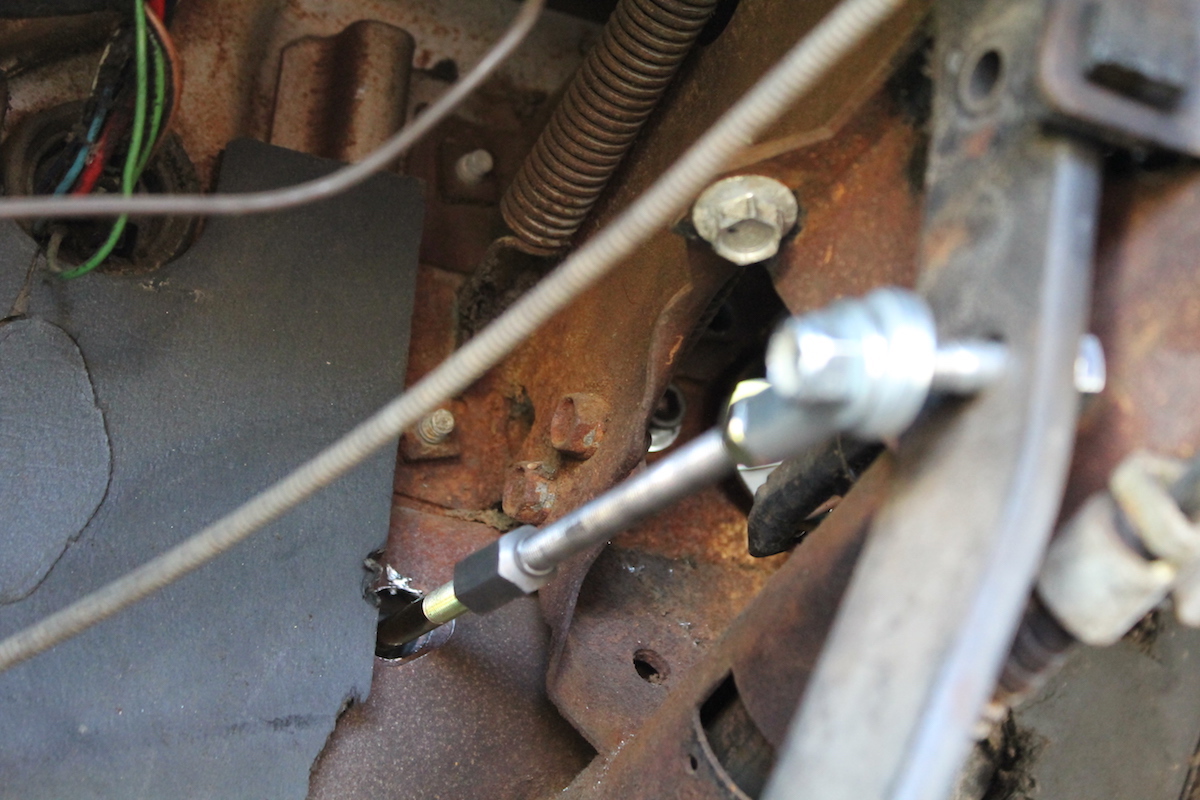
Using the supplied booster mounting brackets, we installed the brake booster. Notice the two bolts on the right side of the booster going into the firewall. These will be used to locate the hole for the new clutch rod.
When you perform a front disc brake conversion and add power assist, pedal ratio can get complicated. Master Power Brakes has simplified this by using the factory pedals (clutch and brake) with a combination of an adjustable pushrod and a brake booster with mounts that are designed specifically for each kit.
 [32]
[32] [33]
[33]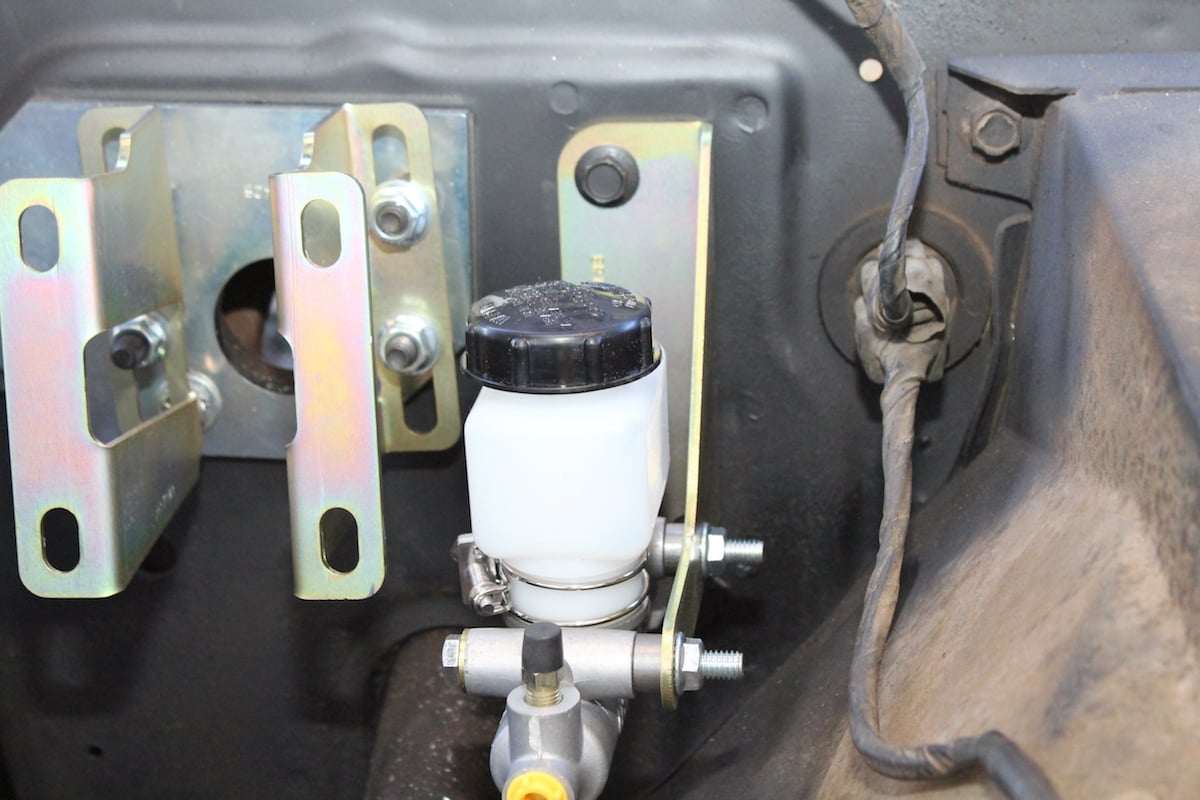 [34]
[34]
Using the new clutch master cylinder mounting bracket, we located the position for the clutch rod hole to be drilled. Once properly cleared, we installed the clutch master cylinder.
“To accomplish the change in pedal ratio for this project, we put the booster on an angle,” Chichester said. “This forces the pushrod to intersect lower on the pedal, and therefore decrease the ratio.” He also pointed out that another option is to change the ratio through a bellcrank. “This leaves the pedal attaching point the same, but alters the movement through a bellcrank and basically slows down the pedal motion.”
Preventing Nose Dive, Brake Lock Up, And Other Undesirable Conditions
Master Power Brakes uses a multi-purpose combination valve in many of their disc brake kits. These valves handle the job of a metering valve, a pressure differential switch, and a brake proportioning valve in one unit. “The ideal scenario would be a different valve for every application that the combination valve could be used on,” said Chichester. “But unfortunately that is unrealistic. Therefore, we have to go with numbers that are close estimations of need and averages of the countless possibilities.”
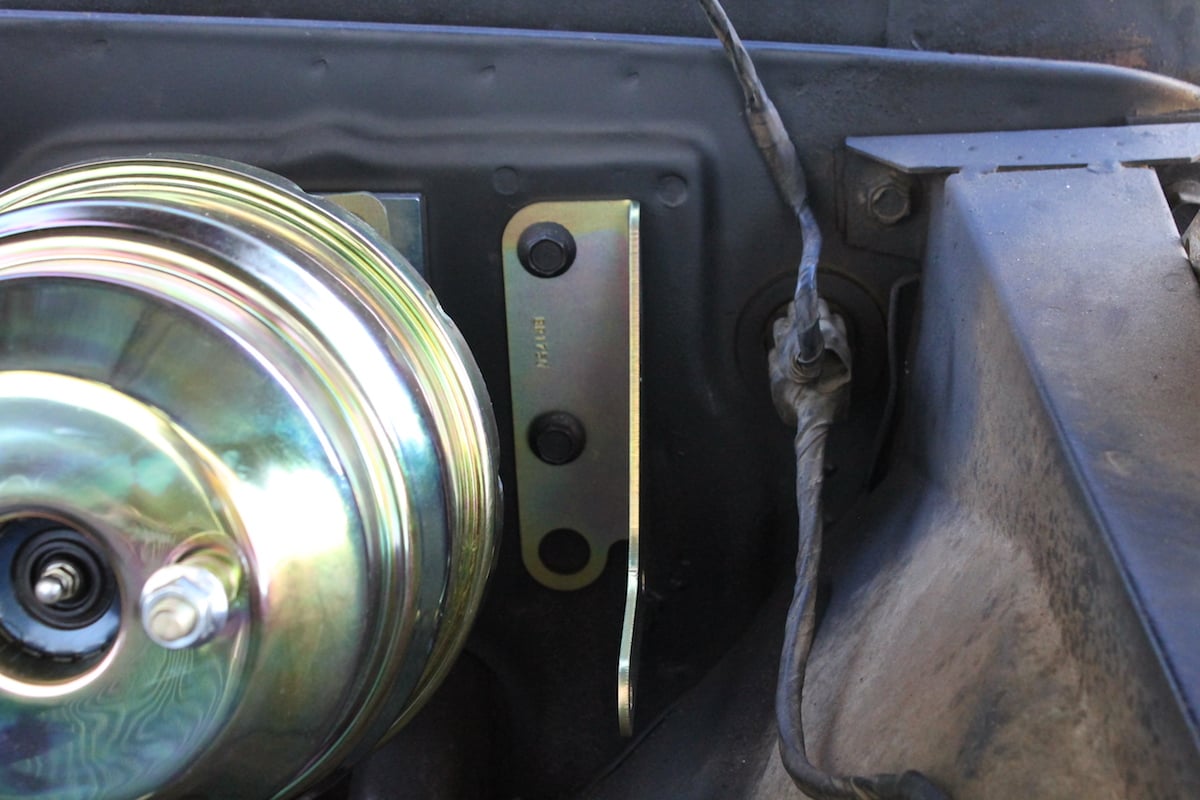
 [35]
[35]We connected the new clutch rod to the clutch pedal and the master cylinder.
“That said, the valve will typically provide about a 60/40 split from front to rear under a heavy braking situation. Remember, a proportioning valve only works under a heavy braking situation. Under light braking, the valve is just along for the ride.”
 [36]
[36]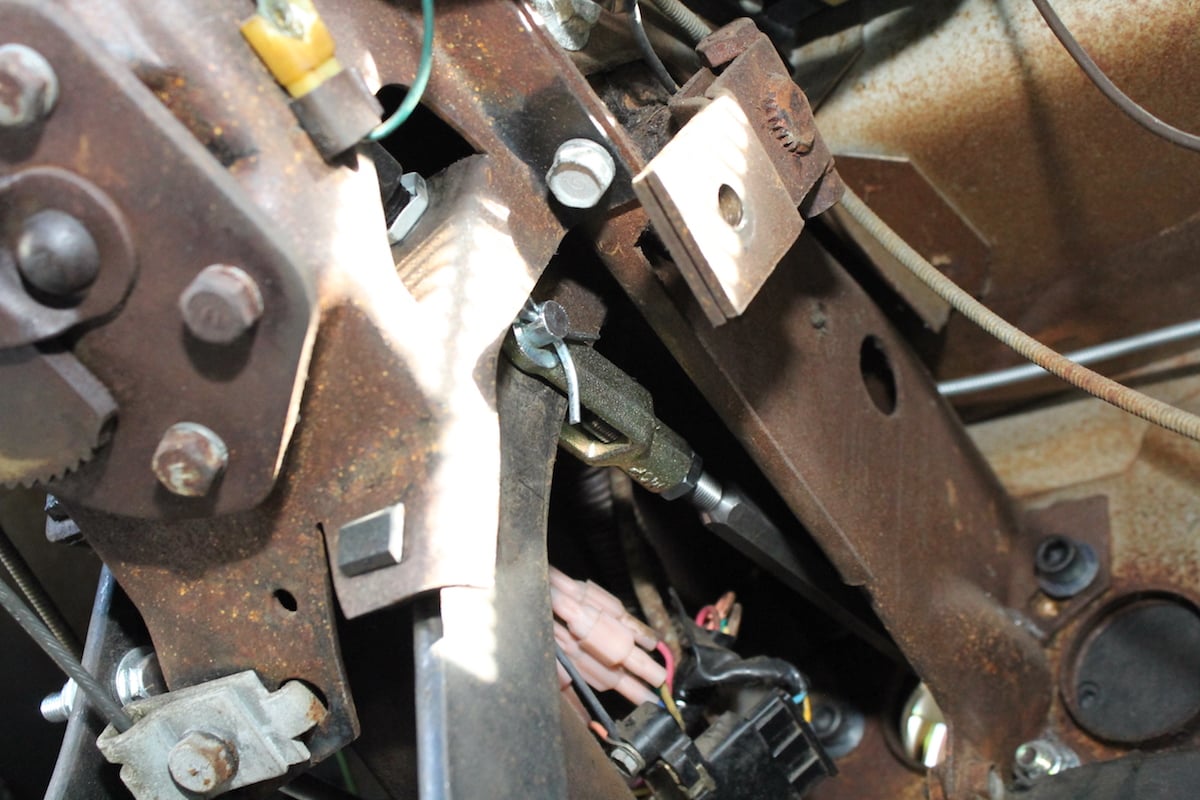 [37]
[37]
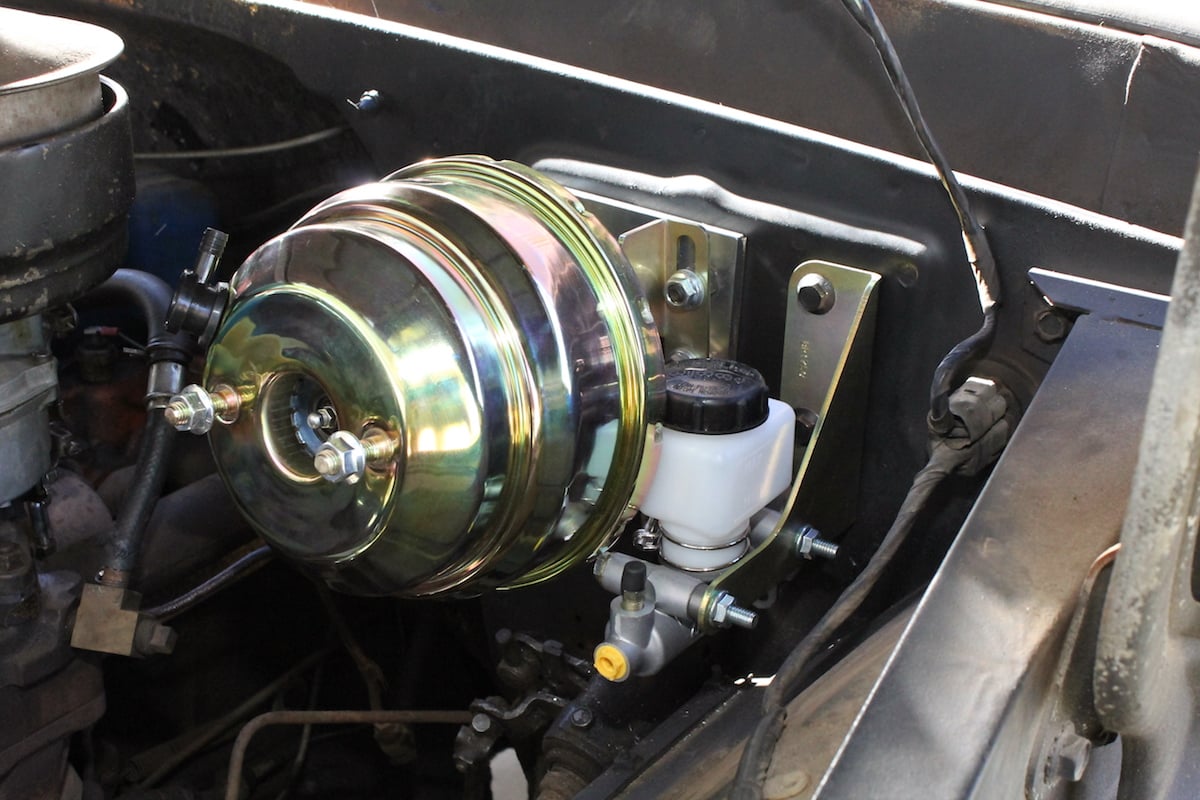
The brake booster was reattached, and the brake actuating rod was installed through the firewall and connected to the pedal.
The proportioning valve portion resides in the rear area of the combination valve. Under normal braking, the proportioning valve has no effect on the system. “However, during a panic stop, the valve has a tip-in point of approximately 350 psi, which controls and proportions the brakes so the rear doesn’t receive extremely quick pressure. If this weren’t done, the rear brakes would lock immediately, which is never good.”
 [38]
[38] [39]
[39]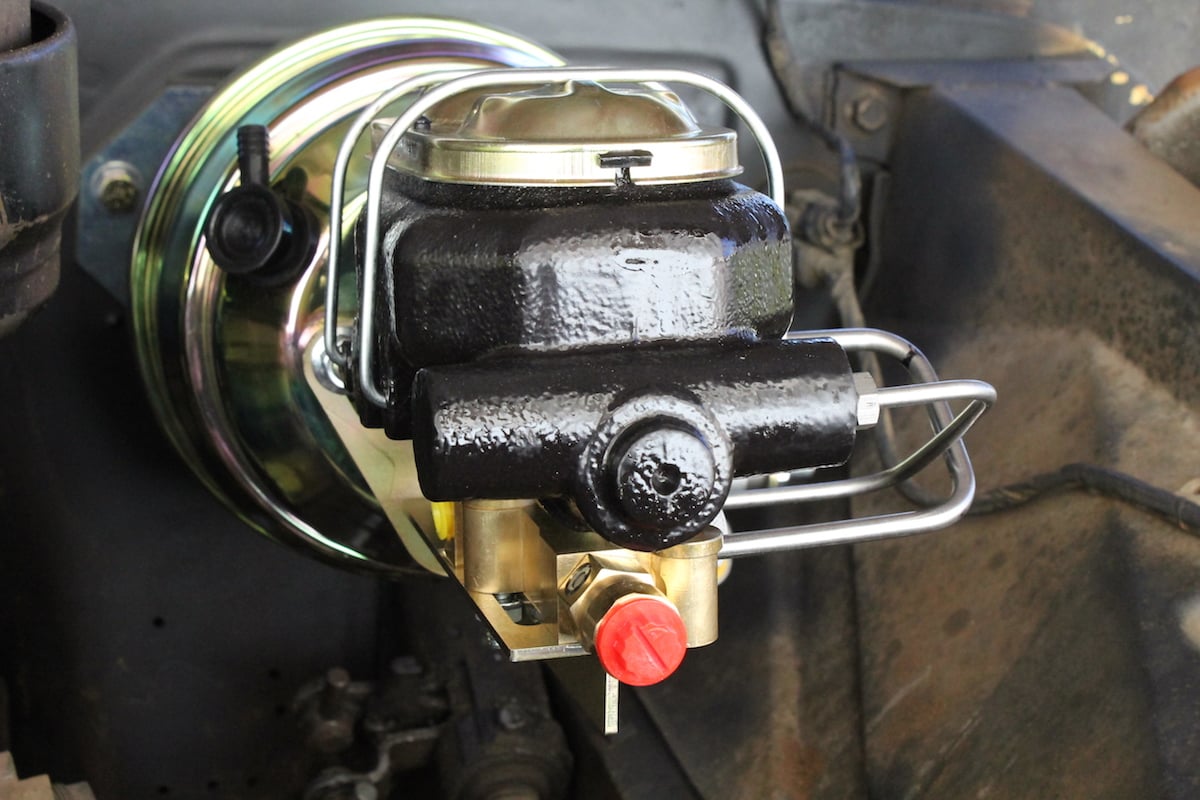 [40]
[40]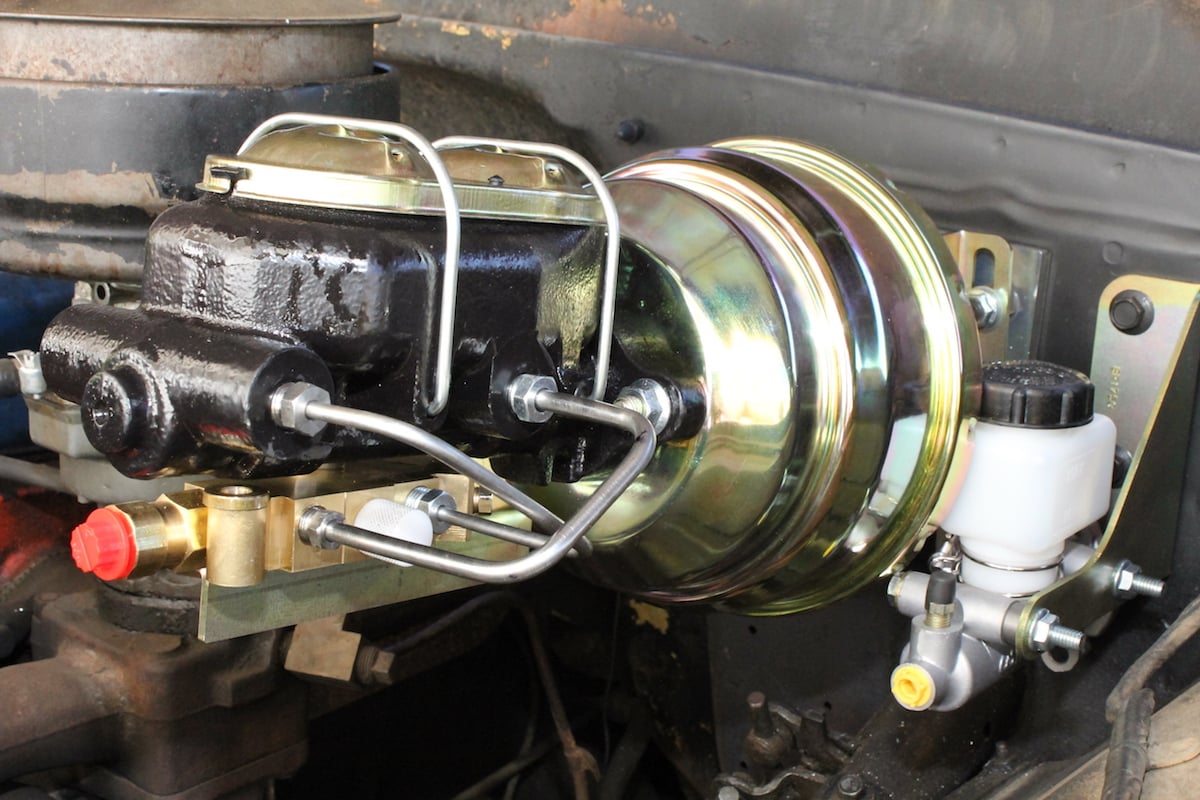 [41]
[41]
Using the Master Power Brakes bleeder tool –which keeps the pressure differential switch centered – and the clear plastic syringe to help bench bleed the master cylinder from the combination valve through the master cylinder reservoir. After the unit is bench bled, it is easily installed to the brake booster.
Maintenance And Driving Impressions
We took an afternoon, and one person installed the brake kit in three hours. It is safe to say that a home garage mechanic with common hand tools and some mechanical ability should be able to complete the conversion in a weekend without difficulty. The installation instructions [42] for this conversion kit are very easy to understand and follow, so there is no fear of getting halfway done and having to stop because of a complicated procedure.
 [43]
[43]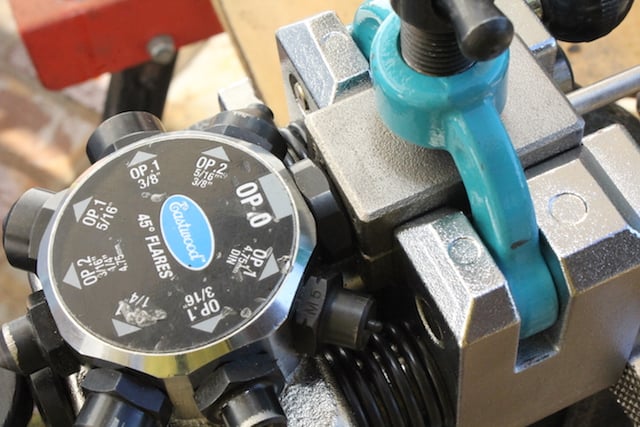 [44]
[44]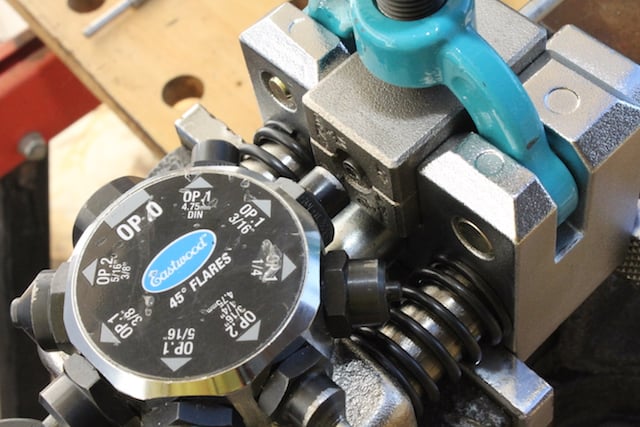 [45]
[45]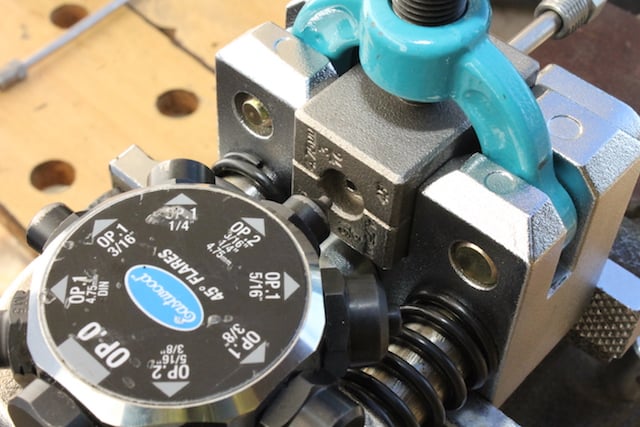 [46]
[46]
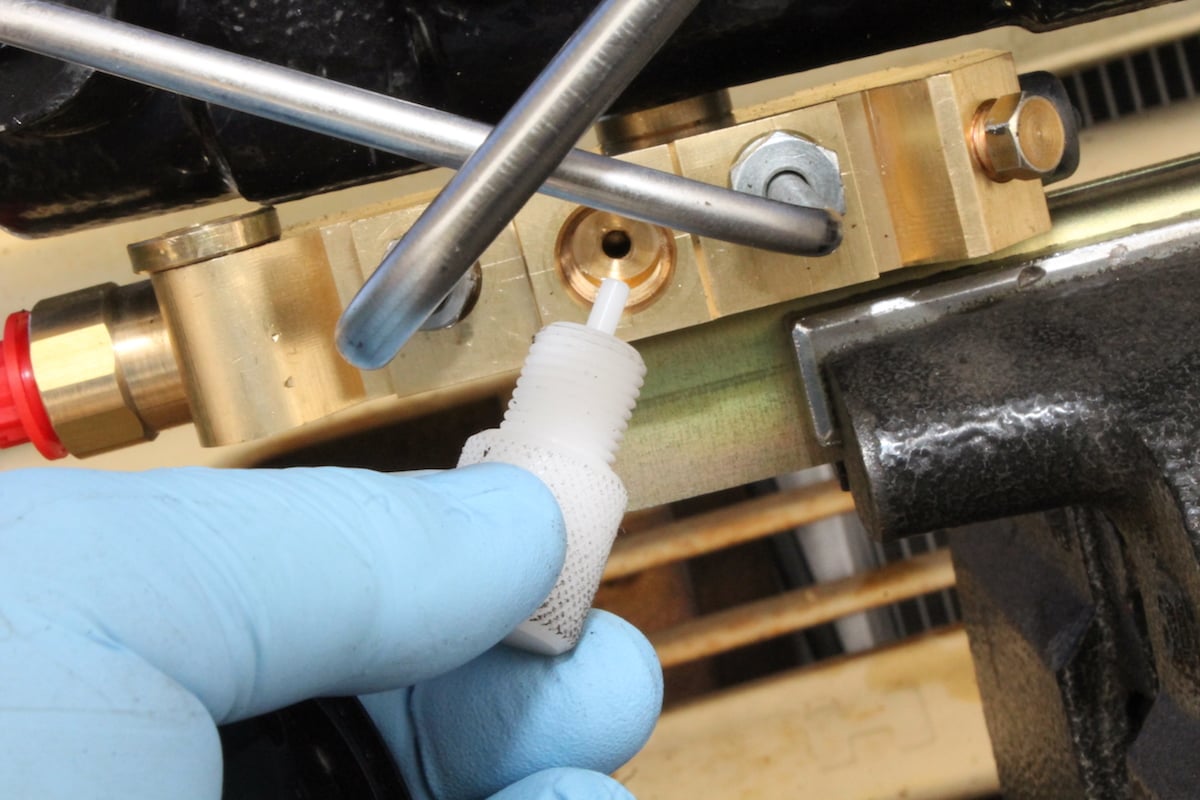
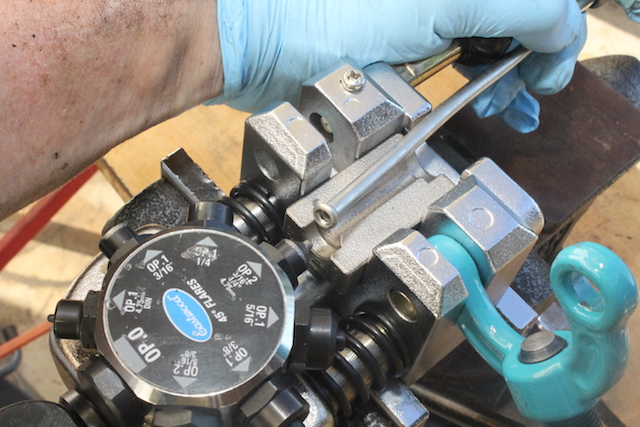
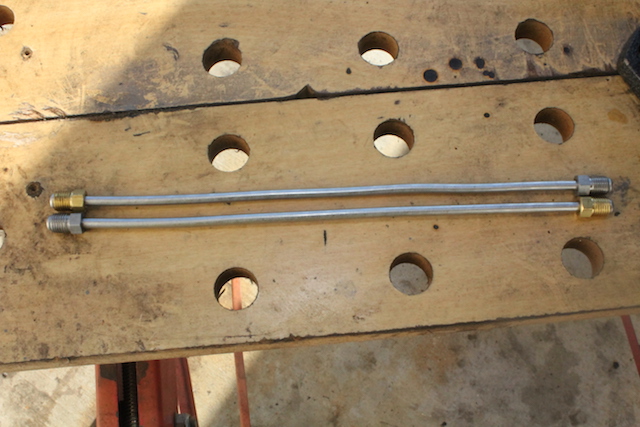
We used Eastwood's brake line flaring tool, which makes incredible double flares required for brake systems. Simply insert the tubing, and one pull will center the tubing at the proper distance for the tool to work properly. Spin the dial to the first setting and pull the lever for the inside flare. Spin the dial to the second setting for the outside flare, and voila ... you have a perfect double-flared end.
The most difficult part of the process for many people doing this conversion is bench bleeding the master cylinder reservoir. Master Power Brakes has made that easier by including a bleeding kit that reverse bleeds the master cylinder. This makes it easier to completely remove trapped air from the internal passages.
 [47]
[47]A perfect “bubble” flare without any hassle.
Before the conversion, the truck’s stopping power was very limited. The driver would have to use excessive force to actuate the brakes, with the rear brakes providing almost all of the braking. Because the rear brakes were doing all of the work, the front end would pull to the side of the rear brake that was doing most of the stopping. In our case, the nose of the truck would pull strongly to the right as the right rear brake locked up and skidded to the left. In traffic, this pinwheel action under braking was exciting to the driver and the drivers of the vehicles around our project truck.
 [48]
[48]It pays to have the right tools. You can make perfect leak-free brake lines the first time, and duplicate existing lines like a pro.
Stop It
Our first trip down the street to test the brakes at speed proved to be equally exciting, because the brakes took much less effort than we were expecting. We accidentally locked up all four brakes. The pedal effort was smoother and less forceful with the power assist, and our total braking distance was cut approximately in half during straight line braking.
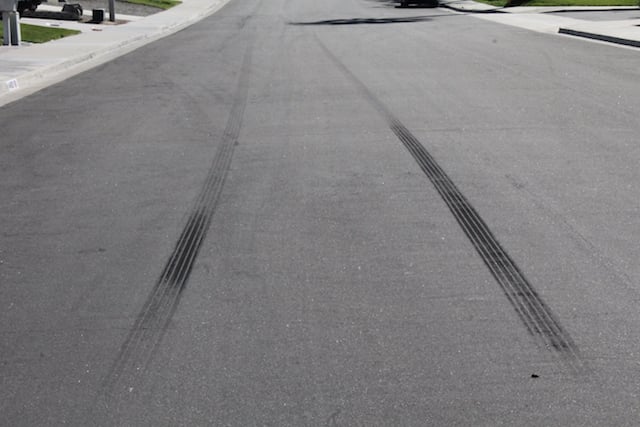 [49]
[49]Our first run at a stop with increasing brake pedal pressure was enough to let us know that we were on the right track. The left side was braking harder than the right, which cleared up after another round of bleeding the front calipers. The rear drum brakes did not lock up, in fact, they were weak. We strongly urge anyone considering this upgrade to change all four wheels to disc brakes. You won’t regret it.
If we were to sum up the swap in one word, confidence would be our choice. There was a certain level of confidence in the parts and the procedure as we installed the brake components. Then we got a higher level of confidence as we stepped on the pedal and felt the brakes working like we had been wanting them to for months. That confidence translates into security. Now we can take our family along for the ride without fear.
For more information on Master Power Brakes, or the conversion kits offered, visit them online at www.mpbrakes.com [2].