Getting a car down a quarter mile might seem to be a pretty simple proposition. You mash the pedal to the floor, keep the steering wheel straight, and don’t let off until you cross the finish line. But in reality there are a lot of functions taking place simultaneously throughout the car to produce that quick ET you’re looking for; especially in the car’s suspension. If every suspension component isn’t doing exactly what it is supposed to, when it is supposed to, your ET is going to suffer. Drag racing can be particularly hard on stock suspension components. When you really start to push them hard, stock suspension parts will flex and distort and cause wheel hop. Your power gets wasted, and several tenths of a second will get lost in the shuffle.
 [2]
[2]So often, when enthusiasts want to make their cars quicker, they go straight for the bolt-ons for more power. But we set out to get the most out of the power we already had, and wanted to see how much quicker we could make a stock-ish 5th Gen with only drag racing suspension upgrades.
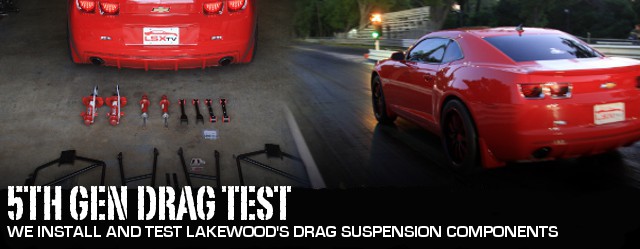
The common train of thought among most racers is to immediately go for the bolt-ons (or even boost and nitrous) to get that quicker ET everyone’s chasing. However, in many cases the added power only further reveals the suspension’s short comings. So, we decided to go another route. We set out to see if a 5th Gen Camaro could cut a few tenths off of its quarter mile ET’s by focusing all our efforts in the suspension alone and get better times without adding even one single horsepower.
Comfort vs. Performance
As well designed as the 5th Gen’s stock suspension is, it still sacrifices ultimate performance for the sake of driver comfort. Big spongy rubber bushings are great for your daily commute over pock-marked freeways, but they will distort and lead to wheel hop anytime you try to launch the car hard. The stamped steel control arms and toe links leave a lot to be improved on as well. Apply all that wonderful late-model LS power and they will flex, and flexing leads to wasted power. That’s when you start to find out how true the old racing cliché is about “power doesn’t matter if you can’t get it to the ground.”
The “Before” Test
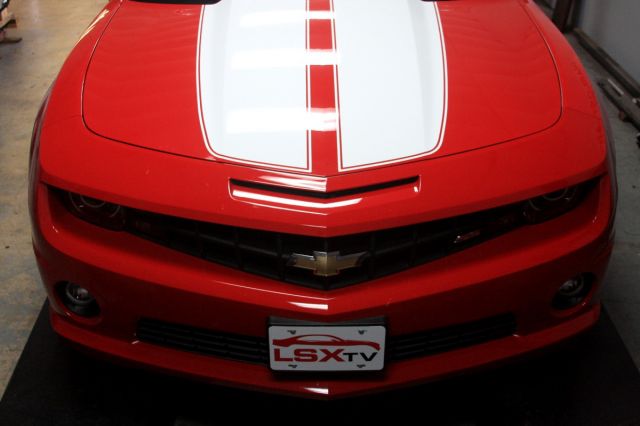
If there’s one thing the new 5th Gen Camaros do have, it’s plenty of power in stock form. Our 5thGen test Camaro comes from the factory with the 400 horsepower L99, and the only modification performed is a simple K&N cold air intake. This is the same car we used in our K&N Intake Shootout, and the car made 338 horsepower and 352 pound feet of torque on the Dynojet with its current Aircharger intake.
We left the track more than a little disappointed, but knowing there was plenty of room for improvement.
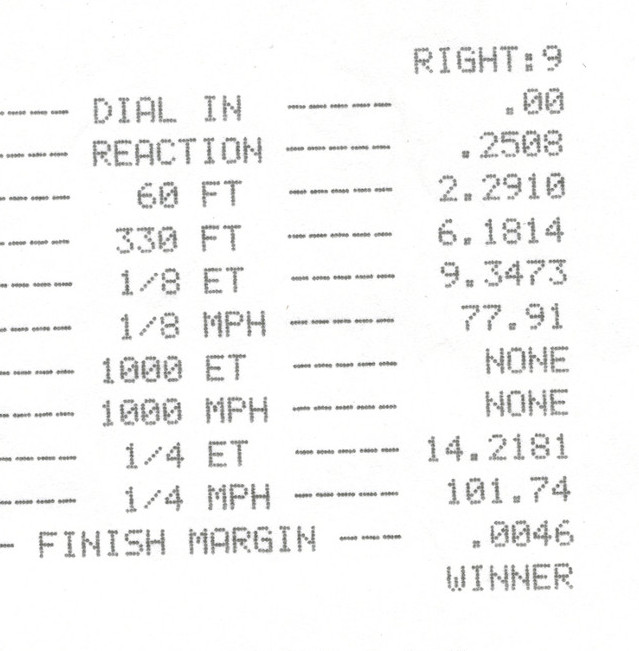 [5]We took our test Camaro out to the Little River Dragway, [6] near Academy, Texas, to make a few passes and see where we stood before making any changes. For all of our testing we used the same set of stock Pirelli 20” tires to keep everything consistent. After taking a few runs to figure out the best way to launch the car we found that the car had the least amount of wheel hop with the traction control on, and stalling the converter up to about 2,000 RPM’s. The wheel spin was only excessive when we stalled it up higher than that, but on a few runs we observed some aggressive wheel spin on the car’s 1-2 upshift when the L99 was higher in it’s powerband. After several runs, the very best we could squeeze out of the 5thGen was a 14.21 at 101.74 MPH, with a not so hot 60-foot of 2.29.
Our initial test numbers were a little lower than what we were expecting, but we're here to report the facts, and the numbers are what they are.
Not great, we know. We kept thinking that the car should be significantly quicker, but we were really giving it hell on every run. This is still the best we could get out of it. It is what it is. We left the track more than a little disappointed, but knowing there was plenty of room for improvement.
Suspension Swappin’
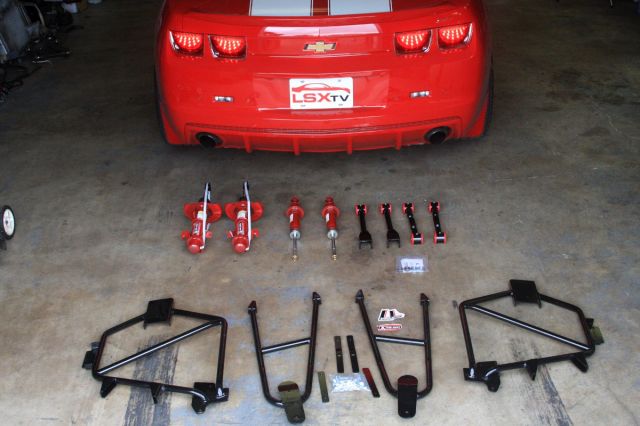
Lakewood 5th Gen Camaro Drag Suspension
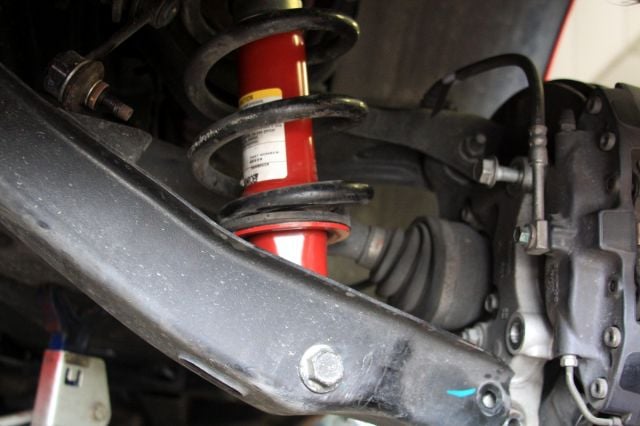
Front 90/10 Drag Shocks (PN 40520, 40521): Maximum front to rear weight transfer for racing applications. Bolts in like stock.
Rear 50/50 Drag Shocks (PN 40524): Properly load rear wheels to prevent over-reaction and wheel hop. Longer shaft requires the use of stock springs from a V6 2010 and up Camaro.
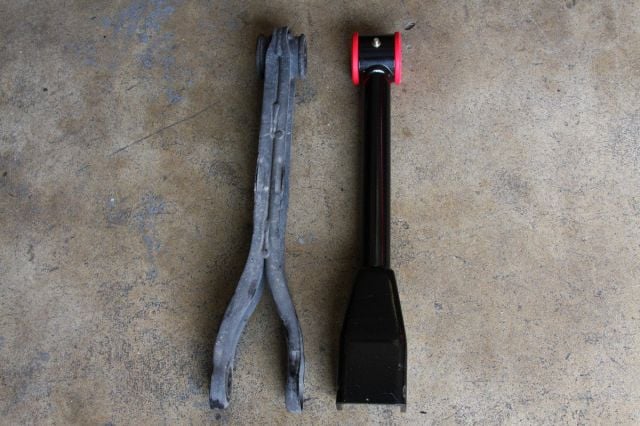
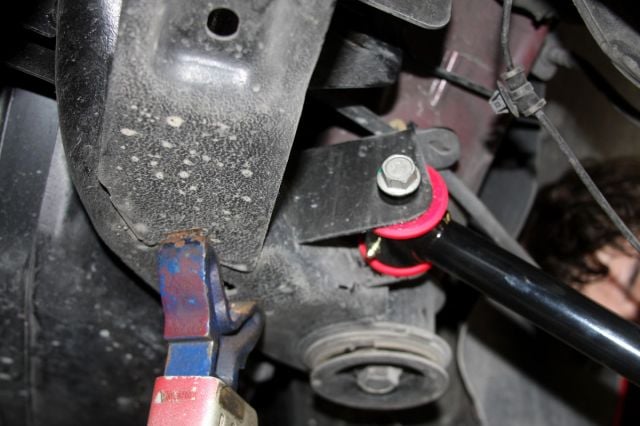
Rear Lower Control Arms (PN 20143): Eliminates flex common with stock arms. Powdercoated heavy gauge boxed steel construction with polyurethane bushings.
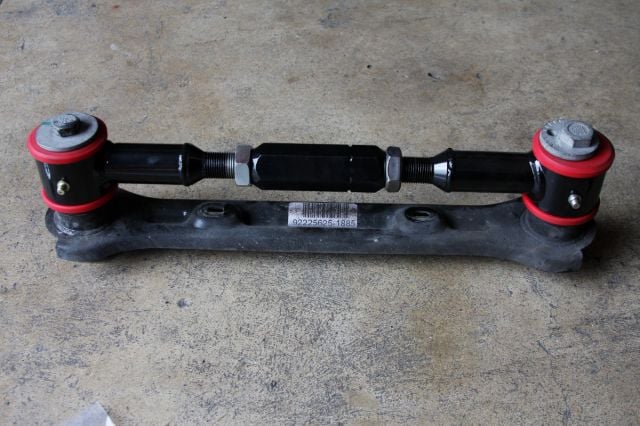
Rear Toe Links (PN 20141): Maintain consistent toe settings under extreme loads of drag racing. Tubular steel construction with polyurethane bushings.
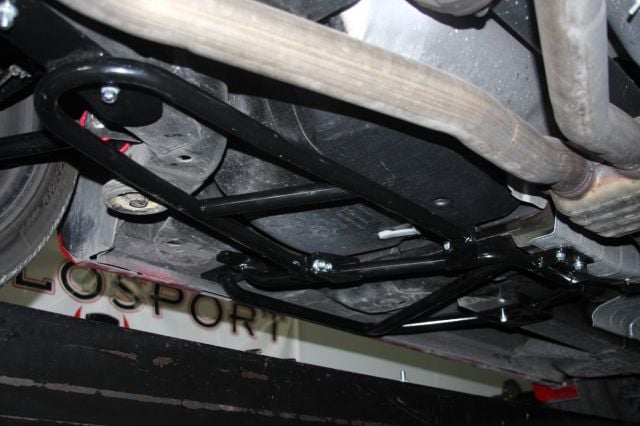
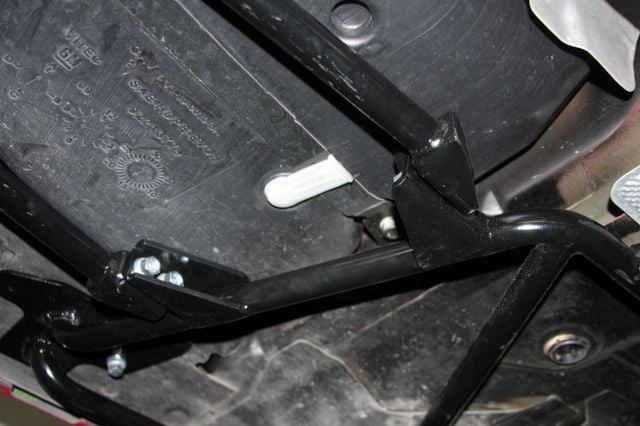
Subframe Connectors (PN 30101): Ties front and rear subframe together to reduce chassis flex and wheel hop. Simple bolt-in or weld-in installation, and powdercoated steel construction.
We asked Lakewood’s Product Specialist, Jim Puskas, to give us advice on a straight-forward, relatively inexpensive, yet overall comprehensive solution to get our suspension in dragstrip mode. What he suggested was a package of components that would give us the proven effects of front-to-rear weight transfer, combined with overall stiffening and strengthening in key areas to help make the most of the power we already had at our disposal.
Front 90/10 Drag Shocks
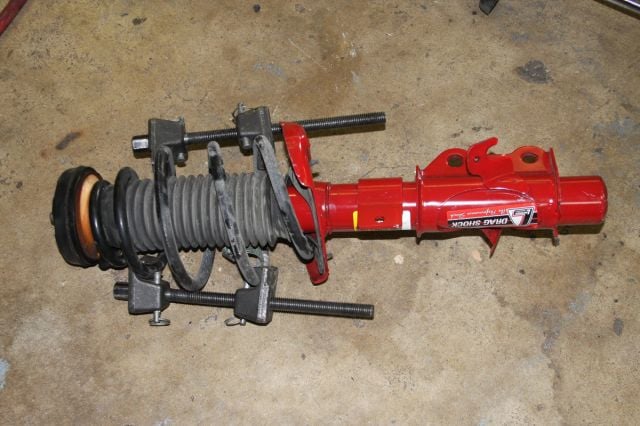
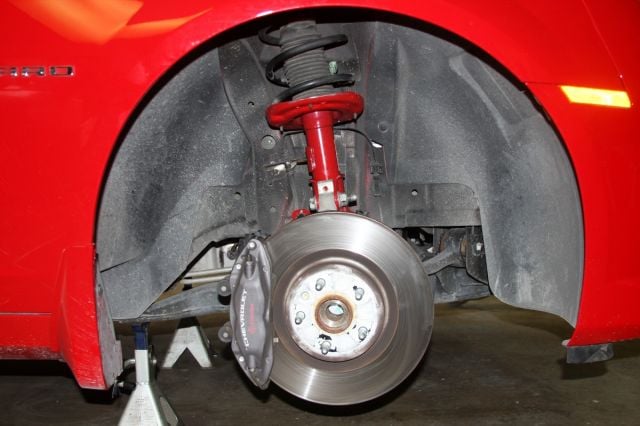
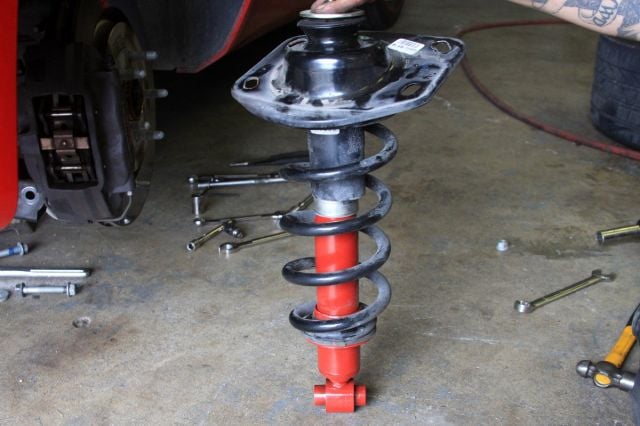
Starting with the front suspension, Lakewood [10] sent us a set of their Drag Shocks [11] (PN 40520, 40521) with the racing valving of 90/10. Lakewood also has 5th Gen front drag shocks in a 70/30 configuration [12] (PN 40522, 40523) for street/strip cars, and doesn’t really recommend using the 90/10 race shocks on the street. However, for the purposes of our test, we went with the 90/10’s to try to get the maximum amount of weight transferred to the rear of the car off the line. Puskas says, “The numbers mean that the shock only gives 10% resistance in allowing the front to rise up, and there is a 90% resistance in allowing the front end to compress back down after the launch. This helps keep the front end in the air and keeps the weight transferred to the rear tires. So, the shocks will have a much quicker extension, and will compress much more slowly.”
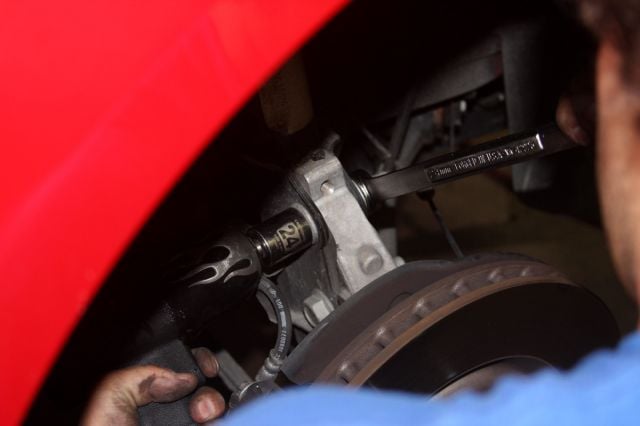
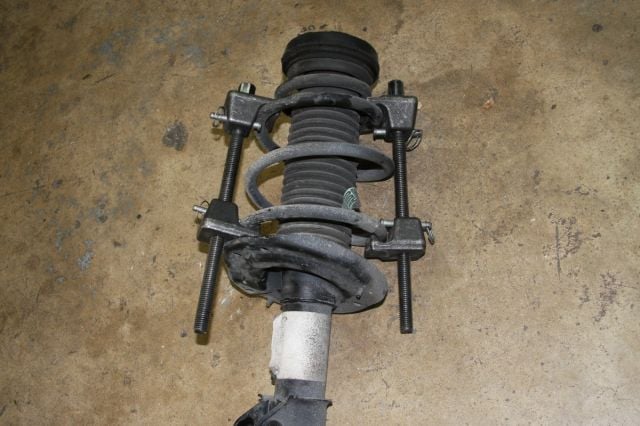
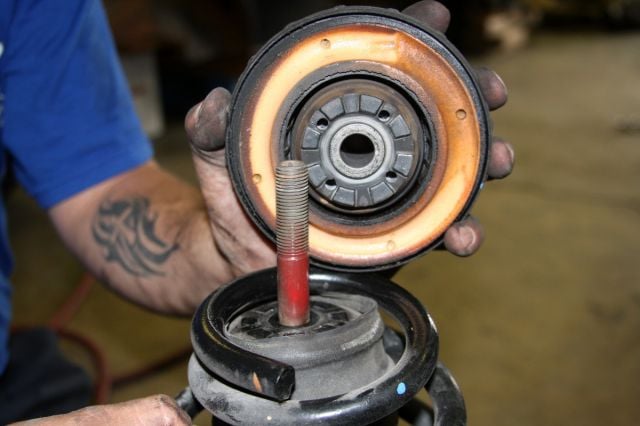
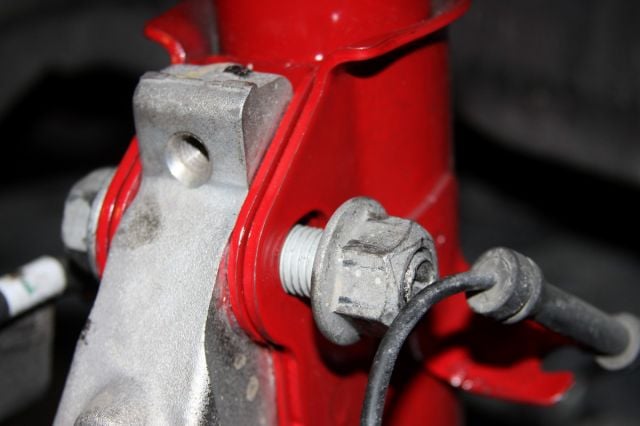
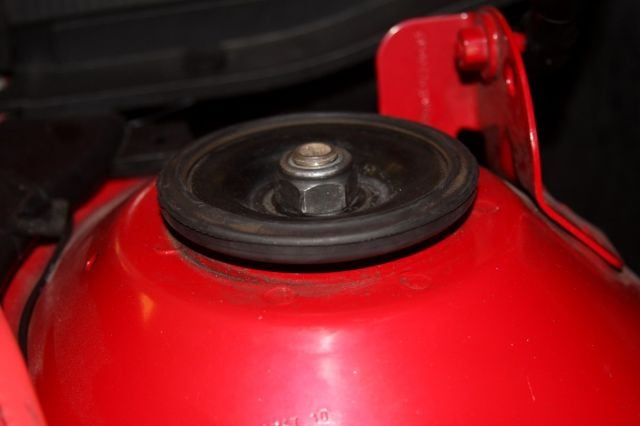
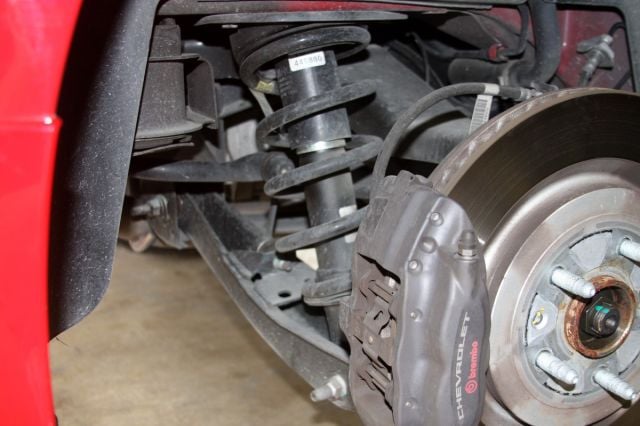
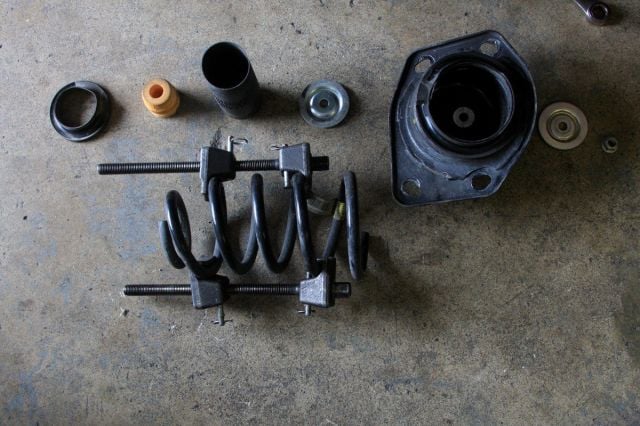
For the installation of our new Lakewood parts we took our 5th Gen to our friends at Sunshine Performance [17], in Killeen, Texas. Even though we enlisted professional help, a skilled DIY'er shouldn't have too much trouble installing any of these parts. After we got the car up on jackstands, Mike from Sunshine popped off the two huge bolts that mount the strut to the spindle, and removed the top shock mount. Next, take the tension off the stock springs with a Macpherson style spring compressor, and unbolt the shock top. Pay close attention to how everything comes apart on the stock stuff, because you'll need to assemble it the same way on the Lakewood shocks. Note how the coil spring is indexed in the top and bottom pockets of the strut assembly.
Compress the springs again, and reassemble the shock. Run the bolts back through the spindle and tighten to spec with a torque wrench. You'll need to use the nylock nut that Lakewood provides to tighten down the upper part of the shock mount. All in all, it wasn't a very difficult install.
Rear 50/50 Drag Shocks
Moving to the rear of the car is where we really needed to make some changes to get some “traction action” working in our favor. We started with a set of Lakewood’s rear Drag Shocks [22] (PN 40524) with 50/50 valving to compliment the weight transfer from the front of the car. These shocks are set up to be more firm than the stockers. They should press the tires down into the pavement with authority and help take full advantage of the weight that’s being transferred by the front drag shocks.
Installing the rear Drag Shocks is very similar to the front. The most important thing to note about the rear shocks is that they have a longer shaft, and require the use of rear springs from a V6 5th Gen. The stock springs in the SS are too short, and won't stay seated. In case you are wondering, these shocks won't work with aftermarket lowering springs either.
It’s very important to note here that the Lakewood [10] rear drag shocks use a longer shaft, so you will have to use them with a set of stock 5th Gen Camaro V6 rear springs. The V6 rear springs are slightly longer than the V8 springs, and will help keep the proper seat pressure in the shock assembly. Again, the stock springs on your SS won’t work with the Lakewood rear drag shocks; they will be too short to seat correctly in the spring cups. Find a set of V6 rear springs ahead of time, and your life will be much easier.
Rear Lower Control Arms
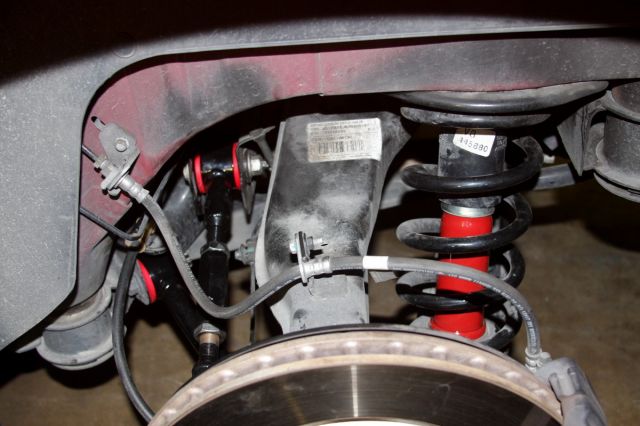
Then it was time to address the rear lower control arms. One of the great things about the Lakewood rear lower control arms [27] (PN 20143) is that they kill two birds with one stone. Or, more accurately, they kill two major causes of the Camaro’s wheel hop with just one part. The Lakewood lower control arms feature greasable polyurethane bushings and heavy duty tubular steel construction; huge improvements over the stock rubber bushings and flimsy stamped u-channel arm. “The ride will be more firm with these control arms,” Puskas says, “but they will go a long way in helping the chassis flex less, and work more effectively.”
In a side-by-side comparison, you can tell just how much stronger the Lakewood rear lower control arms look. The stock pieces almost look flimsy enough to bend with your bare hands. The install is pretty straight forward, and the Lakewood arms drop right in place of the stockers.
Adjustable Rear Toe Links
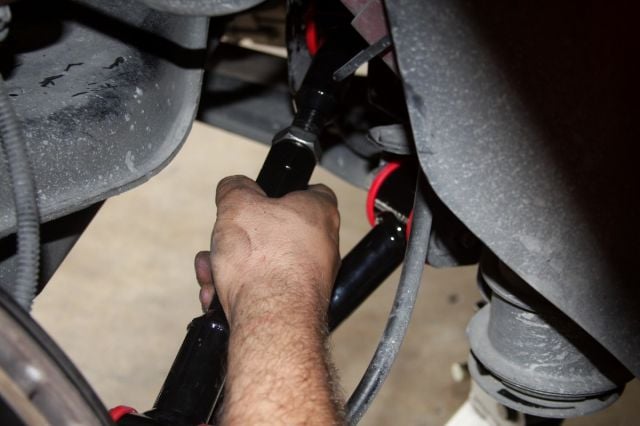
While we had everything apart, we took the chance to have Sunshine [30] further beef up the Camaro’s rear suspension with a set of Lakewood’s adjustable rear toe-links [31] (PN 20141). The stock toe-links are in the same boat as the factory lower control arms when it comes to bushing deflection and flex, so we changed them out for the same reasons. However, there are a few other benefits to upgrading the toe-links. The toe-links do just what it sounds like they do – control toe. The toe setting determines how much the Camaro’s rear tires angle in (pigeon toed) or out (duck waddle). The adjustable toe links also offer you the option of dialing in more or less toe into each side of your IRS just by cranking the center turnbuckle. Puskas tells us, “The more square the tire is on the pavement at launch the more traction it can provide. You want your toe setting on both rear wheels to be zero when you launch. But more often than not with an IRS your static toe setting won’t give you zero toe when the suspension squats. You might have to give it a head start one way or the other so that when the suspension does squat, it moves the rear tires to a zero toe setting. Adjustable toe-links give you that ability.” If you aren’t looking for that much adjustability, Lakewood also makes a non-adjustable replacement toe-links [32] (PN 20142) for the 5th Gen.
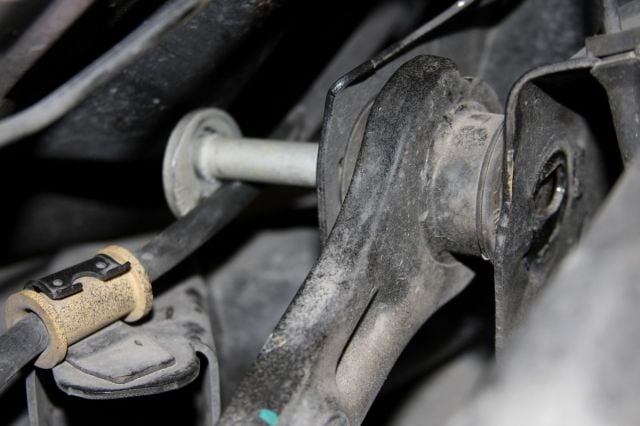
The adjustable toe links need to be the same length as the stockers to help you get a baseline for your alignment. The drivers' side takes a little more work to get the alignment bolt past the gas tank. Just pop out the front IRS cradle bolts and pry down until the bolt can slide out.
The first thing we did when installing the Lakewood adjustable toe links was make them the same length as the stock links. To do that, tighten each end of the link as far as it will go into the turnbuckle, then have a helper hold the ends while you crank the turnbuckle to lengthen each end out equally. Compare it to the stock link, and when you get the bolt holes to line up perfectly, you know you’ve got it the right length for your baseline and you can tighten down the lock nuts. The passenger side toe link goes in fairly easily, but on the driver’s side expect a bit more work. We quickly realized that there was no way the stock alignment bolt was going to come out because the gas tank was in the way. Luckily the solution was fairly simple. We just removed the front driver’s side bolt that holds the IRS cradle to the body, and pushed down with a prybar. The stock rubber cradle bushings distorted just enough to gain about an inch of clearance, and the alignment bolt came right out. You’ll need to do the same to get the bolt back through the Lakewood toe link.
 [37]
[37]The whole rear package took us a solid afternoon's worth of work to install. A skilled DIY'er with the proper tools shouldn't have any trouble doing this job in their own garage over a weekend.
Subframe Connectors
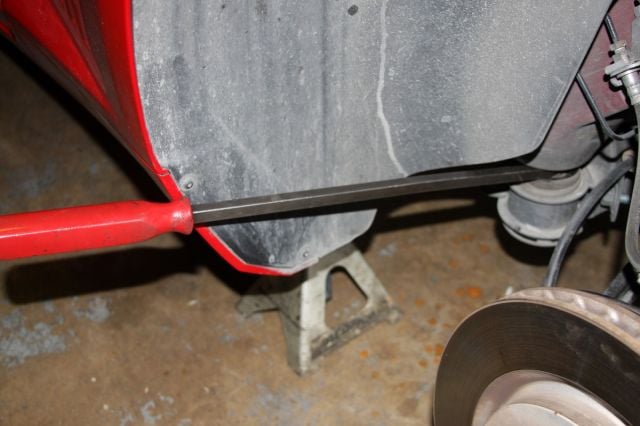
We finished off our Camaro’s drag suspension upgrades with a set of Lakewood’s subframe connectors [38] (PN 30101). “Subframe connectors tie the front and rear subframes together, and keep them from flexing independently.” Puskas tells us. “When you have flex in the chassis it delays the reaction of the suspension. Less flex means the horsepower you already have will work more effectively on the chassis, and get everything moving quicker.” The Lakewood [10] subframe connectors are made from high grade mild steel tubing and powder coated black. They can be bolted in for an easy and reversible installation in a street/strip car, or welded in for maximum rigidity in a dedicated race car.
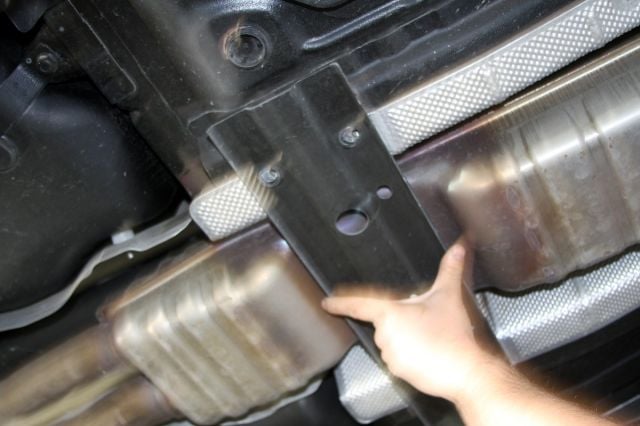
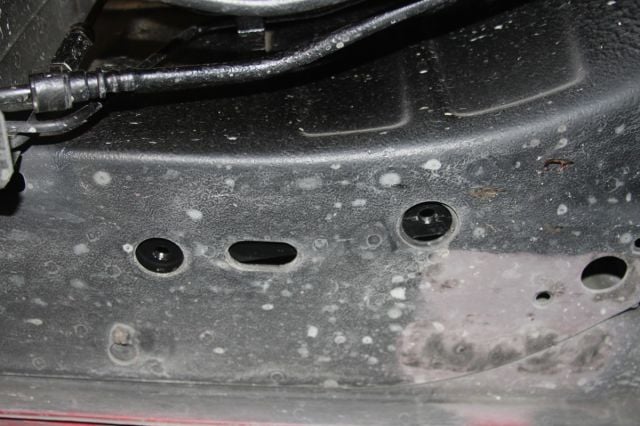
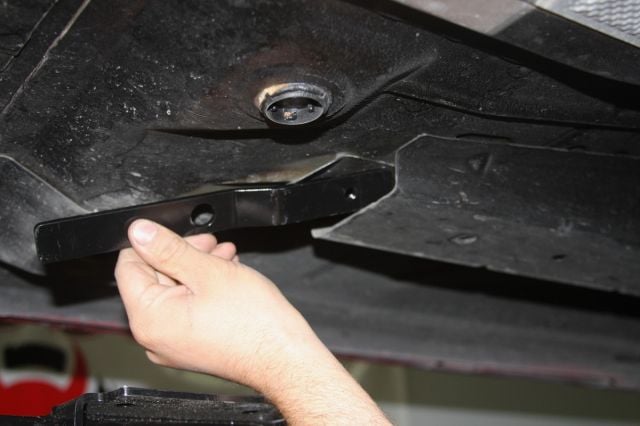
A nice feature of the Lakewood subframe connectors is that they use stock holes in three different locations to mount up to the Camaro's chassis. The first step is to remove the stock tunnel brace; you'll be reusing its mounting holes for the subframe connectors. Next, you simply slide in the supplied mounting bars into the shown holes in the front subframe and body and position them so you can see the threaded holes.
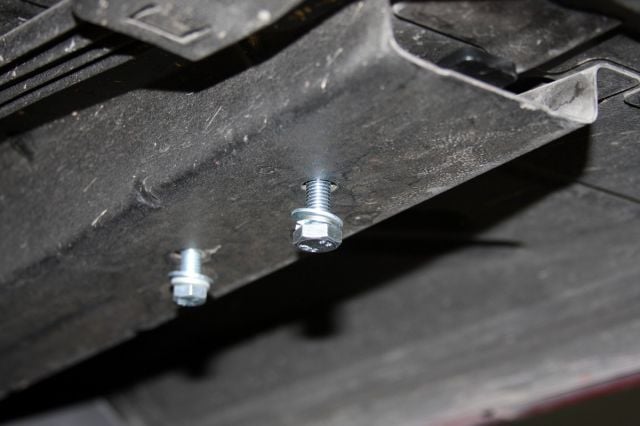
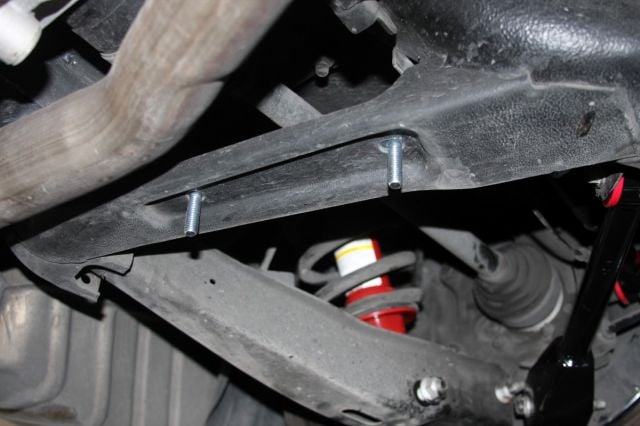
The rear portion of the subframe connectors uses two existing holes in the rear subframe, and bolts directly to the front half of the connectors with four bolts.
 [47]
[47]Once we had all our new Lakewood parts installed it was time to hit the strip again to see how much of a difference they made, if any...
The “After” Results
We were able to go two-tenths quicker in our essentially stock 5th Gen with just a few suspension changes, without adding one single horsepower.
 [48]After Sunshine Performance [30] had the install completed and a four-wheel alignment performed, we headed back to Little River [6] to see how much (if any) time we could shave with just the suspension modifications we had made. We took a few warm-up passes to get acquainted with how the suspension would now react. It became evident that there was more weight transfer occurring and we noticed significantly less wheel-hop. The Camaro’s nose would lift higher and stay up longer than before. After about 8 passes, the best time we ran with the new Lakewood [10] parts installed was 13.99 at 101.44 MPH, with a 2.30 60-foot time.
It struck us as odd that we were a full two-tenths of a second quicker with the same exact 60-foot time as what we ran before. After looking the time slips over carefully, we noticed that the time we shaved off was actually earned in the 60-foot to 330-foot split, which carried all the way out to the quarter mile ET.
We noticed that the Camaro's nose was lifting up quite a bit more off the line with the Lakewood drag shocks installed, and was keeping the nose up further down the track.
A few things different things are going on here. First, keep in mind that this is with the same set of stock Pirellis we used in the before test with. Ultimately, there is only so much traction that you can extract from a slightly worn set of street tires, and no matter how hard you plant it with the suspension. The coefficient of friction just isn’t going to get better. That could be a big reason the 60-foot didn’t change. Secondly, the drag shocks were keeping the nose of the car raised up to around the 330 foot mark. Keeping the rear suspension loaded for longer helped quell any traction issues once the car’s full power was applied and started hitting redline later on down the track.
We didn't see any real improvement in our 60-foot time, but something was clearly working better. Ultimately, the two tenths of second we cut from our ET was earned in the 60-330 foot split.
Conclusion
Our drag suspension upgrades did ultimately make a difference, but not quite in the ways we were expecting. The limitations of the stock tires seem to have really kept us from chopping away at the less-than-stellar 60-foot times we were running, but something was absolutely working better in the 60-to-330 foot split of the track.
Our test car has respectable power on tap, but to take an honest look at things it doesn’t quite have enough power to truly man-handle the stock suspension off the line. Put these same parts on a supercharged SS, especially if it’s using drag radials, and it would likely be a whole different ballgame.
However, we were still very pleased with the results and accomplished exactly what we set out to do. We were able to go two-tenths quicker in our essentially stock 5th Gen Camaro with just a few suspension changes, and without adding one single horsepower.
